


Page 6
INITIAL SETUP
CAUTION - The brewer must be disconnected from the power source throughout the initial setup, except when
specified in the instructions.
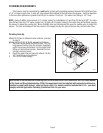
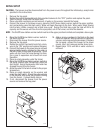
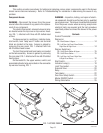
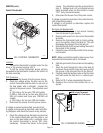
1. Remove the top panel.
2. Rotate the control thermostat knob fully counterclockwise to the “OFF” position and replace the panel.
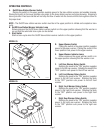
3. Insert an empty funnel into the funnel rails.
4. Place a decanter containing a small amount of water on the warmer beneath the funnel.
5. Connect the brewer to the power source, place the On/Off brew station warmer switch the upper position,
and momentarily press the start switch. Water will begin flowing into the tank. When water stops flowing
into the tank, initiate a second and a third brew cycle. During this third brew cycle the tank will fill to its
capacity and the excess will flow from the sprayhead, out of the funnel, and into the decanter.
NOTE - The On/Off brew station warmer switch must be in the upper position to initiate and complete a brew cycle.
6. Place the On/Off brew station warmer switch in
the lower position.
7. Disconnect the brewer from the power source.
8. Remove the top panel.
9. Rotate the control thermostat knob fully clock-
wise to the “ON” position and replace the panel.
10. Connect the brewer to the power source and wait
approximately twenty minutes for the water in
the tank to heat to the proper temperature. Some
water will drip from the funnel during this time;
this is due to expansion and should not occur
thereafter.
11. Place an empty decanter under the funnel.
12. Place the On/Off brew station warmer switch in
the upper position and momentarily press the
start switch. Empty the decanter after water has
stopped flowing from the funnel.
13. Allow the water in the tank to reheat to the proper
temperature.
14. Place an empty decanter on the warmer and
press the start switch. Check the water volume
in the decanter after water has stopped flowing
from the funnel. It should be 64 ounces.
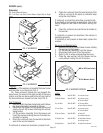
15. If not, disconnect the brewer from the power
source and remove the top panel.
16. Add or remove washers to the float on the level
switch as required. Adding washers increases the
volume, removing washers decreases it. Replace
the top panel, connect the brewer to the power
source, start, and measure another brew cycle.
17. Repeat steps 13-16 until 64 oz water volume is
achieved.
P1712
P1478
32430 051512