


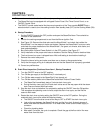
11
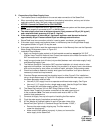
8. Do NOT connect the SteamChef drain directly to drains or to the plumbing of any other equipment.
9. Do NOT install a trap or shutoff in the drain line.
10. The total length of pipe and number of bend fittings required to reach the open drain determines the
pipe size used to extend the drain line to an open drain.
• Do NOT make a drain outlet extension more than 12 feet long.
• If the drain outlet extension requires 6 feet or less of pipe, and no more than two elbows are
required, 1 ½-inch pipe and fittings are acceptable.
• If the drain outlet extension requires 6 to 12 feet of pipe, or requires three elbows, then 2-inch
pipe and fittings are required.
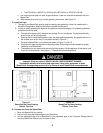
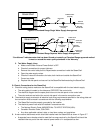
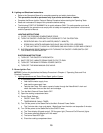
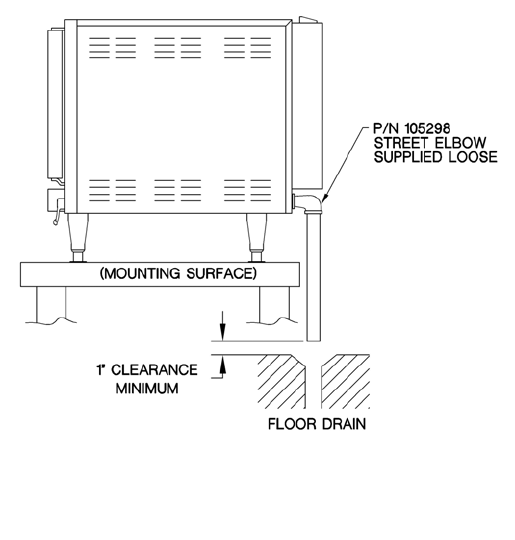
11. Refer to Figure 3-5: Connect the drain as described:
NOTICE: The appliance is supplied with 1 inch pipe connection at the back of the appliance, and a
1 X 1 ½-inch street elbow for connecting the 1 ½ -inch drain outlet extension. If a 2-inch drain
outlet extension is required, the 1 X 2-inch fitting must be supplied by the Owner/Installer.
a. Apply non-hardening pipe thread sealant to the threads when assembling the pipes and fittings
of the drain outlet extension.
b. Thread fittings together FINGER TIGHT ONLY! DO NOT USE A WRENCH!
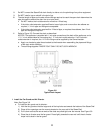
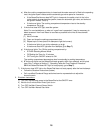
I. Install the Fan Guard and Air Diverter
Note: See Figure 3-9.
a. To Install the fan guard and air diverter:
1) Hold the fan guard so that the large ends of the keyholes are towards the bottom of the SteamChef.
2) Place all four openings over the mounts located on the rear wall of the SteamChef.
3) Pull it down so that the narrow ends of the slots are pulled tight over the mounts. See Figure 3-9.
4) Place the air diverter over the fan guard. Press lightly towards the rear wall until the air diverter
drops into its slots in the fan guard.
Figure 3-8
Typical Drain Layout