


4
4
CONVECTION BROIL (ERD48 left oven
only) – The high wattage, top heating
element supplies the heat in Broil mode
in combination with the convection fan
for better heat distribution. The broil
temperature is adjustable from 135˚F
to the “HI” setting (equivalent to 555˚F)
for greater cooking flexibility. Broiling is
performed with the door closed.
PURE CONVECTION™ (ERD models
only) – In Pure Convection™ mode a
third heating element, encircling the
convection fan located in the rear of the
oven chamber, acts as the heat source.
The convection fan draws air from the
oven chamber, then forces it across
the hot convection heating element.
The heated air is directed back into the
oven chamber through the convection
baffle. The baffle distributes the heated
air evenly to ensure uniform results.
Temperatures may be set from 135˚
to 555˚F in 5˚F increments. Use this
mode for single rack baking, multiple
rack baking, roasting, and preparation of
complete meals.
CONVECTION BAKE – In this
combination convection-radiant mode,
the lower element provides the heat.
As in Pure Convection™ mode, the
convection fan and baffle combine to
circulate heated air evenly throughout the
oven chamber. Temperatures may be set
from 135˚F to 555˚F in 5˚F increments.
Use this mode for single rack baking,
multiple rack baking and roasting.
SELF-CLEAN – In the pyrolytic Self-
Clean mode, the oven reaches extreme
high temperatures, thereby burning off
oven soil automatically. The Self-Clean
time is adjustable up to four hours so
that varying degrees of oven soil can
be successfully removed. Also, the Self-
Clean cycle can be delayed to start at a
later time if desired
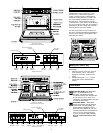
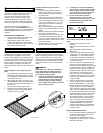
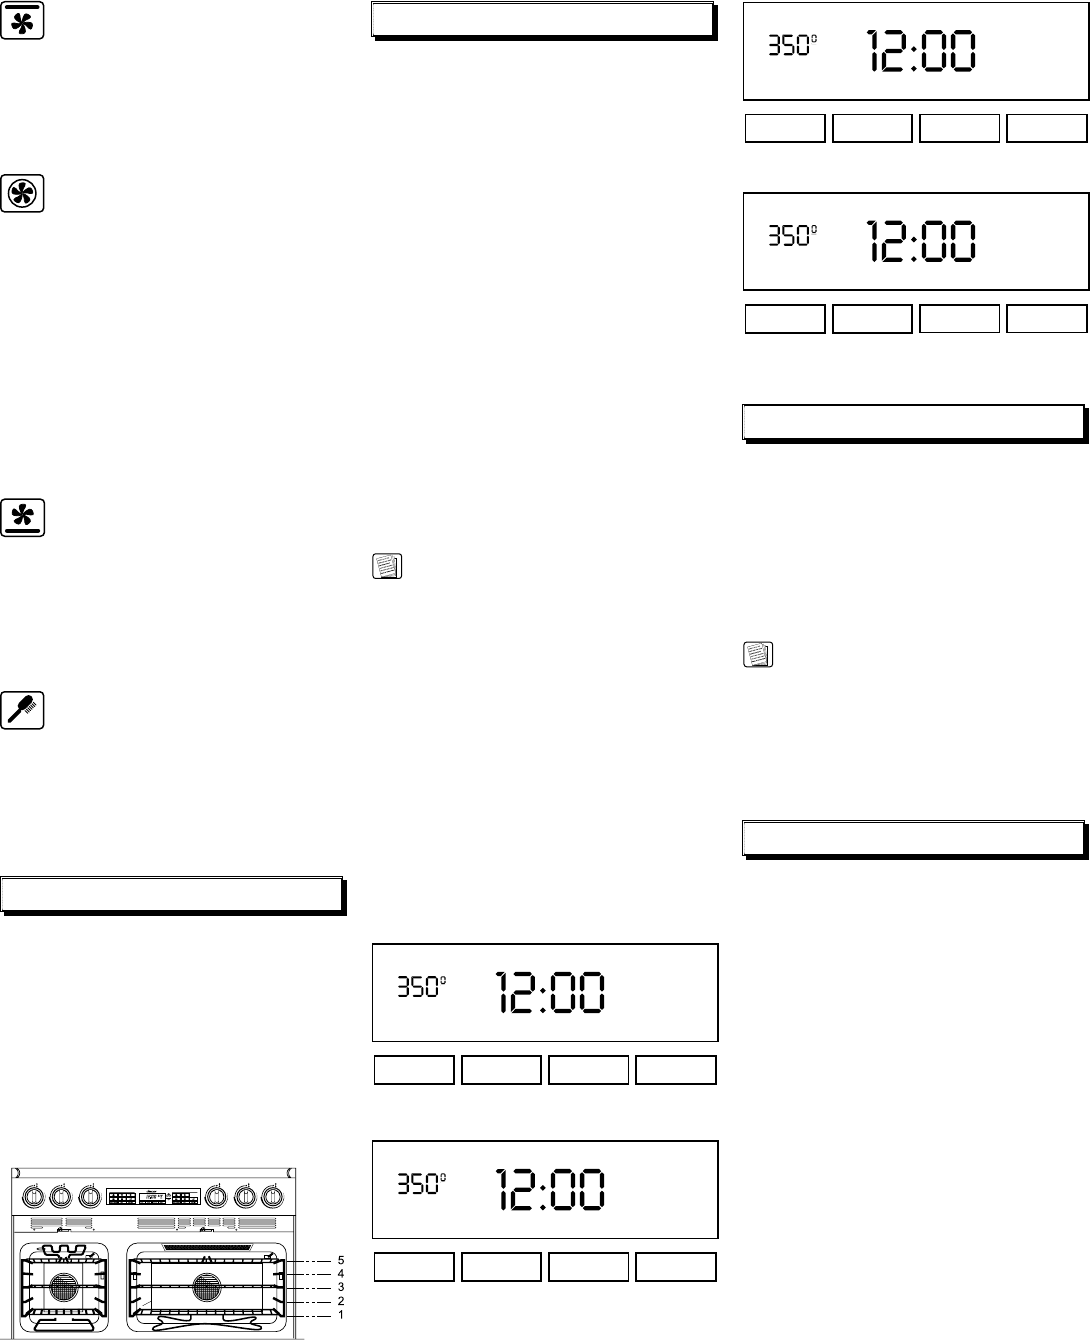
Oven Racks and Supports
Three chrome-plated oven racks are provided.
Always remember to position the racks prior to
heating the oven. Also, remove the oven racks
prior to self-cleaning to prevent permanent
discoloration of the racks
The porcelain rack supports provide five (5)
heights for positioning of the oven racks.
To install a rack, align the left and right edges of
the rack with the horizontal guide rails of the rack
supports, then slide the rack into the oven
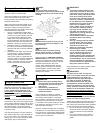
Oven Rack Positions
(ERD48 Shown)
Oven Mode Selection
Follow these steps to operate the oven
modes:
1. Position oven rack(s) at the proper
height(s).
2. Press the touch pad for the modes of
your choice. The oven will beep once,
the selected cooking mode will flash, and
“– – –” will be displayed.
3. Press either the “+” or “–” pad. The default
temperature will be displayed.
4. To adjust the default temperature for
baking, press and hold the “TIME•TEMP”
pad. (Press “+” key to increase the
temperature setting, “–” to decrease.)
“PRE” and “ON” will appear in the
clock display, and the oven will begin
to heat. If in a convection mode, the
convection fan will turn on. Also, the
clock display will change from the desired
cooking temperature to the actual oven
temperature, starting with 135˚F. The
temperature display will increase in 5˚F
increments until the desired temperature is
reached. The cooling fan will turn on when
the oven temperature reaches 200˚F.
NOTE:
Do not place food inside the oven until the
Preheat cycle is complete.
When the desired temperature is attained, the
Preheat cycle is complete. The clock will beep
once and “PRE” and “ON” will disappear from
the display. (From this time forward, the “ON”
display will cycle on and off with the heating
elements.)
5. Carefully place the food onto the desired
rack(s) within the preheated oven.
6. It is recommended that a Minute Timer be
set to time the cooking process.
7. When the time expires and/or the
food is done cooking, press the
“CANCEL•SECURE” pad to turn off the
oven.
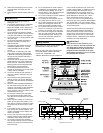
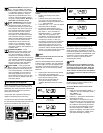
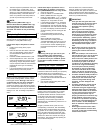
TIMER 1
CLOCK STOP TIME
TIMER 2
BAKE
ON
Clock Display
in Standard Bake
TIMER 1
CLOCK STOP TIME TIMER 2
ON
CONV
Clock Display
in Pure Convection™
TIMER 1 CLOCK STOP TIME TIMER 2
BAKE
ON
CONV
Clock Display
in Convection Bake
TIMER 1 CLOCK STOP TIME TIMER 2
CONV
BROIL
ON
Clock Display
in Convection Broil
(ERD48 left oven only)
Preheating the Oven
The oven features an automatic Preheat cycle
that rapidly brings the oven chamber up to
temperature. Simply by choosing a cooking
mode and setting a temperature, the oven will
automatically perform the Preheat function. The
Preheat cycle operates in Standard Bake, Pure
Convection™ and Convection Bake modes.
There is no Preheat cycle for the Broil or
Convection Broil modes.
NOTE:
Allowing the oven to completely pre-heat
prior to placing food in the oven will avoid
excessive browning of the food. After the
oven signals that the pre-heat is complete,
allow 3-5 more minutes for the heat patterns
to normalize in the oven and then place your
food inside.
Minute Times
The clock features two timers that may be used
for time cooking or other processes up to 11
hours, 50 minutes in length.
To use the Minute Timer function, follow
these steps:
1. Press the touch pad labeled “TIMER 1”, or
“TIMER 2”. The clock will display “00:00”,
and “TIMER 1”, or
“TIMER 2” will flash.
2. Press the “+” pad until the desired time is
displayed on the clock.
3. After “TIMER 1” has expired, the clock
will sound off with one second beeps and
“TIMER 1” will appear in the display. After
the “TIMER 2” minute timer has expired,
the clock will sound alternating one and
two second beeps and “TIMER 2” will
appear in the display. The beeper can be
silenced by pressing the “TIMER” touch
pad while the beeper is sounding.