20
FMV156DBE
FMV156DSE
FMV156DQE
FMV156DCF
TEST PROCEDURES
PROCEDURE
LETTER
COMPONENT TEST
L TOUCH CONTROL PANEL ASSEMBLY TEST
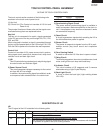
The touch control panel consists of circuits including semiconductors such as LSI, ICs, etc. Therefore,
unlike conventional microwave ovens, proper maintenance cannot be performed with only a voltmeter
and ohmmeter. In this service manual, the touch control panel assembly is divided into two units, Con-
trol Unit and Key Unit, and also the Control Unit is divided into two units, LSI Unit and Power Unit, and
troubleshooting by unit replacement is described according to the symptoms indicated.
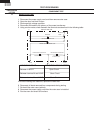
Before testing,
1) Disconnect the power supply cord, and then remove outer case. Refer to procedure of " HOOD
EXHAUST LOUVER REMOVAL ", " REMOVAL OF OVEN FROM WALL " and " OUTER CASE
REMOVAL ".
2) Open the door and block it open.
3) To discharge high voltage capacitor, wait for 60 seconds.
4) Remove two (2) screws holding the hood intake duct R to the ovencavity top plate and the base
plate R. And remove the hood intake duct R.
5) Disconnect the leads to the primary of the power transformer.
6) Ensure that these leads remain isolated from other components and oven chassis by using
insulation tape.
1. Key Unit.
NOTE ;
1) Check key unit ribbon connection before replacement.
2) Reconnect all leads removed from components during testing.
3) Re-install the hood intake duct R with two (2) screws.
4) Re-install the outer case (cabinet).
5) Reconnect the power supply cord after the outer case is installed.
6) Run the oven and check all functions.
The following symptoms indicate a defective key unit.
a) When touching the pads, a certain pad produces no signal at all.
b) When touching a number pad, two figures or more are displayed.
c) When touching the pads, sometimes a pad produces no signal.
If the key unit is defective.
1) Disconnect the power supply cord, and then remove outer case.
2) Open the door and block it open.
3) To discharge high voltage capacitor, wait for 60 seconds.
4) Replace the key unit.
5) Reconnect all leads removed from components during testing.
6) Re-install the outer case (cabinet).
7) Reconnect the power supply cord after the outer case is installed.
8) Run the oven and check all functions.
2. Control Unit.
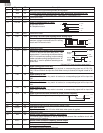
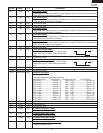
The following symptoms indicate a defective control unit. Before replacing the control unit, perform
the Key unit test (Procedure M) to determine if control unit is faulty.
2-1 In connection with pads.
a) When touching the pads, a certain group of pads do not produce a signal.
b) When touching the pads, no pads produce a signal.
2-2 In connection with indicators
a) At a certain digit, all or some segments do not light up.
b) At a certain digit, brightness is low.
c) Only one indicator does not light.
d) The corresponding segments of all digits do not light up; or they continue to light up.
e) Wrong figure appears.
f) A certain group of indicators do not light up.
g) The figure of all digits flicker.
2-3 Other possible problems caused by defective control unit.
a) Buzzer does not sound or continues to sound.
b) Clock does not operate properly.
c) Cooking is not possible.


