


2928 2929
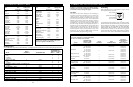
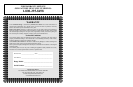
RANGE TROUBLESHOOTING
This section is designed to help you save the cost of a service call. However, you may still need assistance or service. When calling
for service, you will need to provide a complete description of the problem, your appliance’s complete model and serial numbers
a
nd the purchase or installation date (see Warranty). This information is needed to properly identify parts needed.
Before Calling For Service…
PHONE OUR HELP LINE AT: 1-800-295-8498
If your range should fail to operate, review the following list before calling for service.
N
ote: Most electrical clock malfunctions can be corrected by turning the power off to the range for about 15 seconds.
(Clock and Control will reset itself).
Problem Check… What To Do
Nothing will operate
The oven will not operate
The electric surface elements
will not operate
Cooktop control knobs will not turn
The self-cleaning cycle
will not operate
Control is “locked up” (meaning no
buttons will function)
Cooking results are not what
y
ou e
xpected
• Is the power cord plugged into a live
circuit with proper voltage?
• Has a household fuse blown or a circuit
breaker tripped?
• Plug the power cord into a live circuit
with proper voltage.
• Replace household fuse or reset circuit
breaker.
• Has the clock been set?
• Have the electronic controls been set
correctly?
• Has a delayed start time been
programmed?
• Refer to instructions for setting the
electronic controls starting on page 15.
• Wait for the start time
to be reached.
• Has a household fuse blown or a circuit
breaker tripped?
• Are the control knobs set correctly?
• Is a control knob sticking or broken?
• Replace household fuse or reset circuit
breaker.
• Push control knobs in before turning to
a setting.
• See LUBRICATION on page 16.
• Are you pushing in before turning?
• See LUBRICATION page 16.
• Push control knobs in before turning to
a setting. Call factory for help.
• Does the range clock show the correct
time of day?
• Has a delayed start time been
programmed?
• Reset clock to show the correct time of
day (see page 14).
• Wait for the start time to be reached or
reset for immediate start.
• There has been a power interruption. • Reset the main power breaker to the
range.
• Is
the range level?
•
Is the ov
en preheated before baking?
•
Has the recipe been tested or is it from a
reliable source?
• Is the pan used the type or size
recommended in a reliable cookbook?
•
Is there proper air circulation around the
pan when baking?
•
Does cooking utensil fit the surface
burner being used?
•
Ha
v
e you preheated oven for
15 minutes?
• Level range (see Installation instructions
page 6).
• Preheat oven when called for in recipe.
• Use only tested recipes from a reliable
source.
• Refer to a reliable cookbook for
recommended pan type and size.
• Allow 1" to 2" (3.5-5 cm) of air space on
all sides of pan.
•
P
an should be the same size or slightly
lar
ger than surf
ace element being used.
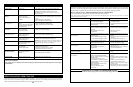
SEE PAGE 10 & 14 FOR GAS TROUBLESHOOTING:
Caution: Do not run burners without pots in place. Excessive heat could damage clock/control above burners.
2828
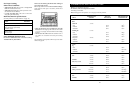
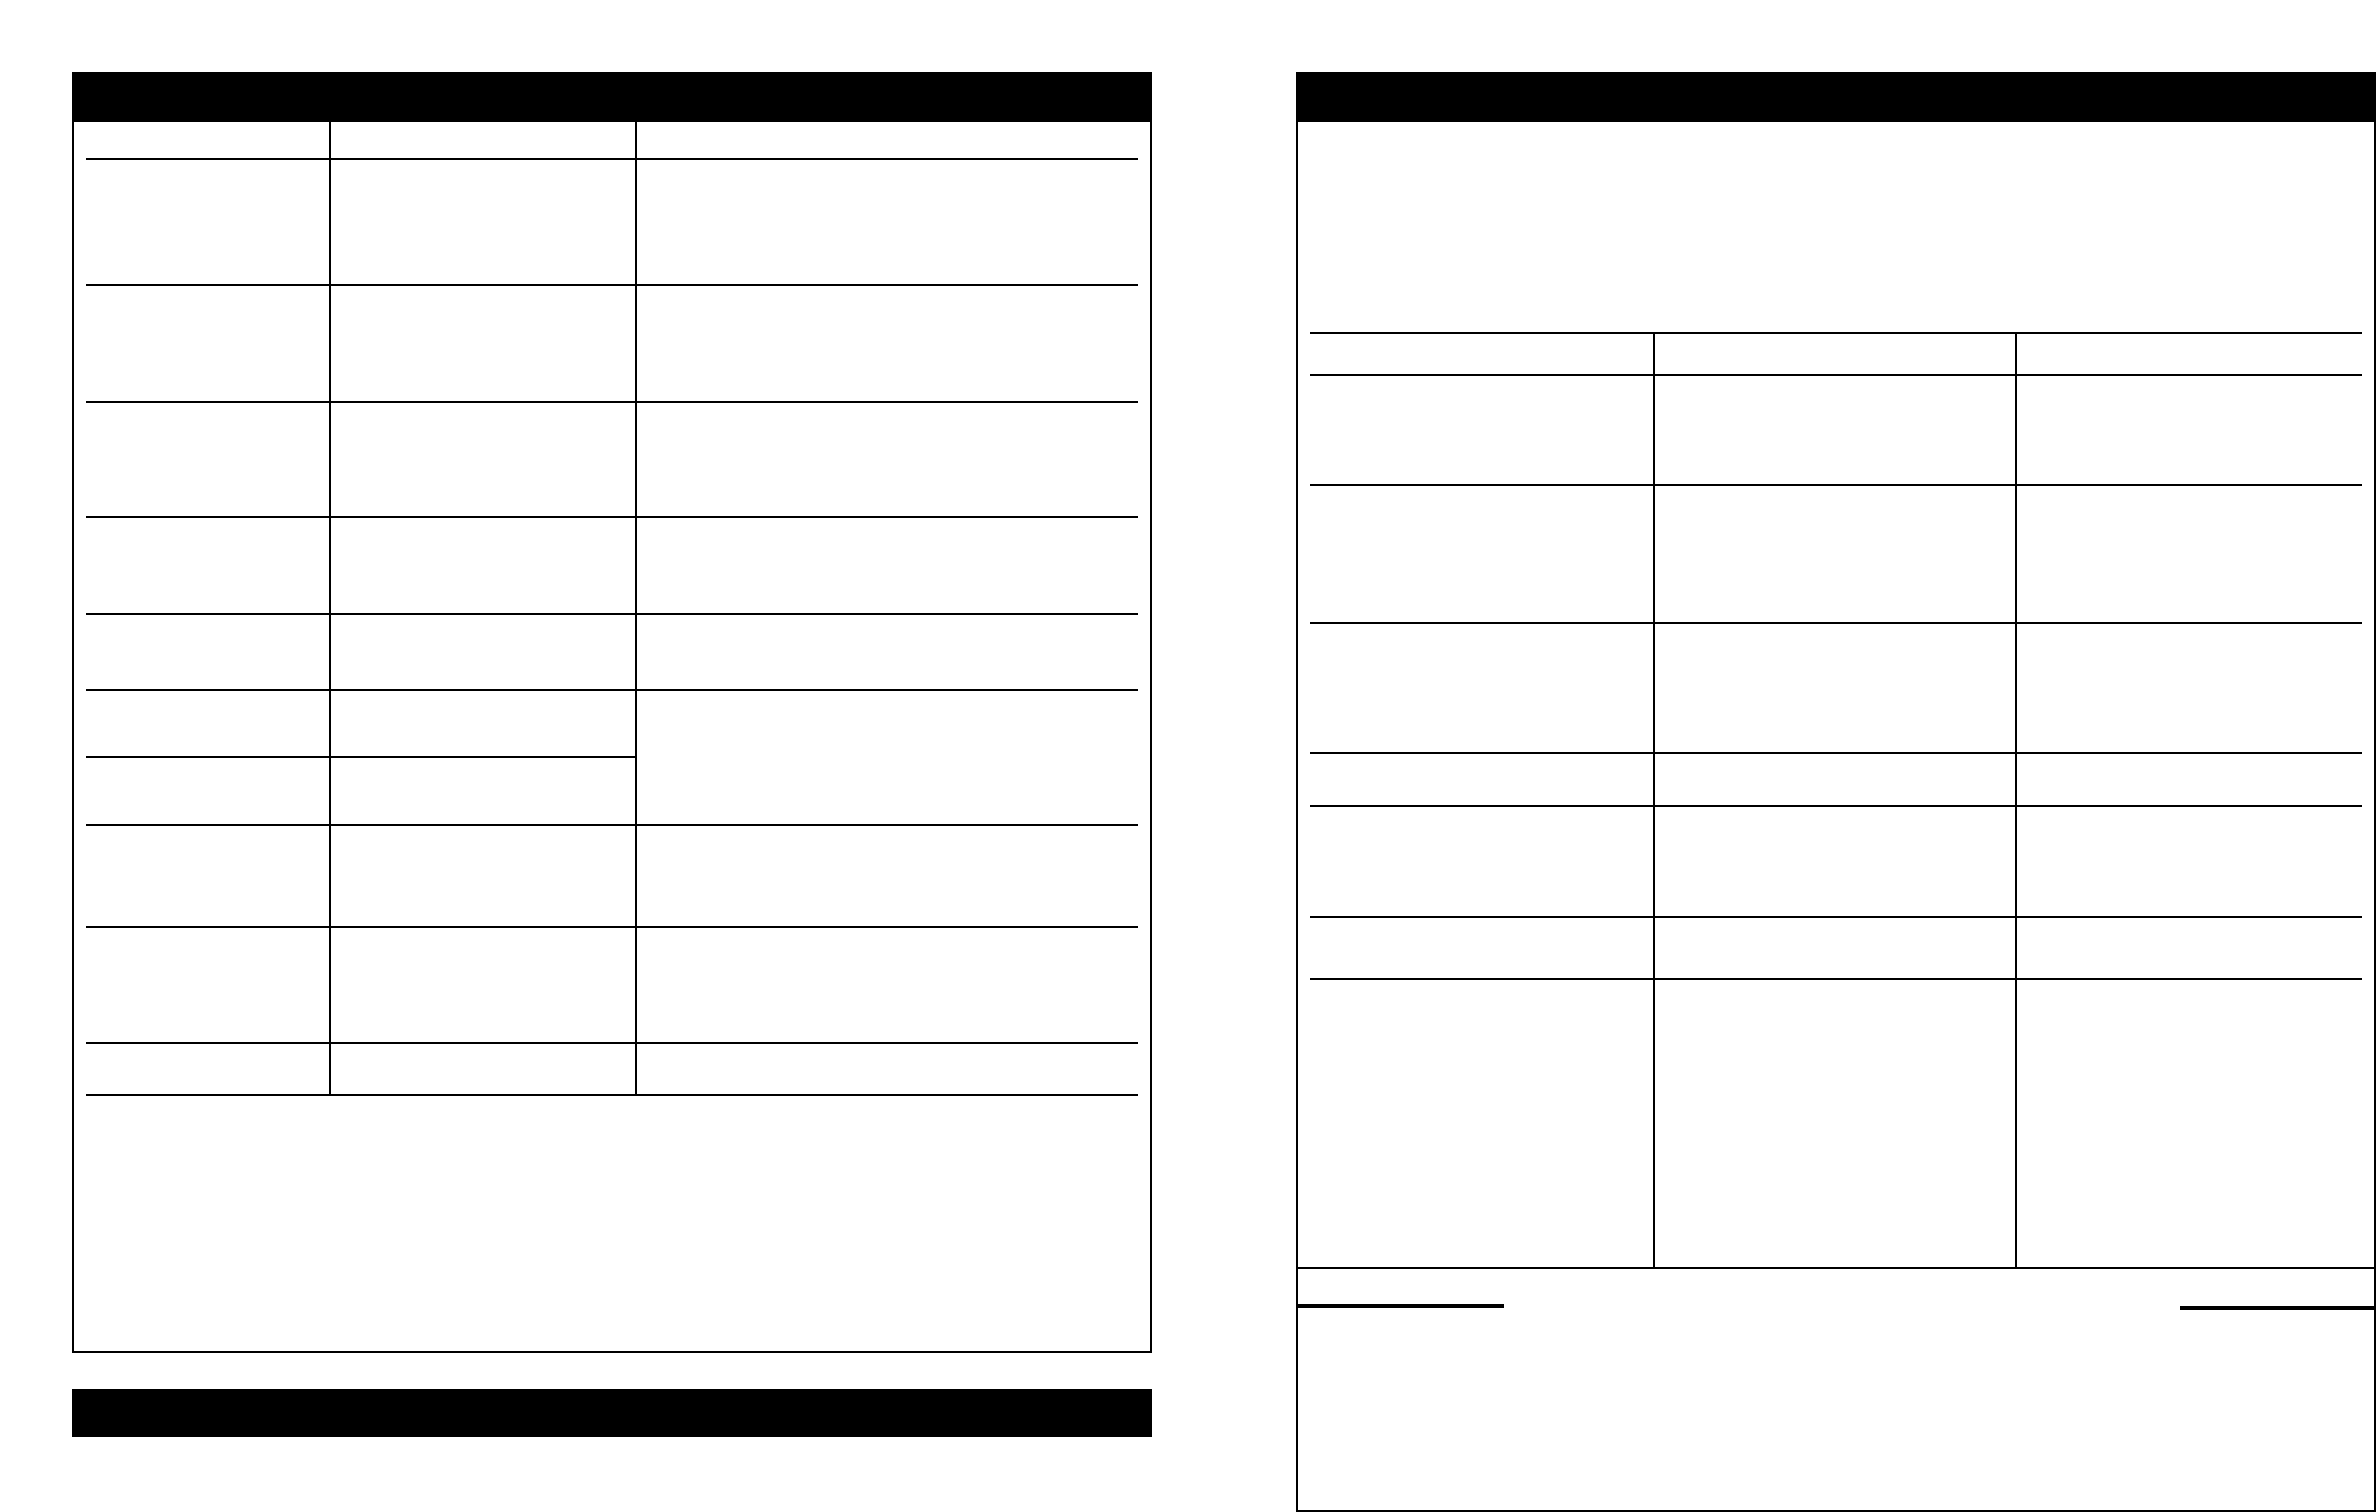
CLEANING GUIDE
P
art What To Use How To Clean
Control Knobs
Exterior Non-Colored
Surfaces
Glass Cook Tops
also see page 9
Porcelain-Enamel
Gas Grates
Broiler Pan & Grid
(Clean after each use)
Oven Racks
Chrome Trim
Stainless Steel
How Can I Clean Stains
Off Painted Enamel?
Pancake Griddle
(Option)
STAINS TO COOKTOP:
Acid (tomato, cherries, rhubarb, citrus, milk and vinegar) will permanently stain cooktop and trim if not wiped
up immediatel
y
.
• Soft sponge
• Warm, soapy water
• Turn knobs to OFF and pull straight off control panel.
• Wash, rinse and dry thoroughly. Do not soak.
•
Replace knobs. Make sure all knobs point to OFF.
D
o Not Use
s
teel wool or abrasive cleaners. They will
damage the finish.
• Wash, rinse and dry thoroughly.
• Use non-abrasive, plastic scrubbing pad on heavily soiled
areas.
• Follow directions on the container.
• Do not use abrasive or harsh cleaners.
• Soft sponge
• Warm, soapy water
• VIM, Flitz or Soft Scrub
cleaners
• Soft cloth with warm, soapy
water
• Vim or Glass Stove Top Cleaner
• Corning Cleaner-Conditioner
• Dry Baking Soda
• Follow directions on container.
• Do not use abrasive or harsh cleaners.
• Apply to soiled areas dry with soft cloth.
• Non-abrasive, plastic scrubbing pad
•
Warm, soapy water
• Wax with Turtle Wax
• Wipe off excess spills.
• Wash, rinse and dry thoroughly.
• Steel-wool pad
• Warm, soapy water
OR
• Self-cleaning cycle
• Wash, rinse and dry thoroughly
OR
• Leave in oven during self-cleaning cycle.
• Steel-wool pad
• Warm, soapy water
OR
• Self-cleaning cycle
•
Maas cleaner, follow directions on tube
• Tarnite metal polish (follow
directions on can)
• Wash, rinse and dry thoroughly
• Remove from oven during self-cleaning cycle.
NOTE: Racks will discolor and become harder to slide if left
in oven during self cleaning cycle. Apply a small amount of
vegetable oil to the side rungs to aid sliding.
• Soft sponge
• Warm, soapy water OR
• Windex
• Wash, rinse and dry thoroughly.
• Follow directions on the container.
•
Plastic scouring pad with
soap & water
•
Soak then w
ash in hot soapy water.
• Stainless Steel Cleaner
and Polish OR
• Windex & Papertowel
• Before cleaning make sure drawer is cool
• Wash with hot soapy water
• Rinse & dry, then use cleaner or windex.
• Rub cleaner in direction of the grain.
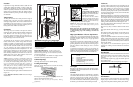
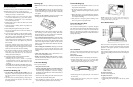
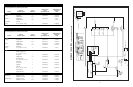
SERVICING RANGE UNDER COOK TOP
(Servicing should be done by a person knowledgeable in appliance service.) Disconnect power to range. Open oven door and
remove it. See removal instructions on page 16. With a Philips Driver, undo the 2 screws holding the top down. Pull top forward
about 2" then lift front up about 10". Raise the service stays on each side to hold top up.