


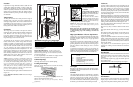
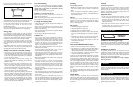

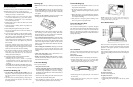


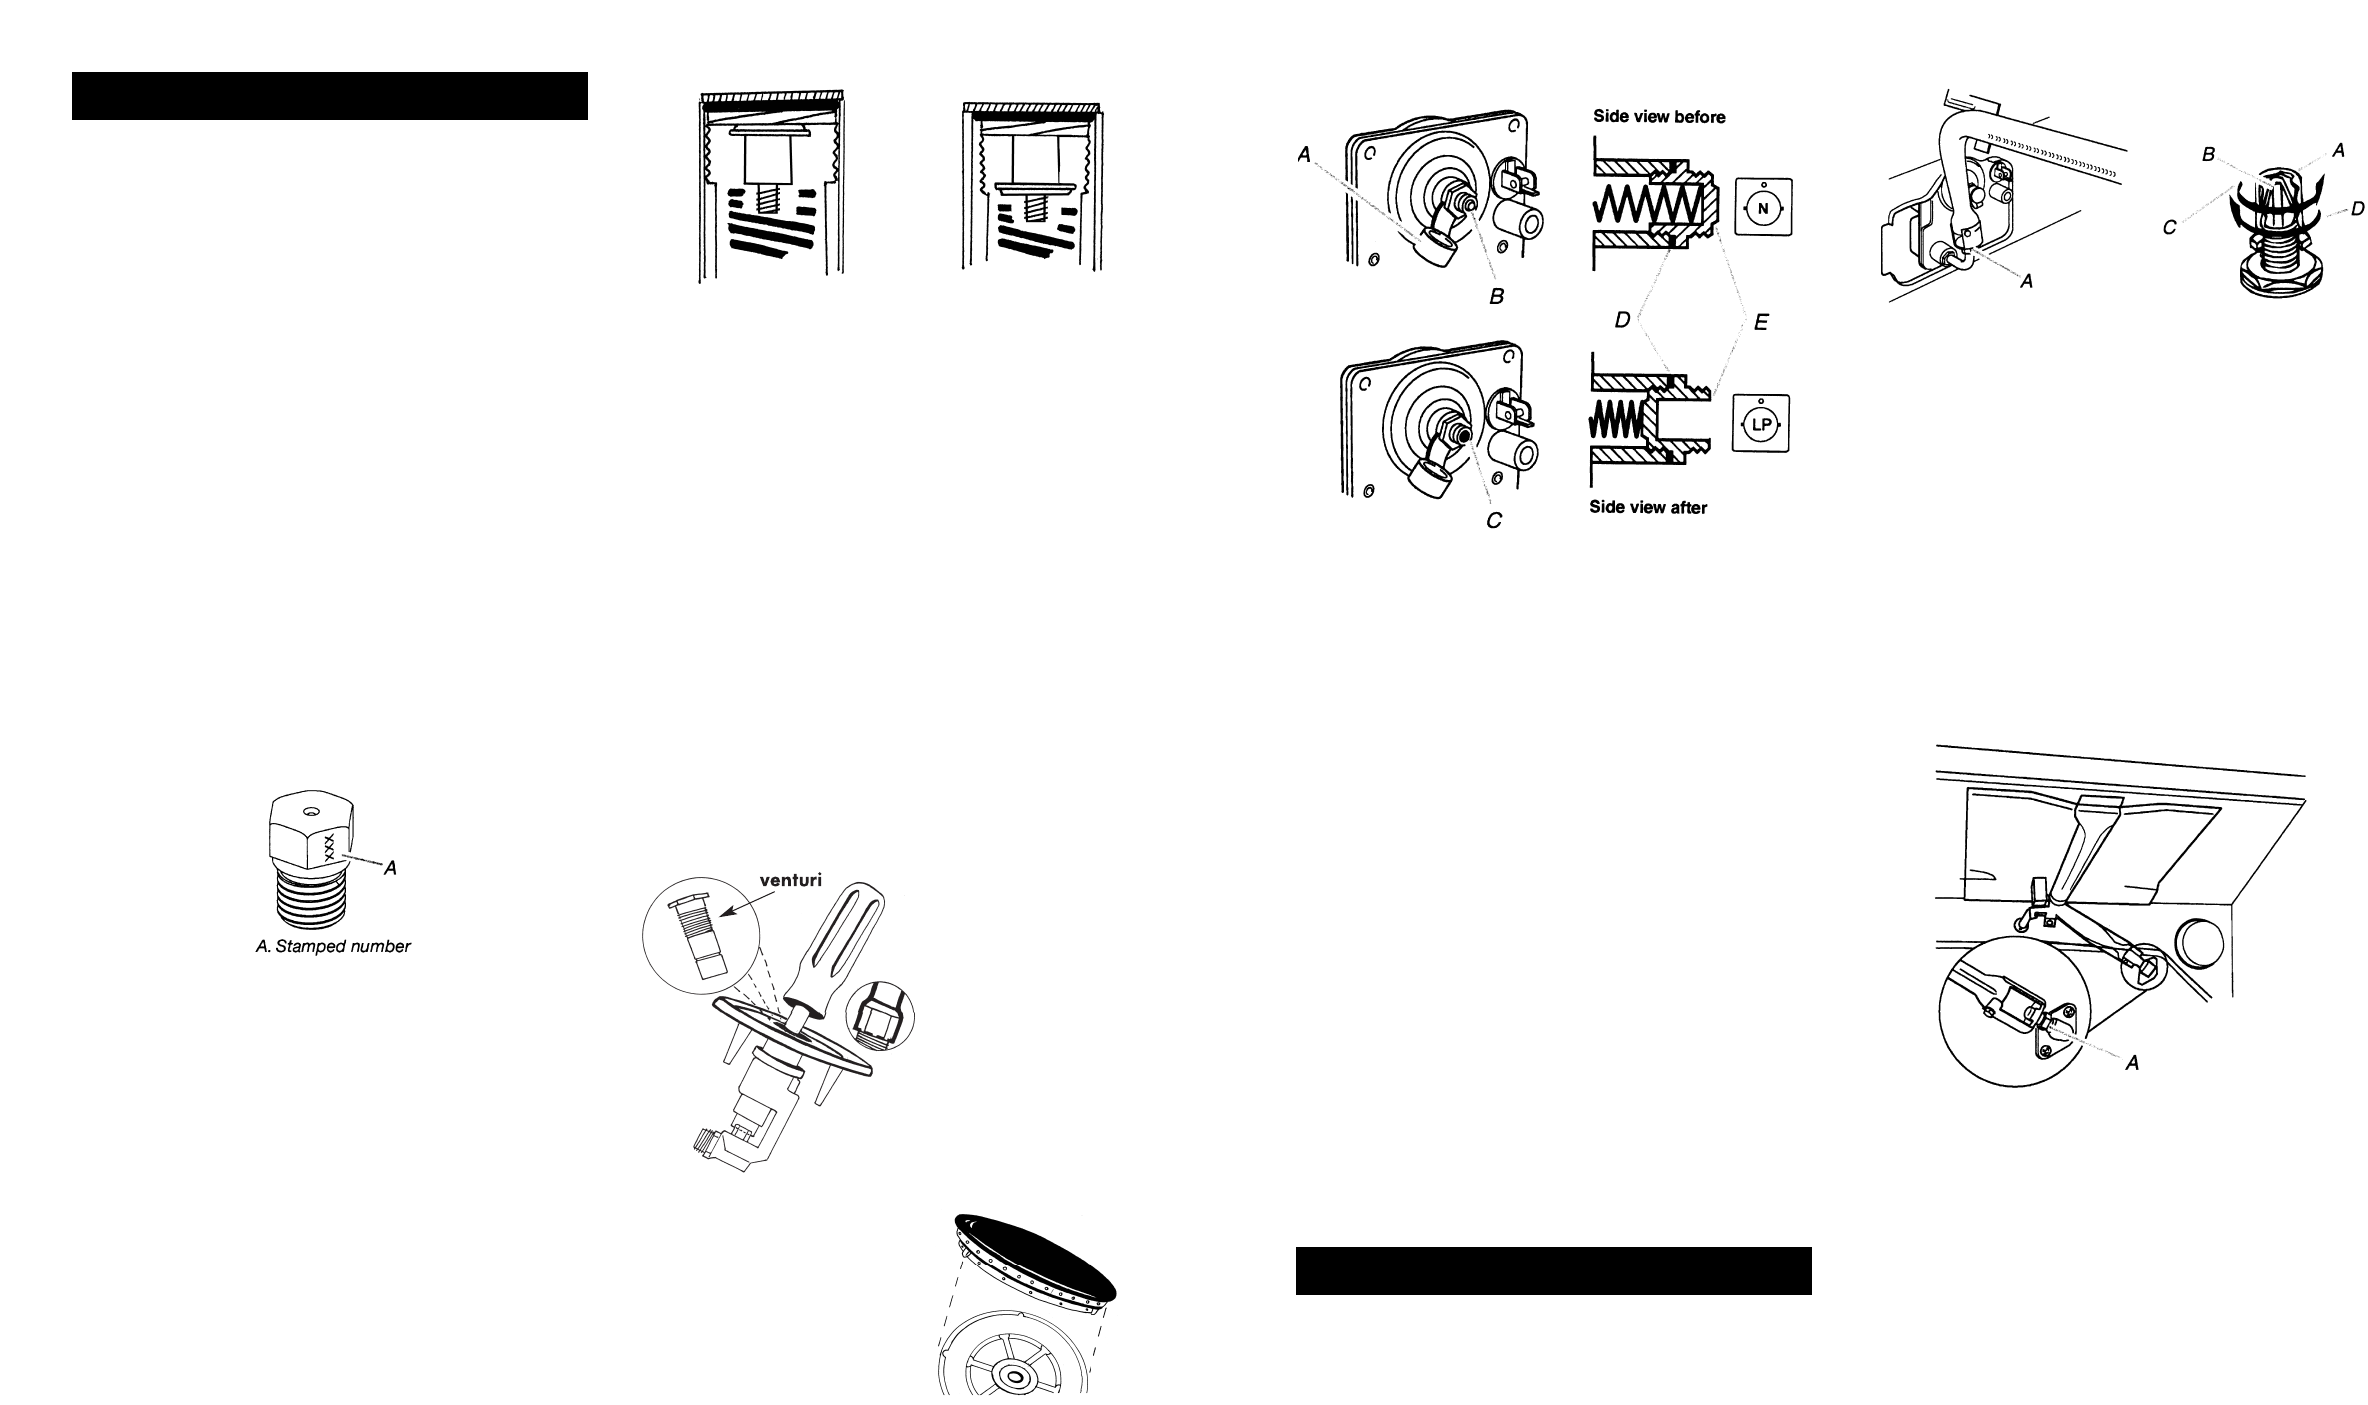
A. PLASTIC COVER
B. GAS PRESSURE REGULATOR CAP WITH SOLID END
FACING OUT
C. GAS PRESSURE REGULATOR CAP WITH HOLLOW
END FACING OUT
D. WASHER
E. GAS PRESSURE REGULATOR CAP
Conversion of Regulator to “LP”
on Model 1956 (gas oven)
• Remove storage drawer. See page 17.
• Locate the regulator at the rear of storage drawer
compartment.
• Remove the plastic cover from the regulator cap.
•
With your fingers, turn the nut counter clockwise.
• Do not remove the spring beneath the cap.
• Turn the cap over so LP faces up and reinstall into
re
gulator
.
•
Replace plastic cover over regulator cap.
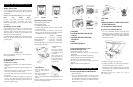
OVEN CONVERSION MODEL 1956
To Convert Oven Bake and Broil Burner
1.
Remo
v
e o
v
en racks.
2. use a 1/2" combination wrench to loosing the orifice
hood away from the pin (about 2 to 2-1/2 turns). The
o
v
en bak
e b
ur
ner flame cannot be properl
y adjusted if
this conversion is not made. See “Adjust Oven Bake
Bur
ner Flame” section.
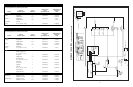
A. ORIFICE HOOD
B. PIN
C. NATURAL GAS: INCREASE GAS – INCREASE FLAME SIZE (PRESET
AT FACTORY FOR NATURAL GAS)
D. LP GAS: DECREASE GAS, DEGREASE FLAME SIZE.
To Convert Oven Broiler Burner
1. Use a 1/2" combination wrench to loosen the orif
ice
hood a
way from the pin (about 2 to 2-1/2 tur
ns.
The
oven broil burner flame cannot be properly adjusted if
this conversion is not made. See “Adjust Oven Broil
Burner Flame” section.
2.
Reinstall the storage or w
arming drawer.
3. Complete installation. See “Make Gas Connection”
and “Electronic Ignition System” sections.
Checking for proper cooktop burner and oven bake
burner flame is very important. Natural gas flames do
not have yellow tips.
IMPORTANT: You may have to adjust “LO” setting for
each cooktop burner.
13
RANGE TOP CONVERSION TO “LP”
Models 1955 & 1956
All our ranges are factory set to burn natural gas unless
“LP” is specified. To use the range on “LP” gas, please do
the following:
Order an “LP” kit from the factory. $35 UPS included.
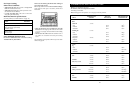
Burner Large Medium Small
Nat. Gas #50 (1.75 mm) #55 (1.32 mm) #57 (1.09 mm)
LP/Propane #64 (.91 mm) #65 (.89 mm) #70 (.71 mm)
Store natural gas spuds so they are available for future
conversions.
Installation of “LP” Spuds
Apply masking tape to the end of a 7 mm nut driver to
help hold the gas orifice spud in the nut driver while
changing it. Press nut driver down onto the gas orifice
spud and remove by turning it counterclockwise and
lifting out, set gas orifice spud aside.
Gas orifice spuds are stamped with a number on the side.
Replace the LP gas orifice spud with the correct Natural
gas orifice spud.
Refer to the follo
wing char
t for the cor
rect Natural gas
orif
ice spud placement.
Conversion of Regulator to “LP”
on Model 1955
Disconnect Power to Range
•
Open oven door and remove it, see removal instructions
on page 16.
•
W
ith a Philips dri
v
er
, undo the 2 scre
ws holding the top
down.
• Pull top forward about 2" then lift front. Raise the
ser
vice sta
y on each side to hold the top up.
• On the back right of the range unscrew the nut on top of
the regulator.
• Reverse the white insert pin by pulling it out of the cap,
reverse it, then snap it back into the cap. Replace cap
into body of regulator and tighten, making sure not to
disturb the regulator spring.
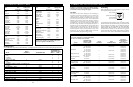
Figure 13 NAT. GAS LP GAS
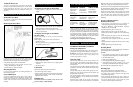
Replacing rangetop orifices
Tools required to replace orifices.
Small adjustable wrench.
1. Remove the lift off burner cap.
2. With the small adjustable wrench, unscrew the brass
venturi and remove.
3. Unscrew the natural gas orifices in each of the top
burners using the 7mm nut dri
ver included with orifice
kit. Replace with “LP” orifices listed below.
Nat. Gas LP/Propane
Front left superburner takes 1.75 mm (#50) .91 mm (#64)
Other front burners tak
e 1.32 mm (#55) .89 mm (#65)
All rear burners use 1.09 mm (#57) .71 mm (#70)
Note: example. Orifices are stamped metric sizes. (00) is
the number drill equivalent.
4. Reinstall the brass
venturi.
Store nat. gas orifices
and nut driver so they
are available for future
conversions.
When replacing the
black caps, make sure
that the tabs in the cap
f
it into the grooves of
the b
ur
ner base.
Warning
– Fire Hazard
• Locate gas supply shut off
valve on the pressure
re
gulator
.
• Shut off gas supply before
converting to L.P. gas.
•
Mak
e all con
v
ersions before turning gas supply valve
back on.
F
ailure to follow these instructions could result in fire,
exposion or other personal injury.
12