


I
N
T
E
G
R
A
T
E
D
P
R
O
D
U
C
T
O
N
L
Y
DISHDRAWER TOE KICK INFORMATION
SECTION 7
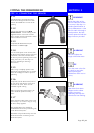
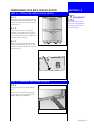
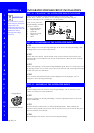
Upper Toe Kick
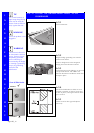
7.1.1
Remove Plastic Toe Kick from product.
Unscrew metal back panel.
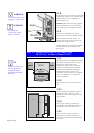
7.1.2
Place customer supplied Upper Toe Kick
face down on soft surface. Locate metal
back panel on rear of Toe Kick (ensure
the bottom of Toe Kick and panel are
flush and centered).
7.1.3
Using screws provided, fix metal panel
onto Toe Kick. Install Upper Toe Kick
onto product.
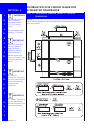
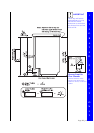
STEP 7.1 INTEGRATED TOE KICK INSTALLATION
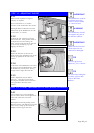
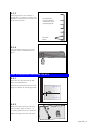
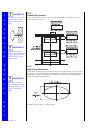
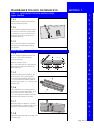
Lower Toe Kick
7.1.4
Place customer supplied Toe Kick face
down on a soft surface and mark a
vertical center line.
Measure out from center
9
29
/
32
(251.5mm) and 10
5
/
8
(269.5mm) in
both directions and mark Toe Kick pin
hole center lines.
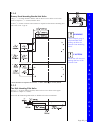
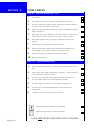
7.1.5
Trim the Toe Kick pin to length, at the
nearest groove. The correct length is
such that when the bottom of the pin is
3
/
64
(1mm) above the bottom of the toe
kick, the top is within +/-
1
/
8
(3mm) of the
Toe Kick top.
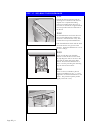
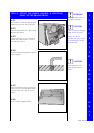
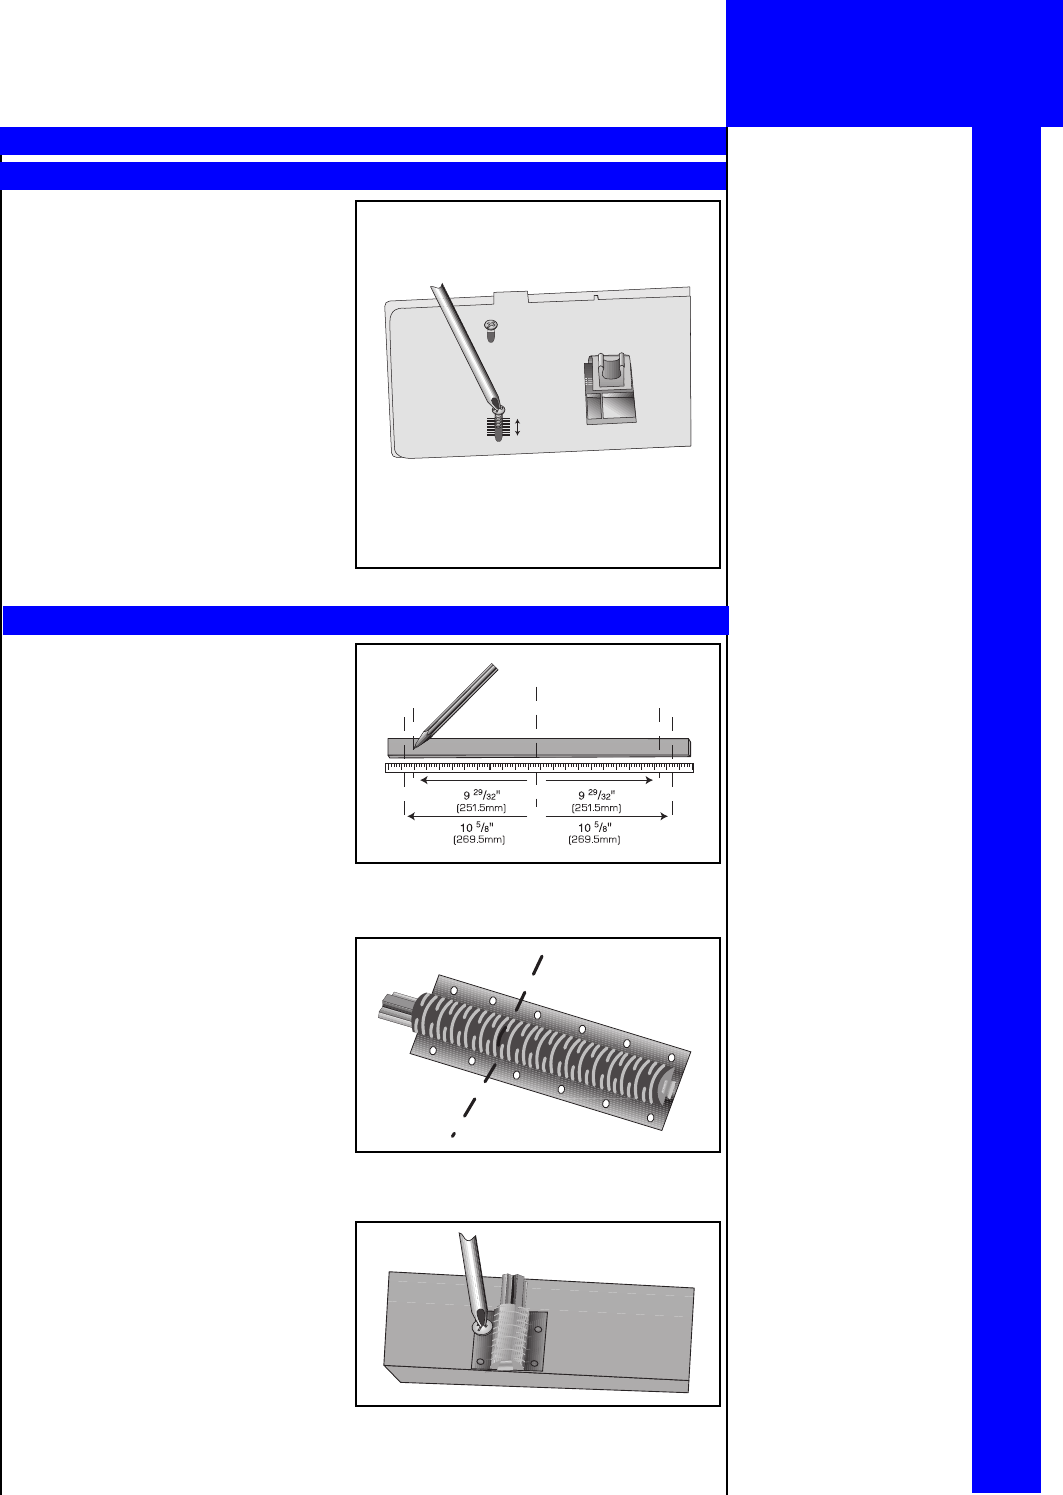
7.1.6
Cut Toe Kick Pin. Locate Toe Kick Pin
screw holes over the vertical lines. Line
up the cut base of the Toe Kick Pin
3
/
64
(1mm) above the bottom of the Toe
Kick then mark out the screw holes.
7.1.7
Drill pilot holes to a depth of
1
/
4
" (6mm).
Fix Toe Kick Pins to Toe Kick with screws
provided. Install Toe Kick to product.
7.1.8
Adjust the Upper Toe Kick as per Step 4.4
to achieve gap.
Toe Kick
Page DD_22