1-12
4. Remove the high-limit thermostat wire from the gas valve pilot coil.
5. Disconnect the pilot gas line tting from the gas valve.
6. Disconnect both pipe union collars from the gas valve and remove the valve.
7. Remove the pipettings from the old gas valve and install them on the replacement valve. Use
Loctite™ PST56765 or equivalent pipe thread sealant on the threads.
8. Reverse Steps 1-6 to install the replacement gas valve.
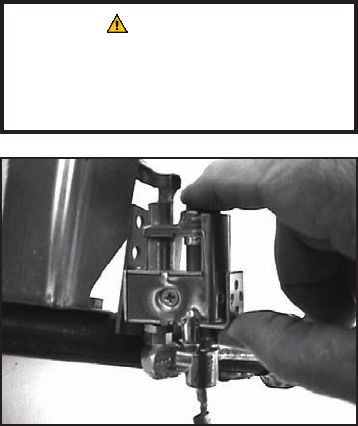
1.4.11 Replacing the Pilot Assembly or Thermopile
1. Remove the burner assembly in accordance with Steps 1-10
in Section 1.4.9.
2. To replace only the thermopile:
a. Bend the clip at the bottom of the pilot assembly and press
the thermopile out of the pilot assembly from the top.
b. Disconnect the thermopile tting from the gas valve pilot coil.
c. Reverse Steps a and b to install the replacement thermopile.
3. To replace the complete pilot assembly:
a. Disconnect the pilot tubing from the bottom of the pilot assembly.
b. Remove the screw from the pilot mounting bracket to release the pilot assembly.
c. Disconnect the thermopile tting from the gas valve pilot coil.
d. Reverse Steps a-c to install the replacement assembly.
4. Reinstall the burner assembly by reversing Steps 1-8 of Section 1.4.9.
1.4.12 Replacing the Frypot
1. Drain the frypot.
2. Disconnect the fryer from the electrical power supply. Turn off the gas supply and disconnect the
fryer.
3. Remove all accessories (i.e., frypot covers, basket lift arms, etc.) from the fryer.
4. If the fryer is equipped with a thermostat control, remove the thermostat knob and control panel
according to Steps 3-8 in Section 1.4.3.
NOTE: If the fryer is congured with a melt cycle, the thermostat leads will be connected to the PC board
rather than to the terminal block and gas valve. Disconnect the leads from the PC board if this is the case.
Bend the clip to release the thermopile.
WARNING
Drain the frypot or remove the
handle from the drain valve
before proceeding further.


