


3-3
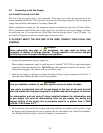
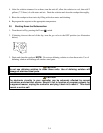
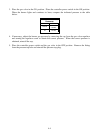
1. Turn the gas valve to the ON position (see illustration below).
OFF
ON
Honey well
2. Press the controller Power switch.
On FBR18 models, the burners will light for several seconds then go out. A few seconds later
they will light again. This cycle will repeat seven times or until the water in the cookpot
reaches 160°F (71°C), whichever comes first, at which time the burners will remain lit until the
setpoint is reached.
On FBRA18 models, if the cookpot is not already full of water, the AutoFill feature will im-
mediately begin adding water. When the water level reaches the upper water level sensor, the
AutoFill solenoid valve will cut off the water flow. (If the water level drops below the upper
water level sensor during operation, the AutoFill solenoid valve will open and add water to the
cookpot). When the water level is above the lower water level sensor, the burners will light for
several seconds then go out. A few seconds later they will light again. This cycle will repeat
seven times or until the water in the cookpot reaches 160°F (71°C), whichever comes first, at
which time the burners will remain lit until the setpoint is reached.
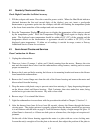
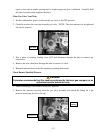
3. When the burners have been lit continuously for at least 90 seconds, observe the burners
through the burner viewing ports. The burners should display a bright orange-red glow. If a
blue flame is observed, or if there are dark spots on a burner face, the air/gas mixture re-
quires adjustment. Refer to Chapter 4, Section 4.4, Clean Combustion Air Blower for ad-
justment procedures.
3.4 Boiling-Out the Cookpot
CAUTION
Do not use deliming solution to clean these units. Use of deliming solution will
damage all stainless steel parts.
To ensure that the cookpot is free of any contamination resulting from its manufacture, shipping,
and handling during installation, the cookpot must be boiled out before first use.
1. Close the drain valve and fill the cookpot with a solution of cold water and 1 cup of Frymaster
FRYER ‘N’ GRIDDLE cleaner or detergent. NOTE: Do not use deliming solution to clean
these units. Use of deliming solution will damage all stainless steel parts.
2. Place the unit into operation in accordance with Section 3.3.
3. Program the setpoint for 200°F (93°C). When the Heat Mode indicator (decimal between the
first two digits of the display) goes out, set one of the product timers for 60 minutes.