


9
Care and cleaning of the cooktop. GEAppliances.com
Be sure electrical power is off and all surfaces are cool before cleaning any part of the cooktop.
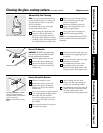
How to Remove Packaging Tape
To assure no damage is done to the finish
of the product, the safest way to remove
the adhesive left from packaging tape on
new appliances is an application of a
household liquid dishwashing detergent,
mineral oil or cooking oil.
Apply with a soft cloth and allow to soak.
Wipe dry and then apply an appliance
polish to thoroughly clean and protect
the surface.
NOTE: The plastic tape must be removed from all
chrome trim. It cannot be removed if it is baked on.
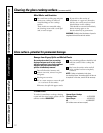
Control Knobs
Clean up spatters with a damp cloth.
Remove heavier soil with warm, soapy
water.
Do not use abrasives of any kind on the control
panel.
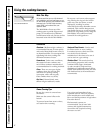
The control knobs may be removed for
easier cleaning. To remove a knob, pull it
straight off the stem. Wash the knobs in
soap and water but do not soak.
Pull the knob straight off the stem.
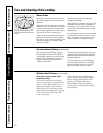
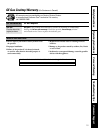
Burner Assembly
The burner assemblies should be washed
regularly and, of course, after spillovers.
Turn all controls off before removing burner parts.
The burner grates, burner heads and
burner caps can be removed for easy
cleaning. Removing them gives you
access to the burner bowls.
The electrode of the spark igniter is
exposed beyond the surface of the
burner bowl. When cleaning the burner
bowl, be careful not to snag the electrode
of the spark igniter with your cleaning
cloth. Damage to the igniter could occur.
To avoid snagging a cloth on the spark
igniter, leave the burner heads in place
when cleaning the burner bowls.
Be careful not to push in any cooktop
controls while cleaning the burner bowls.
A slight electrical shock might result
which could cause you to knock over hot
cookware.
Wash burner parts with an all-purpose
non-abrasive cleaner and warm water.
Soak stubborn soil. Dry them with a
cloth—do not reassemble while wet.
If the igniter orifice gets dirty or clogged
you may use a small sewing needle to
remove the soil.
To reassemble, replace the burner head
first, then the burner cap and finally the
burner grate.
CAUTION: DO NOT OPERATE THE
BURNER WITHOUT ALL BURNER
PARTS IN PLACE.
Grate
Burner cap
Burner head
Spark igniterMixing tube
Burner bowl
Safety Instructions Operating Instructions Care and Cleaning Troubleshooting Tips
Consumer Support