


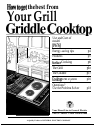
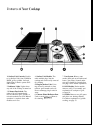

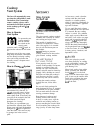
Surface Cooking
See Surface Cooking Guide on pages 8 and 9.
—
Surface Cooking with
Infinite Heat Controls
Your surface units and controls
are designed to give you an infinite
choice of heat settings for surface
unit cooking.
At both OFF and HIGH positions,
there is a slight niche so control
“clicks” at those positions; “click”
on HIGH marks the highest setting;
the lowest setting is between the
words WM and OFF. In a quiet
kitchen, you may hear slight
“clicking” sounds during cooking,
indicating heat settings selected
are being maintained.
Switching heats to higher settings
always shows a quicker change than
switching to lower settings.
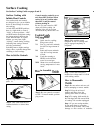
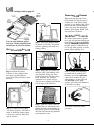
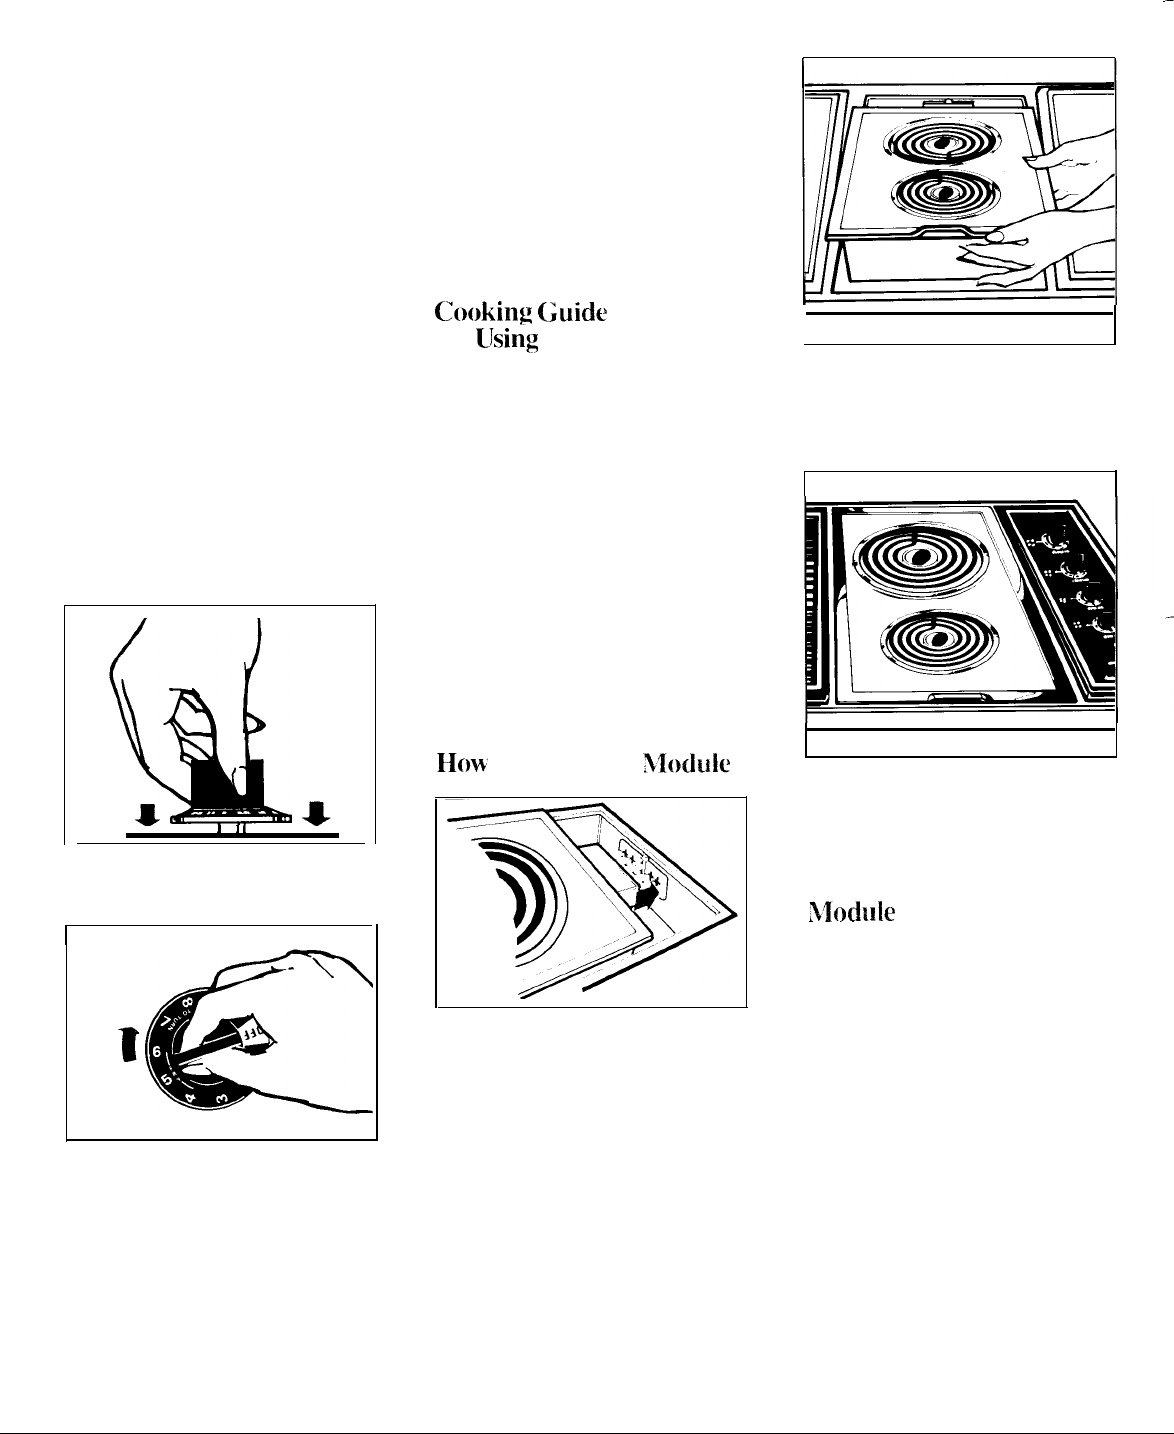
How to Set the Controls
I
11
Step 1:
Grasp control knob and
push in.
-
t
Step 2:
Turn either clockwise or
counterclockwise to desired heat
setting.
Control must be pushed in to set
only from OFF position. When
control is in any position other
than OFF, it maybe rotated
without pushing in.
Be sure you turn control to OFF
when you finish cooking. An
indicator light will glow when
ANY heat on any surface unit is on.
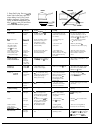
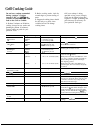
Goking
Guide
for
tJsing
Heats
HI
7-8
5-6
3-4
WM
Quick start for cooking;
bring water to boil.
Fast fry, pan broil; maintain
fast boil on large amount of
food.
Saute and brown; maintain
slow boil on large amount
of food.
Cook after starting at
HIGH; cook with little
water in covered pan.
Steam rice, cereal; maintain
serving temperature of most
foods.
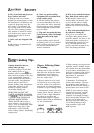
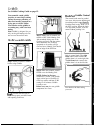
EIow-
to Assemble ~loduie
Step 1:
Be sure controls are turned
Step 2:
Slide module toward
receptacle in rear of cooktop until
plug is engaged completely in
receptacle.
Step
3: Lower the front end of
module into cooktop until it is flush
with cooking surface.
How to Disassemble
Module
Step 1:
Be sure surface units are cool
before attempting to remove module.
Step 2:
Lift up tab at front of
module until base clears the
to OFF. To install module, position
opening at the front of cooktop.
plug to rear.
Step 3:
To unplug, hold module by
the side edges and slide toward front
of cooktop. Lift out when unplugged.
Step
4: If you are storing modules,
do not stack them or store other
materials on top of them. This could
damage or mar surface of modules.
-
6