


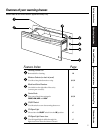

Safety Instructions Operating Instructions Care and Cleaning Installation Instructions Troubleshooting Tips Customer Service
15
Read these instructions completely and carefully.
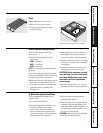
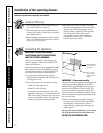
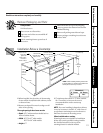
Step 1—Install Anti-Tip Brace
WARNING: ANTI-TIP PRECAUTIONS:
The anti-tip brace must be installed to prevent
the drawer from tipping forward when opened
and loaded.
Failure to do so could result in personal injury.
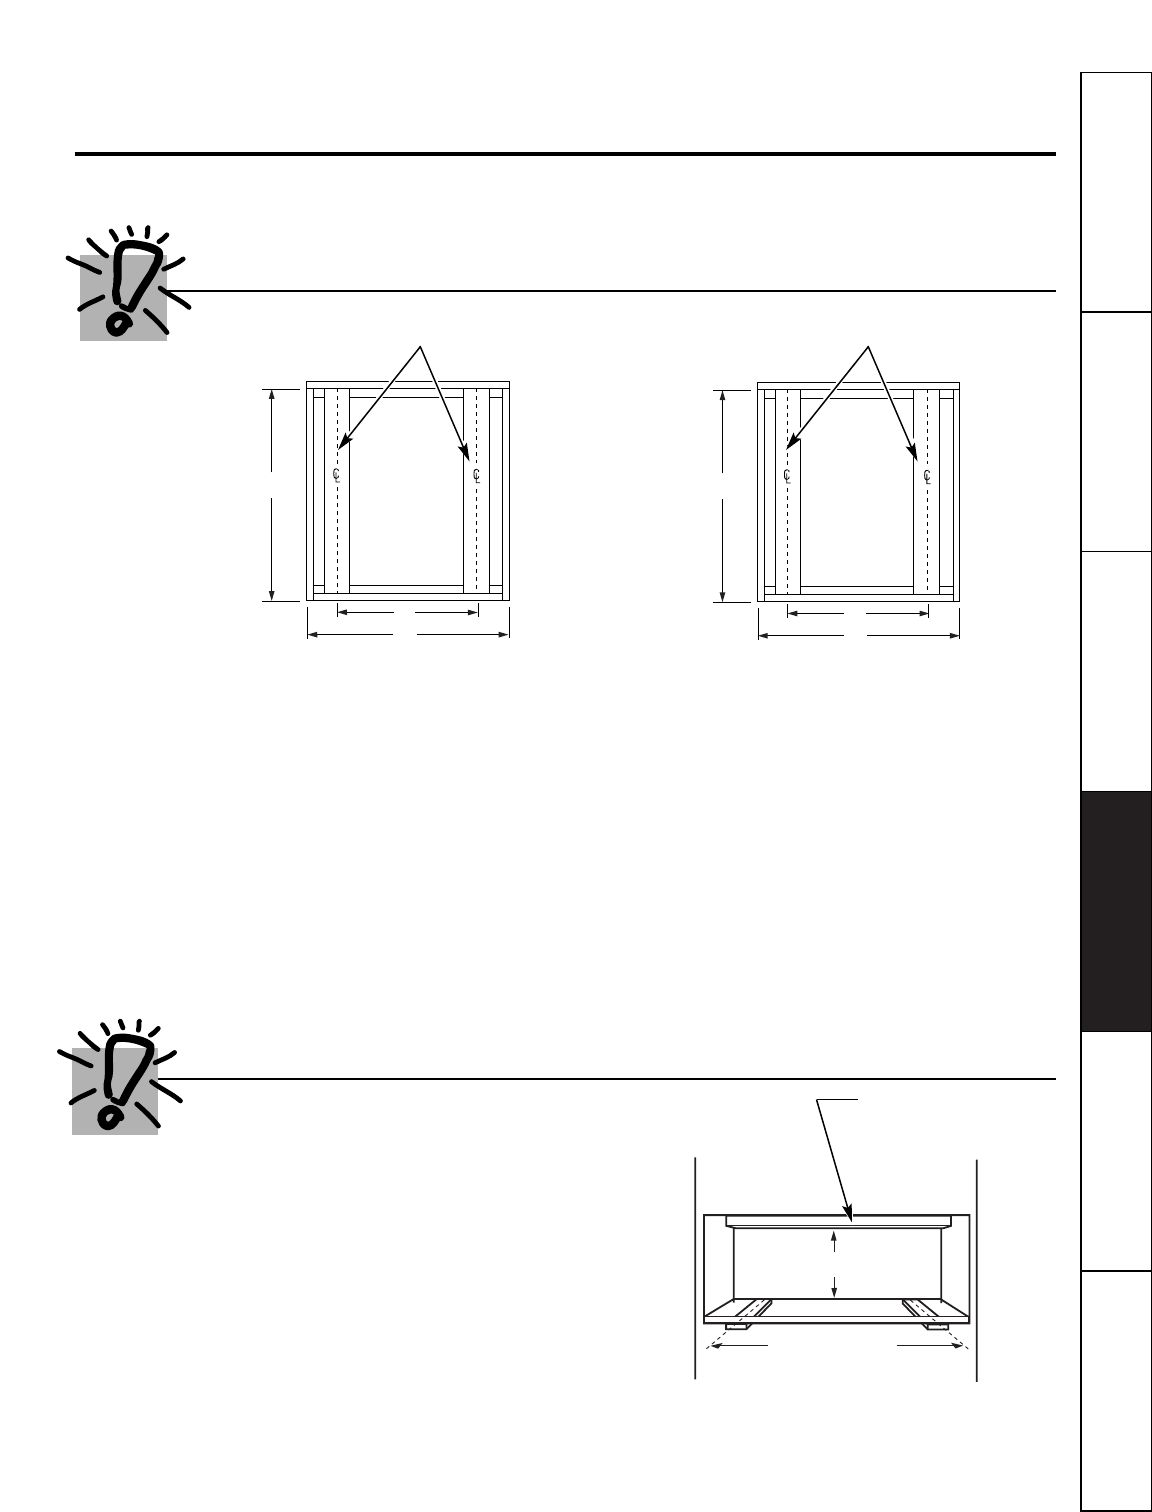
Install 2x4 or 2x2 anti-tip brace
against rear cabinet wall 9″
from floor to bottom of brace
2x4 or 2x2 runners
or solid bottom
9″
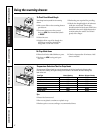
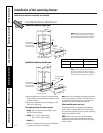
Provide Cabinet Support
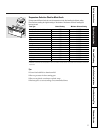
IMPORTANT:
When installed below a single or
double oven, check to be sure that any oven
supports above the cutout do not obstruct the
23
1
⁄2″ required depth of the warming drawer
cutout.
■
A 2″ minimum clearance between oven
and warming drawer cutouts are required.
Additional clearance may be required if
2 x 4 blocks are used to support runners or
solid floor of the oven above.
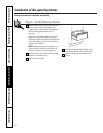
■
The warming drawer may be supported by
either a solid bottom, 2 x 4 or 2 x 2 runners.
■
The support must be level and rigidly
mounted, flush with the bottom edge
of the cutout.
■
There is no way to level the drawer once it
has been installed. Be sure supports are level.
■
The entire weight of the drawer is supported
by the runners or solid floor and must be
capable of supporting 150 lbs.
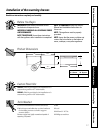
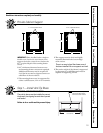
23
1
⁄2″
22″
27″
2″ x 4″ or equivalent runners
23
1
⁄2″
25″
30″
2″ x 4″ or equivalent runners