


6pilli$@
I 1
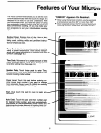
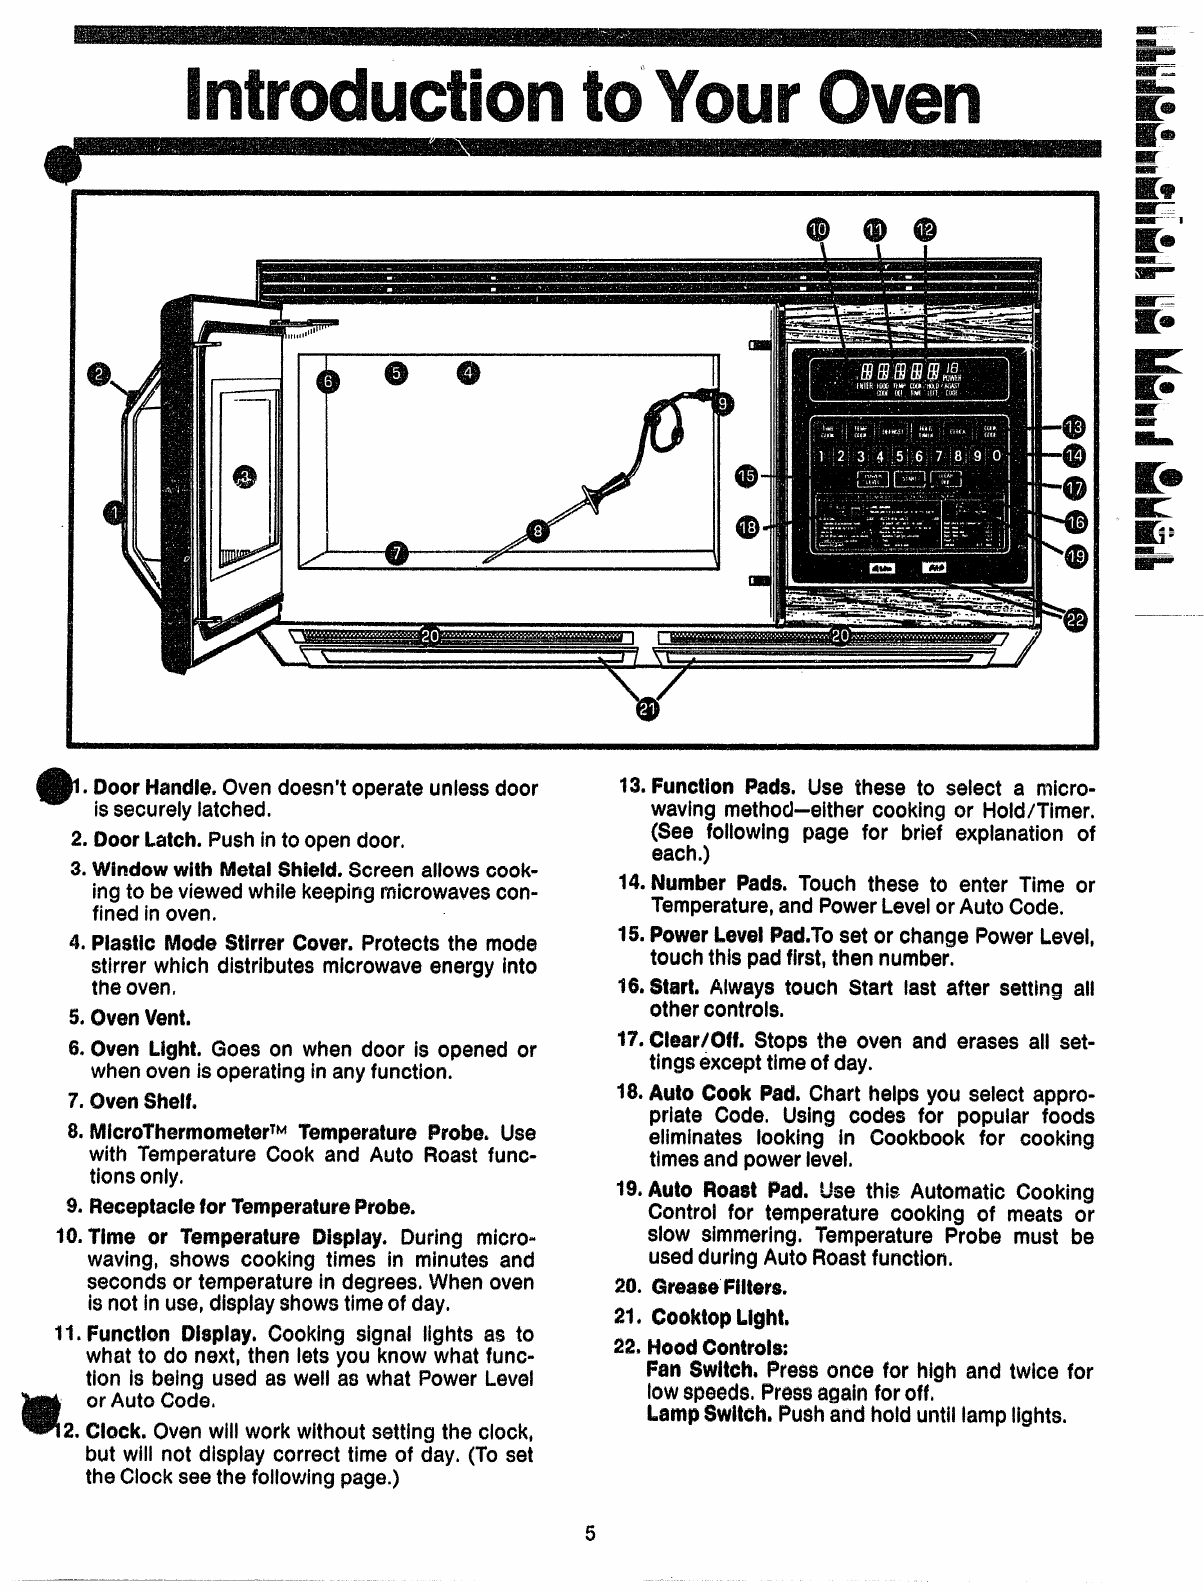
. DoorHandle,Ovendoesn’t operate unless door
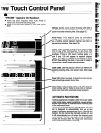
13.FunctionPads. Use these to select a micro-
is securely latched,
waving method-either cooking or Hold/Timer,
2. DoorLatch. Pushin to open
door.
3. Window with Metal Shield. Screen allows cook-
ing to be viewedwhile keepingmicrowavescon-
fined in oven.
4, PlastlcMode Skrer Cover.Protects the
mode
stirrer which distributes microwave energy into
the oven,
5. (Mm Vent.
6. (lve~ Light, Goes on when door is opened or
when oven is operating in anyfunction.
7. OvenShelL
8. Micro’1’herrnometerTMTemperatureProbe. Use
with 7’emperatureCook and Auto Roast func-
tions only.
9. ReceptacleforTemperatureProbe.
10.Time or TemperatureDisplay. During microw-
aving, shows cooking times in minutes and
seconds or temperature in degrees.When oven
is not in use,displayshows timeof day,
11,Functkm M@ay, Cooking signal lights as to
what to do next, then lets you know what func-
tion is being used as well as what Power Level
or Auto Code.
2. Clock, OvenwIIIwork without setting the clock,
(See followlng page for brle~ explanation of
each.)
14.Number Pads.Touch these to enter Time or
Temperature,and PowerLevelor Auto Code.
1%PowerLevelPacLToSetor ChangePower Level,
touch this padfirst,then number.
16.Wart, Always touch Start last after setting all
other controls.
1?,Clear/Off. Stops the oven and erases all set-
tings 6xcqMtimeof day.
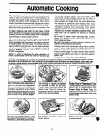
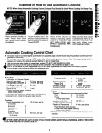
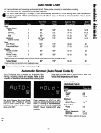
18.Auto Cook Pad.Chart helps you select appro-
priate Code, Using codes for popular foods
eliminates looking in Cookbook for cooking
timesand power level.
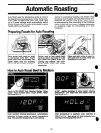
19.Auto Roast Pad, Use
thisAutomatic Cooking
Control for temperature cooking of meats or
slow simmering, Temperature Probe must be
usedduring Auto Roastfunctiori.
20, GreaseIWters.
21. CX)oktopLight,
22, HoodControls:
Fan Switch,FYessonce for high
and twice for
low speeds,Pressagain for off,
LampSwitch.Pushand hold until lamp lights.
but will not display correct time of day, (To set
the Clock seethe following page.)
5