


CARE AND CLEANING
(continued)
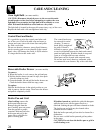
Turn all controls OFF before removing the
burner parts and drip pans (if so equipped).
The burner grates, caps, burner heads and drip
pans (if so equipped) can be lifted off, making
them easy to clean.
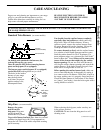
For proper ignition,
make sure the small
hole in the section that
fits over the electrode
is kept open. A sewing
needle or wire twist-tie
works well to unclog it.
The slits in the burner heads of your range
must be kept clean at all times for an even,
unhampered flame.
You should clean the surface burners routinely,
especially after bad spillovers, which could clog
these openings.
To remove burned-on food, soak the burner heads
in a solution of mild liquid detergent and hot water
for 20-30 minutes. For more stubborn stains, use a
toothbrush.
Before putting the
burner head back,
shake out excess
water and then dry it
thoroughly by setting
it in a warm oven for
30 minutes.
Replace the burner
heads and caps. Make
sure that the heads and
caps are replaced in the correct location. There is
one small, 2 medium and one large head and cap.
NOTE: On some models the burner heads and caps
are all the same size and can be used in any of the
4 needed locations.
NOTE: Before removing the burner heads and
caps, remember their size and location. Replace
them in the same location after cleaning.
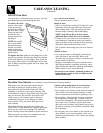
The electrode of
the spark igniter is
exposed when the
burner head is
removed. When one
burner is turned to LITE, all the burners spark.
Do not attempt to disassemble or clean around
any burner while another burner is on. An
electric shock may result, which could cause
you to knock over hot cookware.
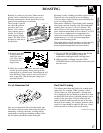
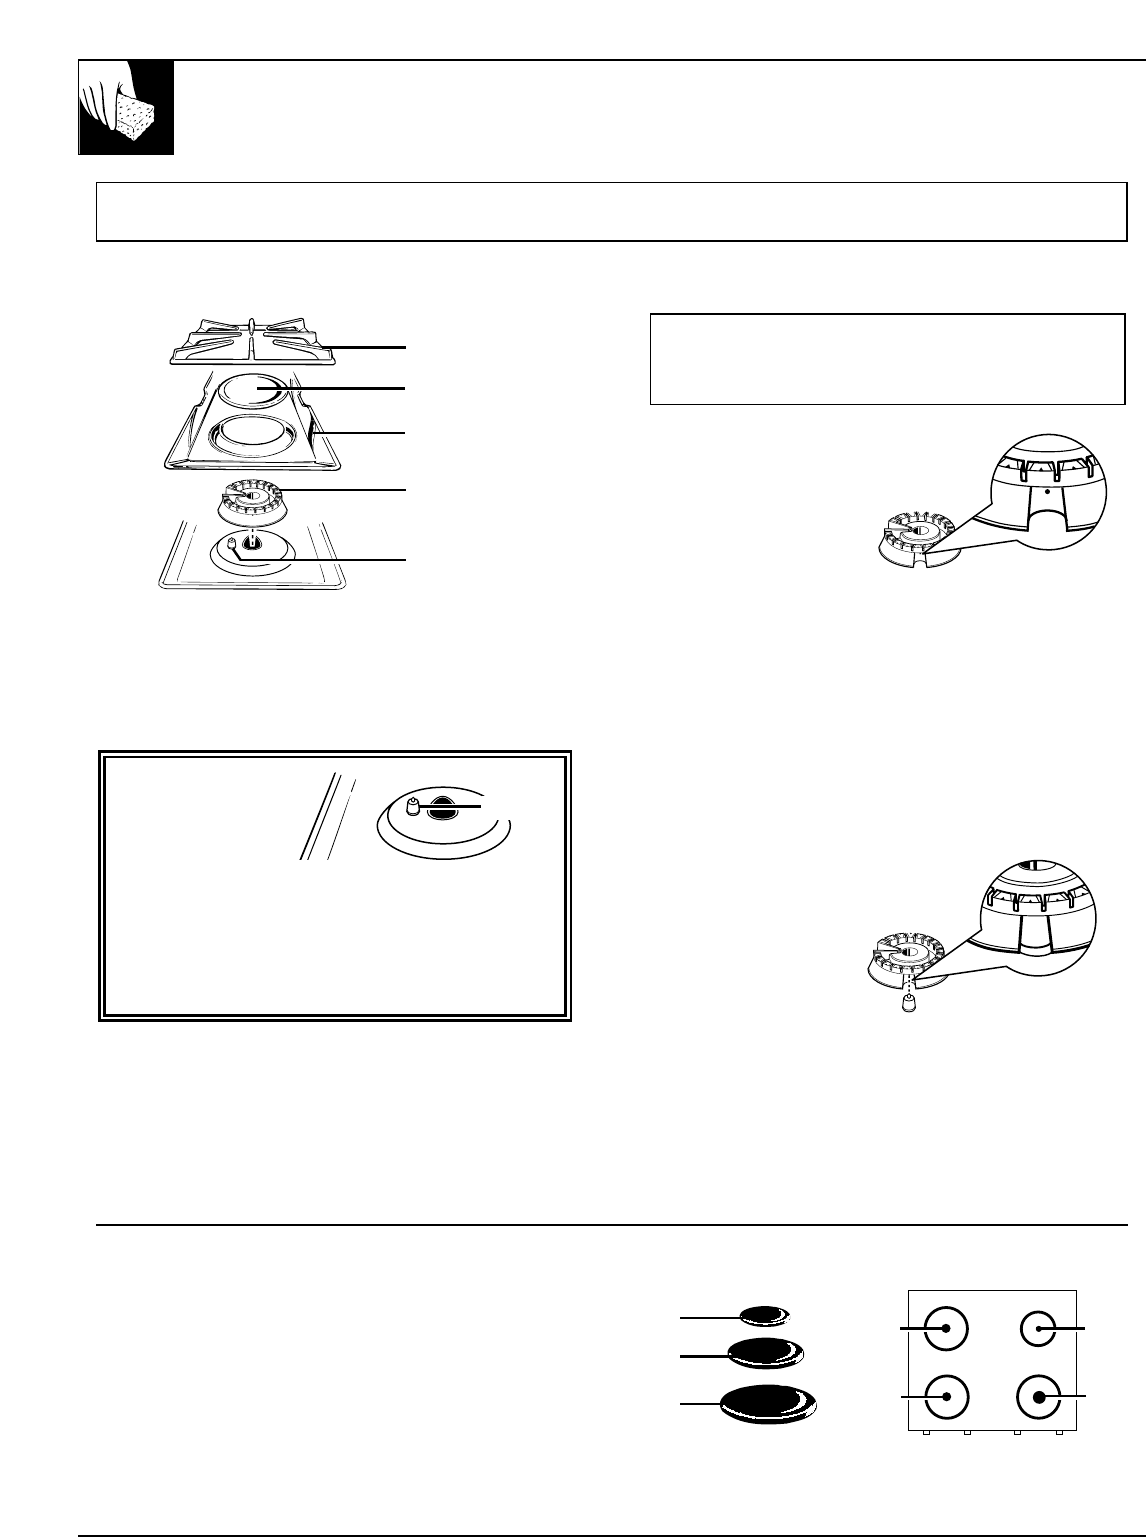
Sealed Burner Assemblies
(on some models)
Burner Heads
(on sealed burners only)
CAUTION: DO NOT OPERATE THE BURNER WITHOUT ALL BURNER PARTS AND DRIP PANS
(IF SO EQUIPPED) IN PLACE.
Grate
Burner cap
Burner head
Drip pan
(on some models)
After cleaning, make sure
the slot in the burner head is
positioned over the electrode.
Electrode
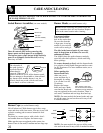
Burner Caps
(on sealed burners only)
Lift off when cool. Wash burner caps in hot, soapy
water and rinse with clean water. You may scour with
a plastic scouring pad to remove burned-on food
particles.
Dry them in a warm oven or with a cloth—don’t
reassemble them wet. Replace the burner caps.
Make sure that caps are replaced on the correct size
burner. There is one small, 2 medium and one large cap.
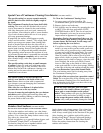
Front of Range
NOTE: On some models the caps are all the same
size and can be used in any of the 4 needed locations.
medium
small
large
small
large
medium
medium
22
Electrode