Page 17
BE ALERT. The next steps will expose the knife.
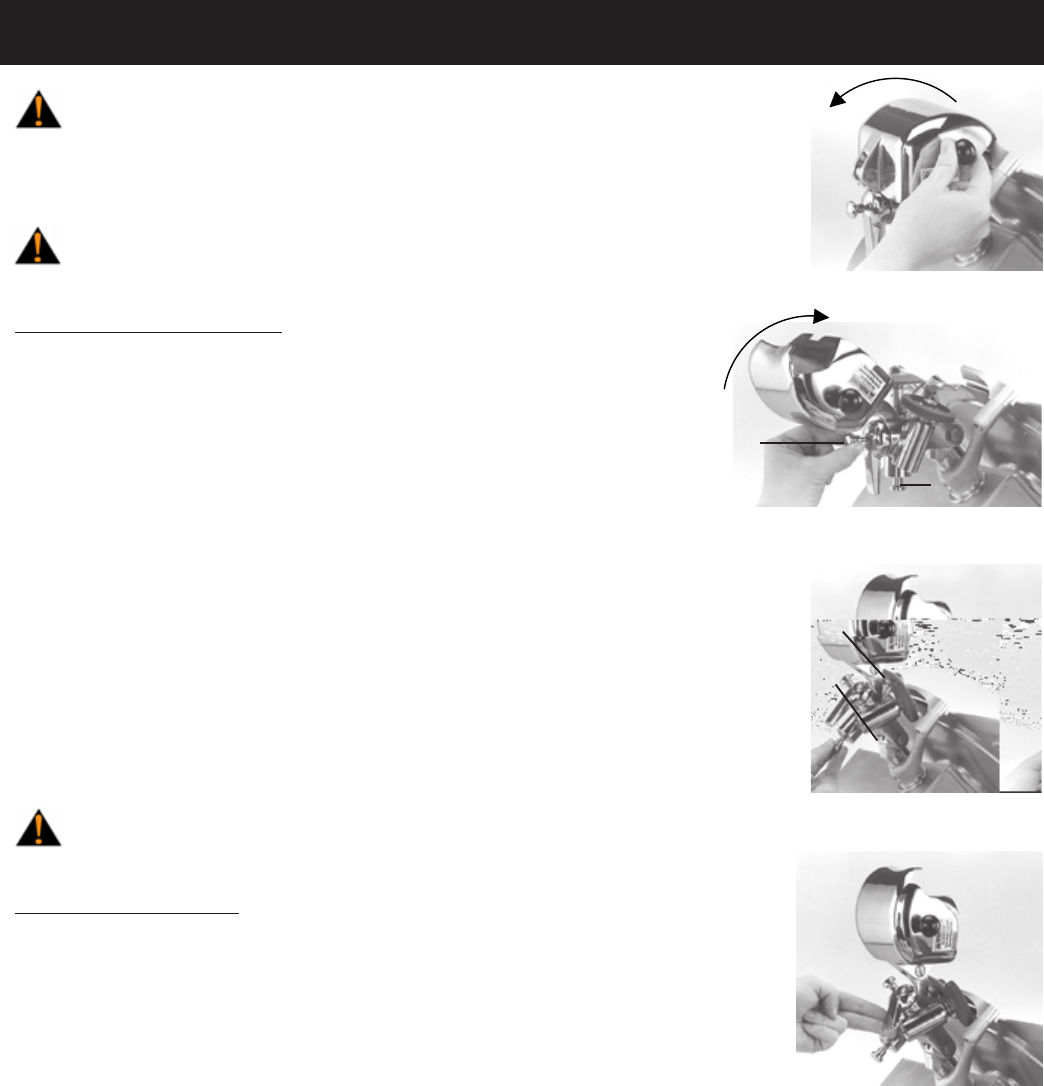
4. Lift the sharpener cover to expose sharpening stones (Fig. 17-1). Stones
should be clean and dry.
ALWAYS keep hands and arms away from exposed knife.
SHARPENING THE KNIFE
1. Pull on knob #1 (Fig. 17-2) keeping it extended and swinging
sharpener up into position. Release knob, and sharpener will lock
in sharpening position.
2. Pull out knob #2 (Fig. 17-3).
3. Turn knife motor on by pressing the start button (automatic slicers only)
or by pulling the on/off tab towards you. Pull the lever counterclockwise to
bring stones into contact with the knife (Fig. 17-4). Maintain pressure on the
lever for 10 seconds. Be sure both stones are in contact with knife.
Repeat operation until knife is sharp.
NOTE: If knife becomes very dull, activate only the bottom stone by
pushing in knob #2. When sharpening with the bottom stone is complete a
slight burr will be raised on top of the knife. Pull out knob #2 and sharpen
for 10 seconds with both stones contacting the blade.
TURN OFF slicer before inspecting.
FINISH SHARPENING
When sharpening is finished, follow these procedures:
1. Turn the slicer off by pressing the stop button (automatic slicers only) or by
pushing the on/off tab inward. Unplug the power cord.
2. Return the sharpener to its original position by pulling on knob #1
keeping it extended and swinging sharpener back to stored position.
3. If sharpening stones need to be cleaned, use soapy water and a brush. Dry stones afterwards.
4. Close sharpener cover.
5. Clean slicer as necessary using cleaning procedures listed on pages 13 through 15.
6. Plug in power cord.
7. Reinstall food chute on slicer.
KNIFE SHARPENING
Figure 17-1
Figure 17-2
Figure 17-3
Figure 17-4
#1
#2
#2
#1
