


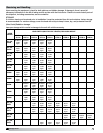
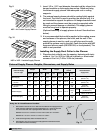
5
Canopy Hood
®
NOTE: If you have a Back
Supply Plenum (BSP), this must
be installed before the hood.
Please see Page 10.
For Wall/Single Island Style
Hoods, prior to installation,
check with local authorities
having jurisdiction on clearances
to combustible surfaces, etc.
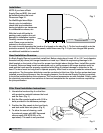
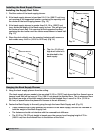
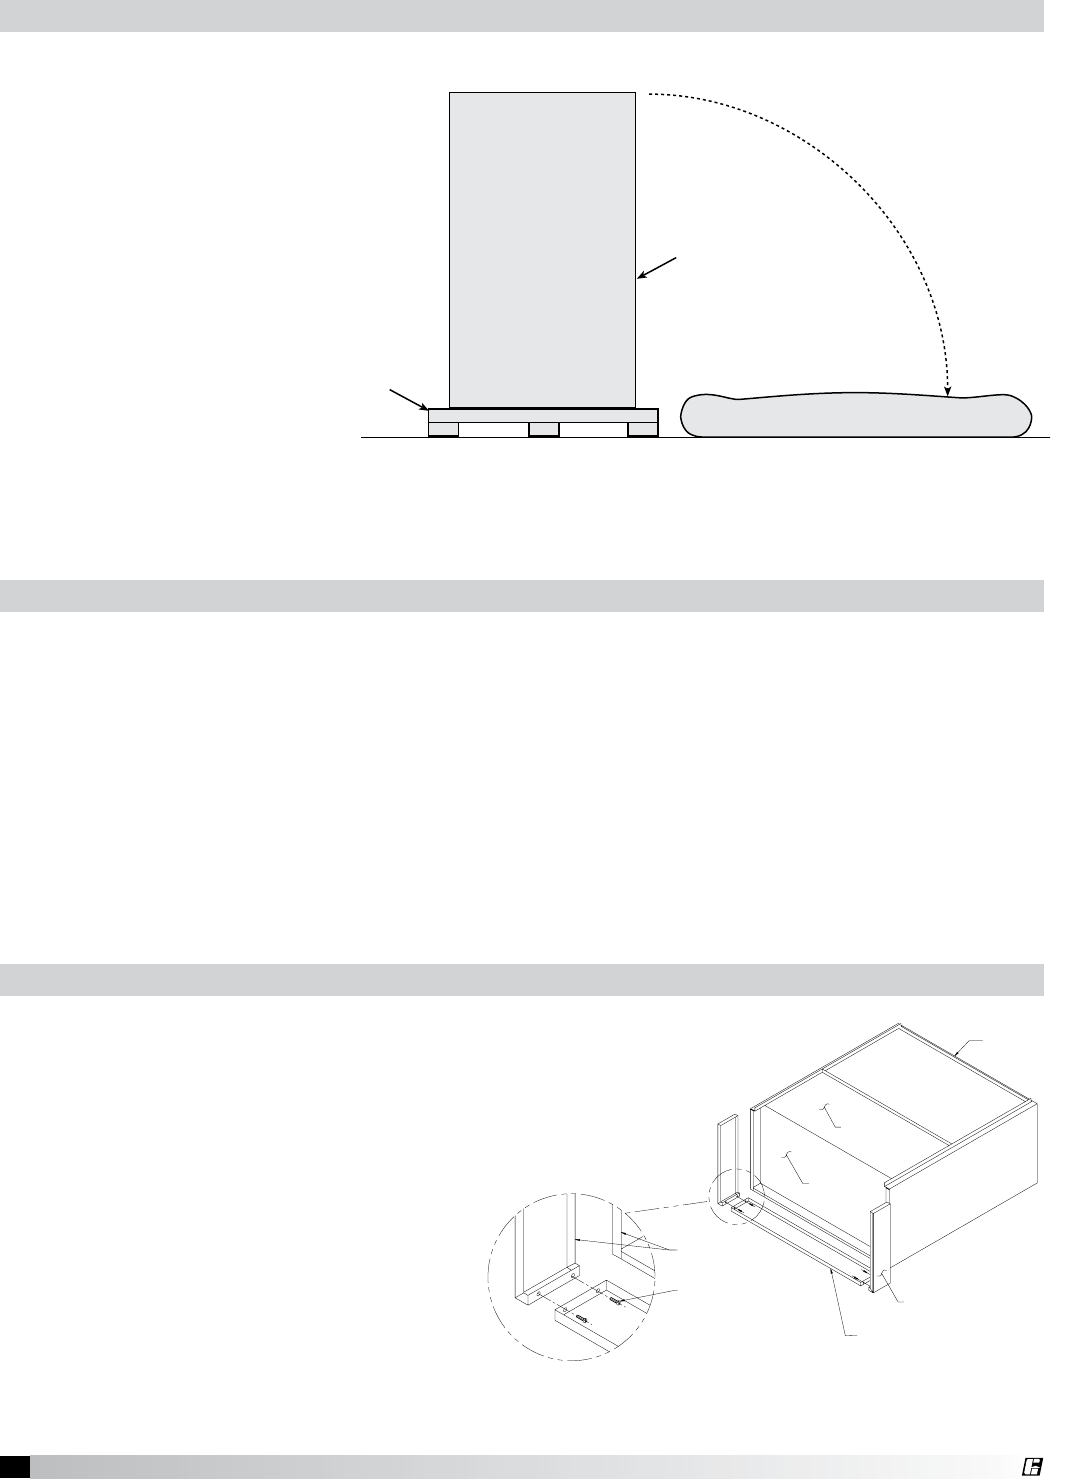
With the hood still inside its
packing crate, position the unit
beneath its installation location.
Carefully remove the packing
crate. Place some protective
material on the floor next to
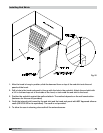
the crate to avoid damaging the hood as it is tipped on its side; Fig. 1. Tip the hood carefully onto the
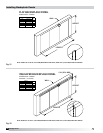
protective material. If you have filler panels, install them now; Fig. 2. If you have integral filler panels,
no additional installation is needed.
Front
1
/
2
in. threaded rod by
Bottom
Pallet
Protective Material
Fig. 1
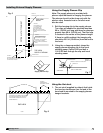
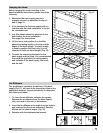
If a Back Supply Plenum is provided, install first. Before raising hood, insert 1/2 in. (12.7 mm) diameter
threaded rod (by others) into hanger brackets on hood top. Check the engineering drawings or UL
label located on the inside of the hood for proper hood height above finished floor. Install filler panels
if needed. Raise and hang hood from adequate roof or ceiling supports All hanger brackets must be
used and the hood must be properly supported while lifting to prevent damage or distortion to the
hood. The hood must be hung level to operate properly. After hood is secured, make the exhaust duct
connections. The fire system distributor must be contacted at this time. After the fire system has been
installed, mount the enclosures, then the supply plenums. If an Horizontal Supply Plenum is provided,
it should be installed before the enclosures. The hood and accessories are now installed. Finally, make
the electrical connections from switches to fans and complete the fire system circuits as required by
the job specification.
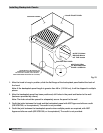
Hood Installation Overview
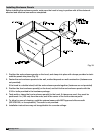
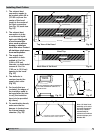
HOOD
HOOD
HOOD
RIGHT FILLER PANEL
BOTTOM FILLER PANEL
TACK-WELDED TO
HOOD BACK
5/16 IN. X 3/4 IN. BOLTS
WITH WA SHERS & NUTS
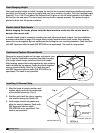
1. Uncrate the hood and lay it on the floor
with protective material between the hood
and the floor. (Fig. 1)
2. Bolt the filler panels together with 5/16 in.
bolts provided in the hardware package.
3. Position the filler panels to the hood back,
and tack-weld them into place. (Fig. 2)
4. To allow for ease of cleaning, caulk
the external seams with NSF Approved
silicone caulk (GE SCS1009, or its
equivalent). The caulk is not provided.
Fig. 2
Filler Panel Installation Instructions
Installation