


F25230 (Rev. A, May 2008) © HOBART 2008Page 6 of 8
Operation
1. Make sure cold water supply line valve is open
and pressure gage is set to 15 psi flowing, for a
drain pump machine or 20 psi flowing for a drain
solenoid machine.
2. Check for and correct any plumbing leaks.
3. Check water and drain hoses for kinks which
could hinder operation of the Drain Water
Tempering Kit or dishwasher.
4. Check unit for proper operation of Drain Water
Tempering Kit.
5. Adjust regulator on cold water line for
acceptable temperatures per local code.
INSTALLATION (SR24H ONLY)
Plumbing Connection
WARNING: PLUMBING CONNECTIONS MUST
COMPLY WITH APPLICABLE SANITARY, SAFETY
AND PLUMBING CODES.
The plumber who connects this machine is
responsible for making certain the water lines are
thoroughly flushed out before connecting to any
manual valve or solenoid valve. This "flush-out" is
necessary to remove all foreign matter such as:
chips (resulting from cutting or threading of pipes),
pipe joint compound from the lines, or if soldered
fittings are used, bits of solder or cuttings from the
tubing.
Debris, if not removed, may lodge in the valves and
render them inoperative. Manual valves or solenoid
valves fouled by foreign matter and any expenses
resulting from this fouling are NOT the responsibility
of the manufacturer.
NOTE: Use preferred type of pipe sealant on all
threaded plumbing connections.
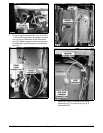
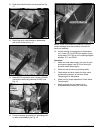
1. Assemble drain tempering plumbing to the cold
water line per Fig 1. Connect cold water (45° F
to 70° F [7° C to 21° C]) to the 1/2" NPT union
fitting.
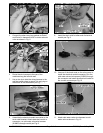
2. Assemble drain tempering plumbing to the end
of the SR24H Dishwasher drain hose per Fig. 2.
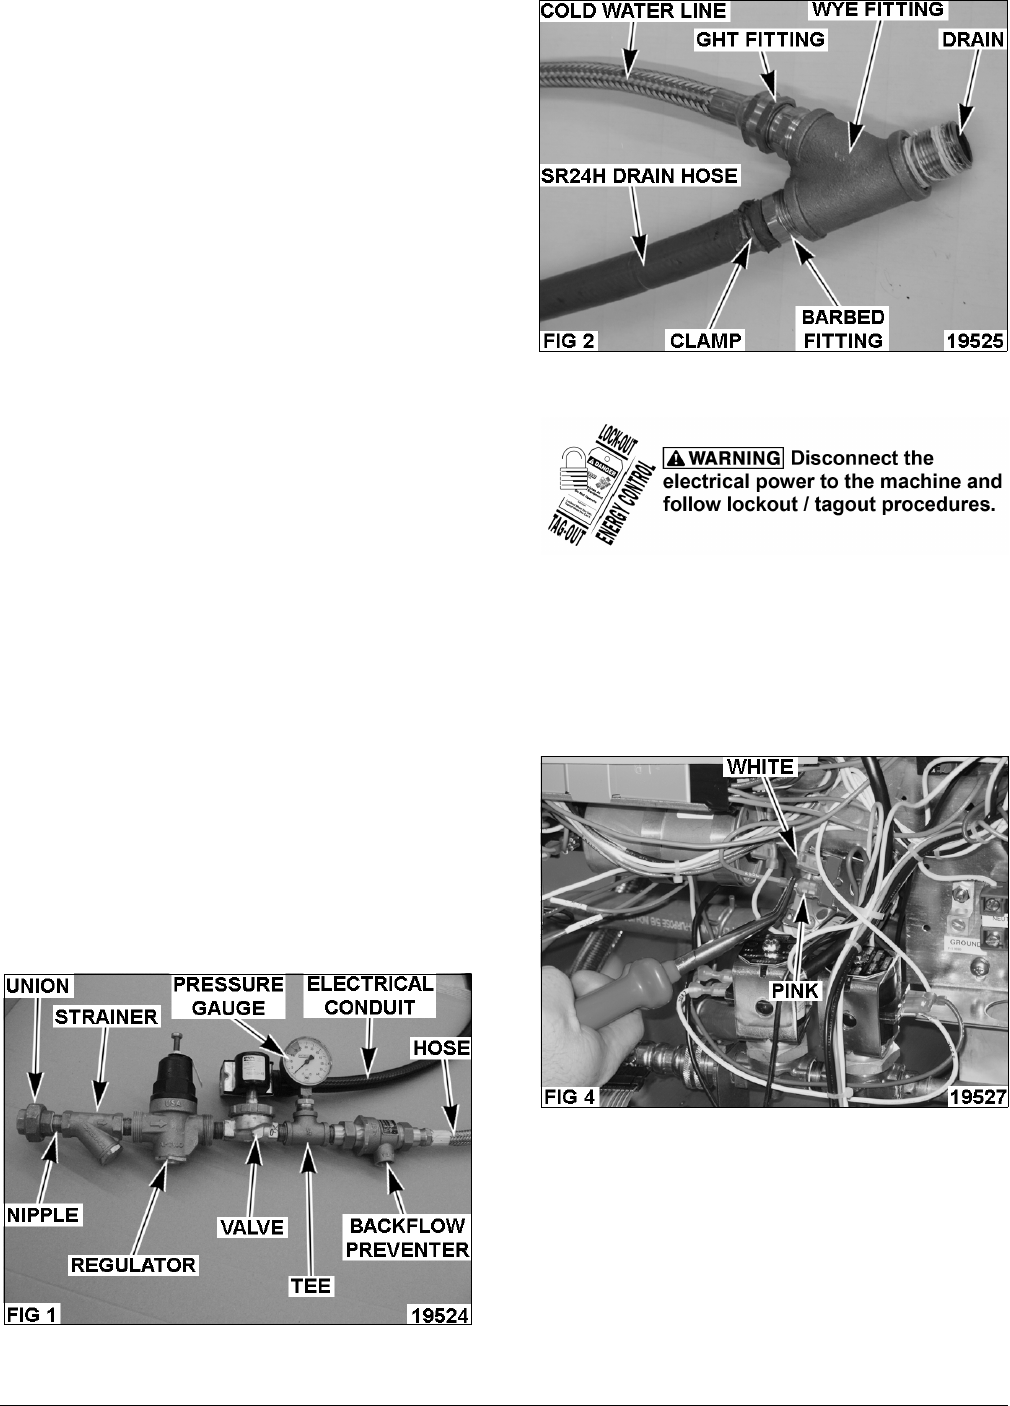
Electrical Connections
1. Provide access to electrical components and
rear of machine.
2. Remove Base Cover from front of unit.
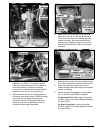
3. Pull out two lead wires (pink and white) marked
2 SOL from drain solenoid as shown in Fig. 4.
4. Hook up the 2 removed wires to two wires
marked as 2 SOL in wiring harness 814267.
(Pink to pink, white to white) per Fig. 5.