11
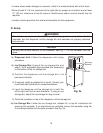
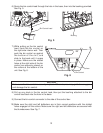
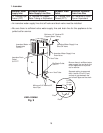
Fig. 3
Discharge
Hose
Float Switch
Connector
Pump Motor
Connector
Thumbscrews
Snap Tab
Pump Motor Bracket
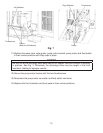
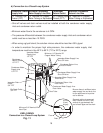
Fig. 4
Float Switch
Pump Motor
Cube Guide
Snap Tab
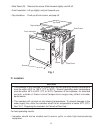
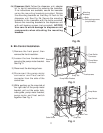
6b) Dispenser Unit: Follow the dispenser unit, adapter
kit, or top kit instructions for securing the icemaker.
If no instructions are available, secure the icemaker
using the mounting brackets provided. Rotate
the mounting brackets so that they fit flush to the
dispenser unit. See Fig. 2b. Secure the mounting
brackets to the icemaker with the bolts provided.
Secure the mounting brackets to the dispenser unit
with self-tapping screws (not provided). NOTICE!
Use care to avoid damage to dispenser unit
components when attaching the mounting
brackets.
Fig. 2b
Self-tapping screws
(not provided)
Bolts
Mounting
Brackets
Dispenser
Icemaker
E. Bin Control Installation
1) Remove the front panel, then
remove the front insulation.
2) Loosen the two thumbscrews
securing the pump motor bracket.
See Fig. 3.
3) Disconnect the discharge hose.
4) Disconnect the pump motor
connector and float switch
connector from the side of the
control box.
5) While pushing up the snap tab at
the right side of the pump motor
bracket, pull out the water tank,
cube guide, pump motor bracket,
pump motor and float switch
together. See Fig. 4.


