19
The No Preheat, 1-Rack Cooking function allows you to bake on
1-rack without preheating the oven. Baked goods, convenience
foods and protein foods can be cooked using this function. Food
items with a 10 minute or less baking time as well as some frozen
convenience foods may require additional cooking time. Convect
Bake, Convect Bake Rapid Preheat, and True Convect modes
should be used for multiple-rack baking.
Before Using No Preheat, 1-Rack Cooking:
Before using No Preheat, 1-Rack Cooking, see the “Positioning
Racks and Bakeware” section and the following tips for rack
positions.
NOTE: An “o” after the rack position number indicates that the
offset rack should be used. An “f” indicates that the flat rack
should be used, and an “r” indicates that the roll-out rack should
be used.
Rack positions
Use rack position 3f for baked goods such as biscuits, cookies,
cakes and convenience foods. Use rack position 2f for meat,
poultry and loaves of bread.
To Use No Preheat, 1-Rack Cooking:
1. Place food in oven on appropriate rack.
2. Touch MODES to move to the Modes menu.
3. From the Modes menu, touch NO PREHEAT 1-RACK
COOKING.
4. After touching No Preheat, 1-Rack Cooking, you will move to
the Temperature screen or you may touch the Temperature
tab to move to the Temperature screen.
Use the slider to enter a desired cooking temperature or
touch the -5°F (-1°C) or +5°F (+1°C) buttons. The temperature
must be between 170°F (77°C) and 550°F (288°C).
5. Touch START to begin cooking.
OR
6. If a programmed cook time is desired, touch TIMER NOT SET
to enter the Cook Time screen. Enter a cooking length using
the on-screen number keyboard to set a timer to alert you
when cooking ends. The time length may not exceed
12:00:00. The oven will turn off when the cook time expires.
7. (Optional) To keep food warm after a programmed cook time
ends, turn Keep Warm ON from the Cook Time screen. See
the “Keep Warm™ Option” section for additional information.
8. (Optional) To set a delay start with a cook time, touch the
TIMER NOT SET/COOK TIME Screen and enter desired cook
time. Select Delay Start, set desired start time and touch SET
DELAY. A second way to set a Delay Start is to touch DELAY
START from the Temperature tab, set desired time and touch
SET DELAY. See “Delay Start” section for additional
information.
9. Touch START to begin cooking or to start the Delay Timer.
10. When the timer ends, you can start the Keep Warm cycle,
Add More Time or Cancel the timer. To add more time, touch
ADD MORE TIME or EXIT TIMER and then set timer. Enter
desired time and select OK.
11. When the cycle is complete, touch CANCEL (CANCEL
UPPER or CANCEL LOWER on double models) to turn off the
oven.
Broil
Broiling uses direct radiant heat to cook food.
The element cycles on and off in intervals to maintain the oven
temperature.
The oven door must be close for the broil element to operate.
If the oven door is opened during broiling, the broil element
will turn off in approximately 30 seconds. When the oven door is
closed, the element will come back on approximately
30 seconds after the door is closed.
■ For best results, use a broiler pan and grid. It is designed to
drain juices and help avoid spatter and smoke.
If you would like to purchase a Broiler Pan Kit, it may be
ordered. See “Assistance or Service” section to order. Ask for
Part Number W10123240.
■ For proper draining, do not cover the grid with foil. The
bottom of the broiler pan may be lined with aluminum foil for
easier cleaning.
■ Trim excess fat to reduce spattering. Slit the remaining fat on
the edges to avoid curling.
■ Pull out oven rack to stop position before turning or removing
food. Use tongs to turn food to avoid the loss of juices. Very
thin cuts of fish, poultry or meat may not need to be turned.
■ After broiling, remove the pan of food from the oven.
Drippings will bake on the pan if left in the heated oven,
making cleaning more difficult.
To Use Broil:
Before broiling, position rack according to the Broiling Chart.
When broiling, changing the temperature allows more precise
control. The lower the temperature, the slower the cooking.
Thicker cuts and unevenly shaped pieces of meat, fish and
poultry may cook better at lower broiling temperatures.
Position food on the grid on the broiler pan, then place it in the
center of the oven rack with the longest side parallel to the door.
Close the door. It is not necessary to wait for the oven to preheat
before putting food in unless recommended in the recipe.
1. Place food in oven and close door.
2. Touch MODES tab to move to the Modes menu.
3. Touch BROIL.
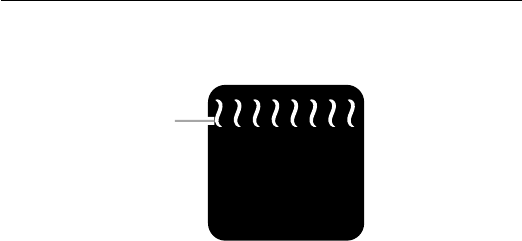
A.Broil element
A
