


25
Special Maintenance
Occasionally, it is necessary to maintain or replace some
parts that are subject to wear and tear. Specific instructions
are given below for each type of maintenance.
Before carrying out maintenance, switch off
the power supply to the cooker and close the
gas taps.
Removing the oven door
The oven door can be removed completely to make
cleaning the oven easier. Though this is possible, the
door is heavy, therefore this job should only be carried out
by someone with the strength to lift and carry the door. It
also requires a little expertise to refit it. If you are not
you will be able to do this, we recommend that you clean
the oven doors without removing them. In certain
circumstances, you contact the nearest authorized service
centre (see "Repairs - After Sales Service" on page 27).
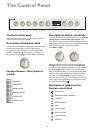
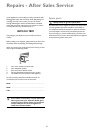
To remove the door, proceed as follows:
• Open the oven door fully and release the safety catches
on the hinges (one for each hinge) by lifting them (A)
(see diagram below) back towards the oven door.
• Partially close the door until there is no more load
tension on the springs (the door will form an angle of
about 30°).
• Using both hands, grip the oven door on each side
and close the door whilst simultaneously lifting it
upwards.
• Pull the lower part of the door towards you to release
the hinges (B, see diagram below) from their seats.
If you need to clean between the panes of glass, turn the
door upside down (see diagram below), slide a soft bottle
brush into the space between the glass panes and brush
gently.
To refit the oven door, carry out the above
instructions the reverse. When the hinges
(B) are back in their seats, lower the oven
door fully down and lower the safety catches
on each hinge securely back in place (A)
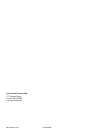
CAUTION: After refitting the door, always
be sure to refit the hinge safety catches.
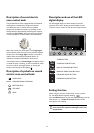
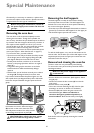
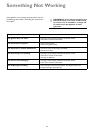
Removing the shelf supports
The shelf supports can easily be removed for cleaning
and to help clean the oven walls. The shelf supports are
hooked to the oven walls in the three points indicated by
the arrows in the figure (detail 1).
• Press the top of the shelf support downwards as shown in
(picture 2) to release the shelf support from the upper pin.
• Lift the shelf support upwards and remove.
To refit the
shelf support, carry out the instructions in the
reverse order. Set the lower part of the shelf support in the
respective pins and press the upper part towards the oven
wall until it hooks into the pin.
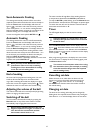
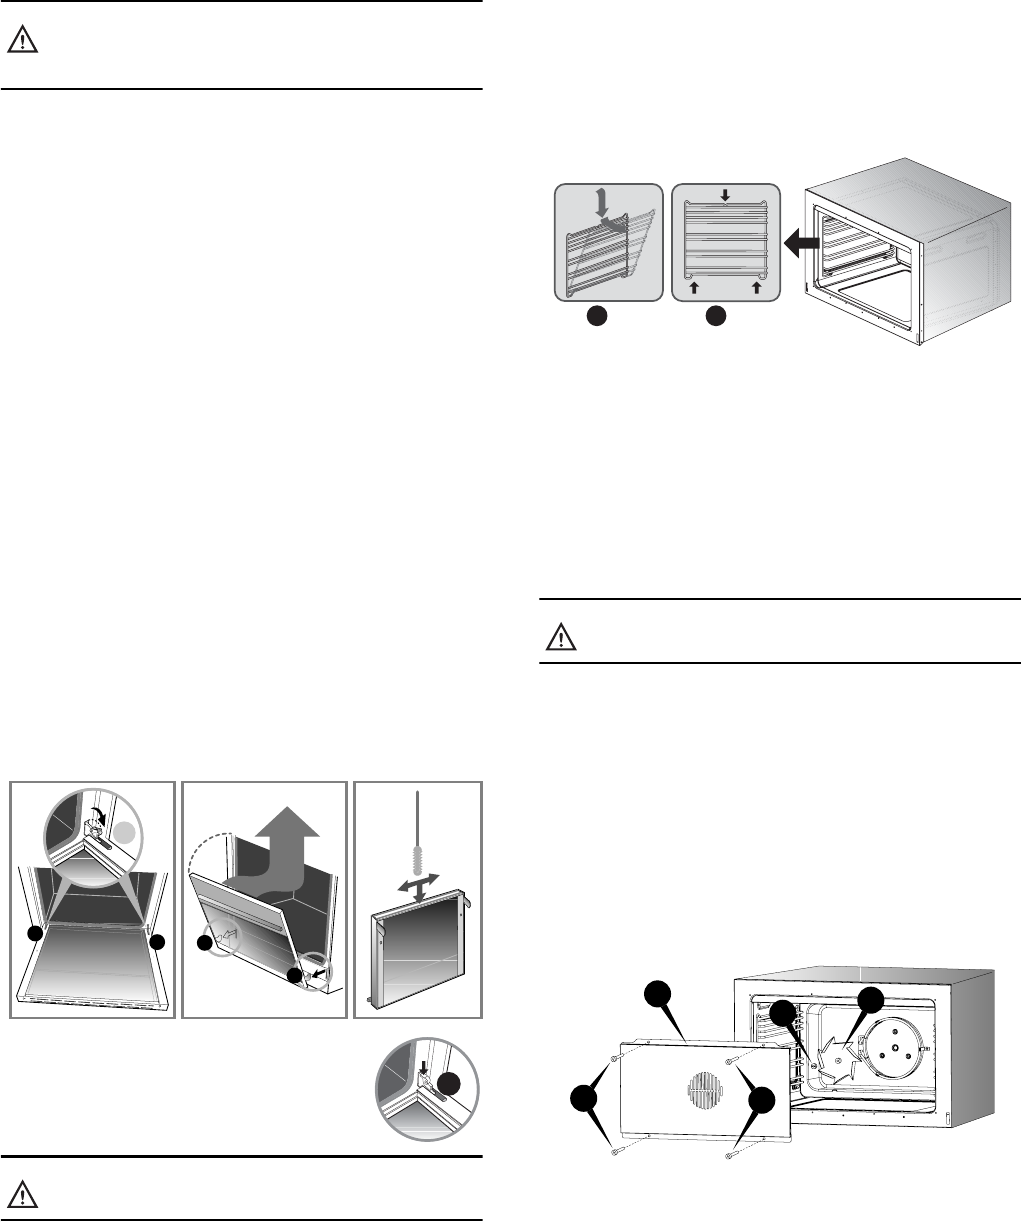
Removal and cleaning the oven fan
The fan in main oven may occasionally need cleaning.
To remove the cover panel and fan proceed as follows
(see diagram below):
Make sure the power supply to the appliance
is switched off.
• Remove
all the oven accessories (shelf supports, shelves
and grill pan).
• Loosen and remove the four screws
(A) from the fan
cover panel.
• Remove the
fan cover panel (B)
• Use a coin to loosen the fixing nut
(C) of the fan (this
threading is in
reverse, to loosen turn clockwise).
• Remove fan
(D) and wash it using warm water and
household detergent. Never use abrasive or
corrosive detergents, powdered products, or
metal scrubbers. Rinse the fan and dry thoroughly.
Refit the fan and
cover panel by reversing the removal
instructions.
$
$
$
%
%
$
$
%
&
$
'