Getting Started
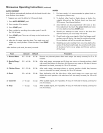
SETTING CLOCK AT POWER UP
You will be prompted to enter the time of day in the event
of a power failure or when you first provide electric power
to your appliance.
° When your appliance is first powered up, 12:00 will flash
in the display.
* Enter the time of day using the numeric key pads and
press START to set.
If an invalid time of day is entered, the control will triple
beep. Re-enter a valid time of day and press START. If
STOP is pressed your clock will start with the time set for
12:00.
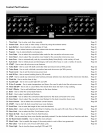
Select the CLOCK @ key to modify the time of day during
other situations such as day light savings.
TIMER
The timer provided with the oven control serves as an extra
reminder in the kitchen. When the timer reaches less than 1
minute the display will start to count down in seconds. When
the time runs out the active timer will beep, and "End" will be
displayed.
The following time settings apply to the timers:
° Min. time: 1 minute
° Max. time: 11hours 59 minutes
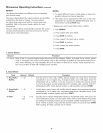
See example below to set the timer for 5 minutes:
1. Press TIMER SET/OFF
2. Enter 5 minutes
3. Press START
To cancel or end the timer, press the TIMER SET/OFF key
again.
NOTE: The timer(s) will not affect the cooking process.
TO SET ADD 1 MINUTE FEATURE
The ADD 1MINUTE pad is used to set the Add 1 Minute
feature. When the pad is pressed, 1 minute is added to the
Timer feature if this feature is already active. If the Timer
feature is not active and the pad is pressed, the Timer
feature will become active and will begin counting down
from 1 minute. For further information on how to set the
Timer feature see Timer instructions above.
USING THE AIRGUARD FEATURE (SOME MODELS)
Your appliance is equipped with a catalytic oven exhaust
cleaner that may be turned on during any cooking process.
This feature helps remove smoke and eliminates 85% of
the odors generated when using your oven. DO NOT use
AirGuard when baking delicate bakery items.
If you wish to clean the oven exhaust once cooking has
started, press AIRGUARD.
NOTE: The AirGuard indicator light wiii glow anytime
AirGuard is active. AirGuard will automatically turn on and
cannot be manually turned off during the Self-Cleaning
cycle.
12
PREHEAT TEMPERATURE DISPLAY
Once a cooking feature has been started in one of the
ovens, the control will display the actual oven temperature
while preheating. Once the oven reaches the oven set
temperature only the oven set temperature will display.
The preheat temperature display is available with the
following cooking modes:
* Bake in lower oven
° Cony Bake in both ovens
CONTROL LOCI(
Two control locks are available on this unit. The lower
oven control loci< will lock the oven controls and the lower
oven door. The microwave control loci< will only loci< the
microwave controls.
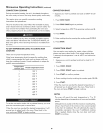
See example below to loci< the lower oven.
To loci<, press and hold STOP for 3 seconds.
To unlock, press and hold STOP for 3 seconds.
DOOR LOCKED wiii flash in the display until the door has
finished locking. Once the door has been locked the door
lock indicator will turn on. DOOR LOCKED will then display
in the upper oven cavity only.
Do not attempt to open the oven door while the door loci<
indicator is flashing.
ACCENT LIGHT
Your appliance includes a decorative Accent light centered
horizontally across the touch-sensitive control panel. The
Accent light comes with a theatre style intensity feature that
slowly increases brightness at turn on and slowly fades when
turning off.
When the Accent light is off, the light is in automatic mode.
This means the Accent light will turn on automatically when
an oven or Timer has been activated. The Accent light will
turn off automatically when these functions are no longer
active.
When the Accent light is OFF, it may be manually turned
ON by pressing the Accent Light keypad once. When the
Accent light has been manually turned on, it will remain
on until manually turned off by pressing the Accent Light
keypad again. The brightness of the Accent light may also
be adjusted.
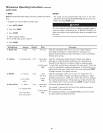
See example below to adjust Accent light brightness:
1. Press and hold the ACCENT LIGHT keypad until an
acceptance tone sounds (about 6 seconds).
2. Using the numeric keypads, enter any digit from 0
to 100 to change the brightness level. Entering 0 will
effectively turn the Accent light OFF until the brightness
level is adjusted to a higher level.
3. Press START to save the desired brightness setting.


