


14
HOW TO PREPARE QUALITYCOFFEE
BEFORE BREWING YOUR FIRST CUP OF COFFEE
Follow the steps under
“H
OW
T
O
B
REW
C
OFFEE
”
but do not add coffee grounds.
SELECTING AND
MEASURING GROUND COFFEE
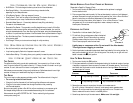
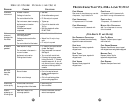
For best results, use coffee ground for use with automatic drip coffeemakers. The amounts shown
below are suggested amounts.
TO B
REW USE THIS AMOUNT OF GROUND COFFEE
8 cups 7 tablespoons
6 cups 6 tablespoons
4 cups 5 tablespoons
2 cups 3 tablespoons
Note: Soft Water Usage
In some cases, the combination of soft water with decaffeinated coffee may cause the coffeemaker
to overflow. It is recommended to either reduce the amount of ground coffee used or to brew fewer
cups of coffee at a time.
HOW TO BREW COFFEE
1. Open the lid and swing the showerhead to the right. Place a MR. COFFEE
®
brand 8-12 cup
cone paper filter or a permanent gold tone filter in the removable filter basket.
2. Add the desired amount of ground coffee to the filter, making sure the grounds are level
in the filter.
3. Slide the showerhead back to its original position, making sure it is centered over top
of the filter. Close the lid.
4. Remove the water reservoir by grasping the handle and pulling upward. Fill the reservoir with
the desired amount of water. Replace the reservoir on the coffeemaker by making sure the
two plastic tabs on the top, outside ridge of the reservoir fit tightly on top of the ridges on
the body of the appliance. Gently push the reservoir down into position. Return the handle
back to its leftward position.
Do not remove the water reservoir at any time during the brewing cycle.
You may notice a small amount of water remaining in the back of the coffeemaker
when you remove the reservoir. This is a normal condition.
5. Place the decanter on the warming plate.
Make sure the decanter is accurately centered on the warming plate or the water and grounds
will overflow from the brew basket. An overflow may cause personal injury or damage to
property. To reduce the risk of damaging the decanter and/or the risk of personal injury, do not
add cold water to the decanter if the decanter is already hot. Allow the decanter to cool before
using. Do not brew coffee while the water reservoir lid is open.
15
BREW STRENGTH SETTING
After preparing the ground coffee, decide the strength of coffee you want to brew. You must set
the brew strength setting to Strong or Standard before turning on the coffeemaker. Deciding which
setting is best for you will depend on your taste preferences and the preferences of those with
whom you share your coffee moments. If you choose Strong, the coffeemaker will brew more slowly.
For instance, 8 cups of coffee will take approximately 20 minutes to brew. This is normal in order
to have
fresh, robust coffee.
6. To begin brewing, press the switch to ON.
The ON/OFF switch will light, indicating that the coffeemaker is on and the brew cycle
will begin.
When the coffee stops flowing, the brew cycle is complete.
While the coffee is brewing, the Pause ’n Serve feature allows you to sneak a cup of coffee from
the decanter. REPLACE THE DECANTER ON THE WARMING PLATE WITHIN 30 SECONDS
TO PREVENT OVERFLOW AND POSSIBLE INJURY.
If the brew basket overflows or fails to empty into the decanter, do not open the brew basket.
Unplug the coffeemaker and wait for the contents to cool before handling. The problem
is most likely the filter basket not being locked into the appliance. See Step 8 below for
more information.
Do not remove reservoir during the brew cycle. The coffeemaker will get hot and release steam
while brewing. Please be careful and allow the coffeemaker to cool before handling.
7. To turn off the coffeemaker, press the switch to
Off
.
8. To discard the coffee grounds and clean the filter basket, please pay close attention
to these instructions:
•
Swing the showerhead to the right and lift up on the filter basket by its handle.
Discard the paper filter and grounds into the trash can. If using a permanent filter,
rinse the filter with warm water after discarding the grounds. You may rinse the
filter basket with warm water.
• Return the filter basket to the appliance. Make sure the filter basket is positioned so the
square hole on the top rim is placed closest to the water reservoir. While holding the handle
upright, place the filter basket back into the appliance ensuring that the handle locks into
the appliance as you push downward and swing the handle towards the back of the unit.
The handle serves as a locking mechanism when positioning the filter basket
into the appliance.
If the filter basket does not lock into position, the brew basket will
overflow while brewing coffee.