6
Accessories
Operating instructions ..................................................... 1
Rotary arm ......................................................................... 1
Camera mounting base .................................................... 1
Mounting screws for the rotary arm and camera
mounting base
(with flat washers, spring washers)
M5
22 mm ............................................................. 7
Camera cable .................................................................... 1
Tally lamp .......................................................................... 1
Tally mounting screws (M36 mm) ................................ 2
Blank panel for tally ......................................................... 1
Wire mounting screws
(with flat washers, spring washers)
M4
8 mm ............................................................... 2
Inch screw ......................................................................... 1
Hexagon key wrench ........................................................ 1
AC cable ............................................................................ 2
Anti-camera-drop wire ..................................................... 1
Installation precautions
Do not install the unit on any of its sides.
Avoid using the unit in the kitchen and other locations with
lots of steam and oily vapors.
Mount the camera on the pan-tilt head only when you
have finished installing it.
The maximum weight which can be borne by this unit is
33.1 lbs (15 kg).
Do not use a lens which will impair or upset the unit’s
balance.
Even if the weight by the unit is less than 33.1 lbs (15 kg),
it cannot be used if the unit will be set off-balance by the
lens mounted on it.
Do not install the unit outdoors or in places where the
temperature will be hotter than 113°F (45°C) or colder
than 23°F (–5°C).
Use the unit in places where the humidity is below 90%.
Obtain separately the screws which will be used to install
the unit since they are not provided with the unit.
Do not hold or lift the unit by its rotating part. Doing so
may cause malfunctioning.
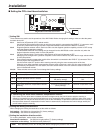
Do not connect a regular LAN line or telephone line to the
CONTROL IN RP connector or COM connector on the
unit. Doing so may cause malfunctioning.
When performing work high off the floor or ground, make
absolutely sure that the work is done by a qualified
contractor.
Do not turn the unit’s rotating part by hand. Doing so may
cause malfunctioning.
Dropping the unit or subjecting it to strong impact may
give rise to malfunctioning.
Leave a clearance of at least 3.3 ft (1 meter) from around
the monitor when installing the unit.
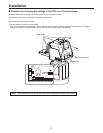
When mounting the camera on the unit, take sufficient
steps to ensure that it will not become detached from the
unit or fall onto the floor.
A length of wire for preventing the camera from dropping
is provided. Read the operating instructions first, and
then be absolutely sure to attach the wire and take the
necessary measures to prevent the camera from falling.
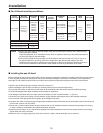
Install the unit in such a way that the equipment mounted
on it and its cables will not come into contact with anything
when the pan-tilt head swivels, and set definite movement
limits.
( For details on the limiter settings, refer to the operating
instructions of the controller.)
When the unit is no longer going to be used, do not leave
it in place, and be absolutely sure to remove it.


