


Models 427 and 427R Installation 28
Model 427R Drawer Panels
IMPORTANT NOTE: D
rawer panels for model 427R must
be a minimum of
5
/8" (16) thick and cannot exceed 12 lbs
(5 kg) for each panel.
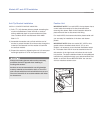
Remove the mounting hardware provided and set aside.
You should work on the back side of each drawer panel
and you should protect the fronts of these panels.
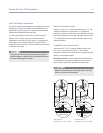
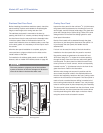
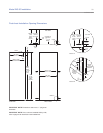
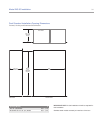
Position the top edge of the drawer template flush with the
top edge of each drawer. For the top drawer, there is only
one place for the lower mounting bracket to be placed.
However, depending on the depth of the lower drawer
panel, you have two options for placement of the bracket.
Refer to the illustration below.
Secure the template in place with tape or small clamps
and mark positions for your pilot holes. Remove template.
Drill pilot holes and place the hardware in the proper place
(dog-ear bracket on top) and fasten securely with the
#8 x
1
/2" screws provided. Refer to the illustration below.
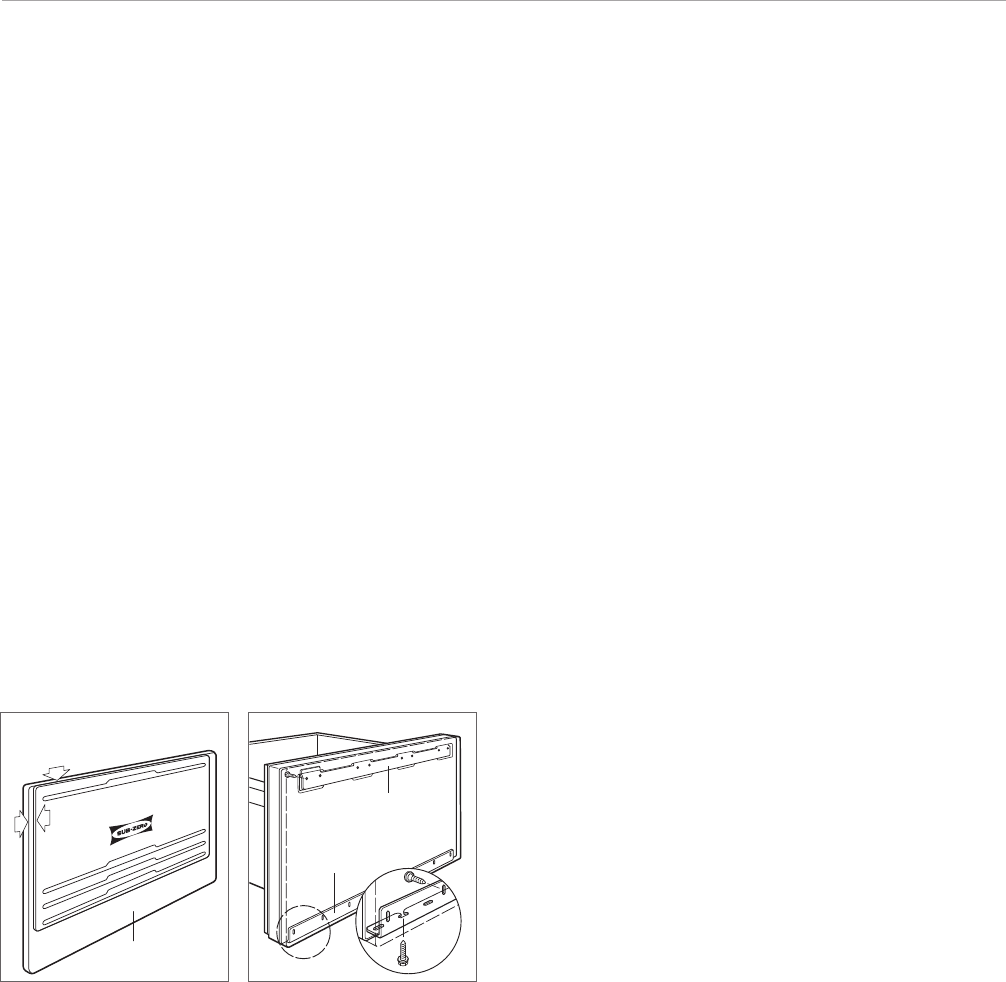
BACK OF PANEL
TEMPLATE FLUSHWITH
TOP OF PANEL
SIDE
EDGE GAP
WILLVARY
Template position. Drawer panel installation.
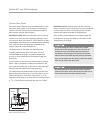
TABBED BRACKET
L BRACKET
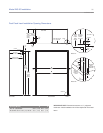
T
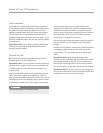
o help with proper placement of drawer panels, examine
the lower panel mounting bracket and determine which
slotted holes to use. Position screws into the lower portion
of the drawer that correspond with these slotted holes.
Leave these screws out a small distance so they can help
when you mount the drawer panels to the drawer.
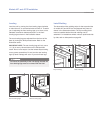
With the two brackets in place on the drawer panel,
engage the top dog-ear bracket first and then the lower
bracket onto the protruding screws. You will have a
1
/4" (6)
adjustment up and down and side to side in each drawer
panel. Fasten all screws to the lower bracket to secure the
drawer panel.
IMPORTANT NOTE: Once drawer panels have been
adjusted for proper spacing, be sure to reconnect the
control cable on the upper drawer after you have installed
the drawer. Refer to the illustration on page 21.