


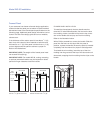
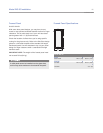
Model WS-30 Installation 39
subzero.com
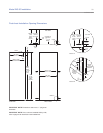
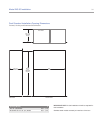
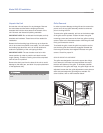
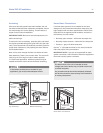
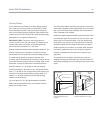
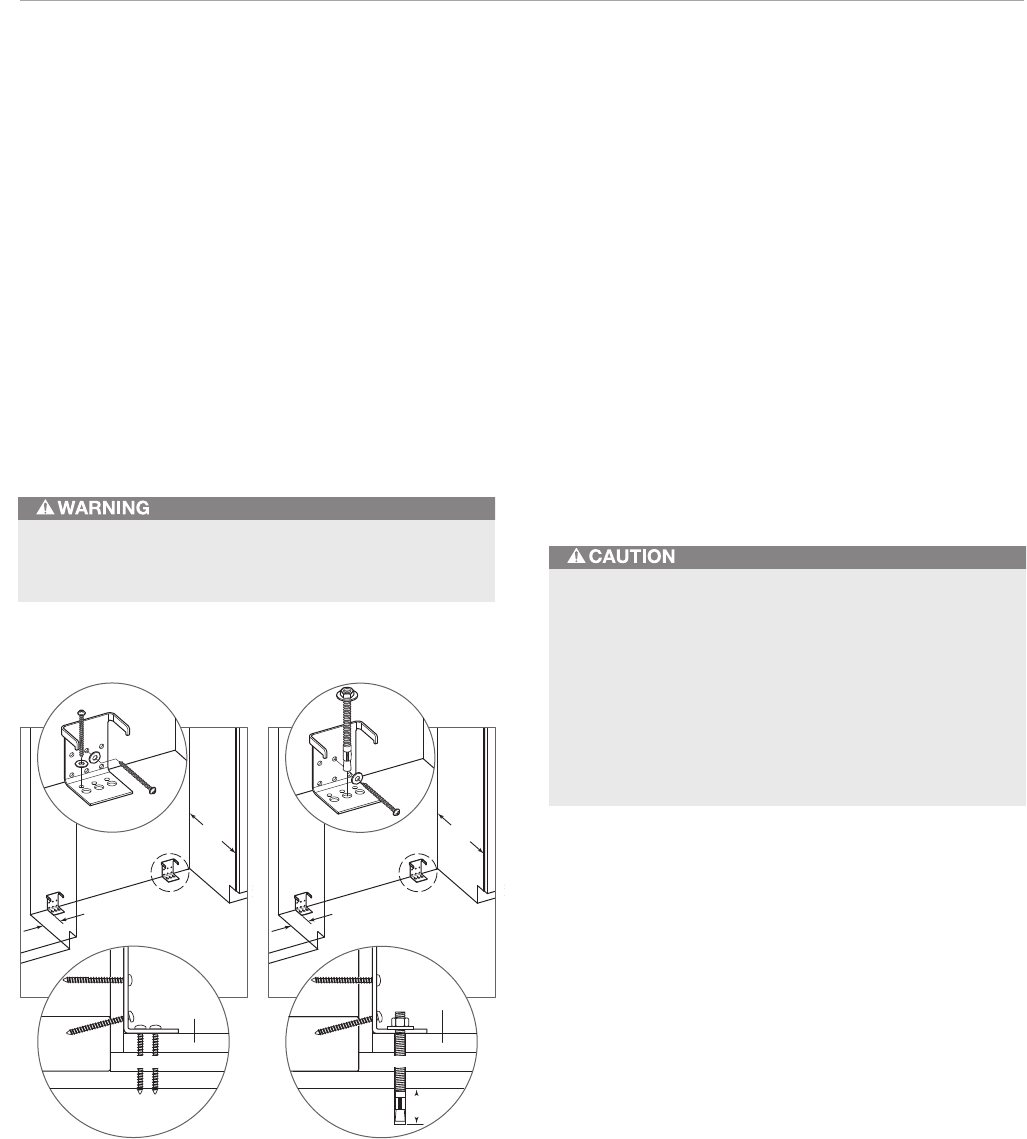
Anti-Tip Bracket Installation
CONCRETE FLOOR APPLICATIONS
After properly locating the anti-tip brackets in the rough
opening, drill pilot holes
3
/1
6
" (5) diameter maximum in the
wall studs and/or wall plate. Then drill
3
/8" (10) diameter
holes into the concrete a minimum of 1
1
/2" (38) deep.
Use the #12 x 2
1
/2" PH pan HD zinc screws and #12 flat
washers to secure the brackets to the wall and use the
3
/8"–16 x 3
3
/4" wedge anchors to secure the brackets to
the floor. Be sure that the screws penetrate the wall studs
or wall plate a minimum of
3
/4" (19). Refer to the illustration
below.
INSTALL CONCRETE WEDGE ANCHORS:
1) Drill a
3
/8" (10) diameter hole any depth exceeding the
minimum embedment. Clean the hole or continue
drilling additional depth to accommodate drill fines.
Use a carbide drill bit manufactured within ANSI
B94.12-77.
2) Assemble the washer and nut flush with the end of
anchor to protect threads. Drive the anchor through the
material to be fastened until the washer is flush with
the surface material.
3) Expand the anchor by tightening the nut 3–5 turns past
hand-tight position or to 25 foot-pounds of torque.
Always wear safety glasses and use other necessary
protective devices or apparel when installing or
working with anchors.
Anchors are not recommended for use in lightweight
masonry material such as block or brick, or for use in
new concrete which has not had sufficient time to cure.
The use of core drills is not recommended to drill holes
for the anchors.
Make sure there are no electrical wires or plumbing
in the area which the screws could penetrate.
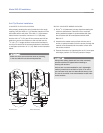
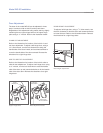
4" MIN
(
102
)
24"
(
610
)
SUBFLOORING
WOOD FLOOR
WALL
PLATE
FINISHED
FLOORING
UNDERLAYMENT
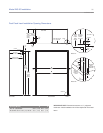
Wood floors. Concrete floors.
4" MIN
(
102
)
24"
(
610
)
SUBFLOORING
CONCRETE
WALL
PLATE
FINISHED
FLOORING
UNDERLAYMENT
1
1
/2"MIN
(
38
)