


9
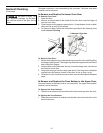
Setting Oven Controls
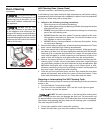
To Bake
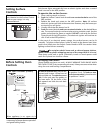
1. Arrange oven racks while the oven is still cool. See "Arranging Oven Racks"
under Before Setting Oven Controls.
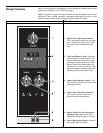
2. Turn the Selector Control knob to BAKE. (Applies to the lower oven only;
skip step if you are setting the controls for the upper oven.)
3. Push in and turn the Thermostat Control knob to the desired temperature.
4. Preheat the oven for 10 to 12 minutes before baking. Preheating is not
necessary when roasting, cooking casseroles or broiling most foods.
5. When cooking is finished, turn the Thermostat Control knob (and Selector
Control knob; lower oven only) to OFF.
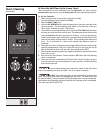
To Set the Timed Bake or Delayed Timed Bake Feature (Lower
Oven Only)
The lower oven has an automatic timer function. This function allows you to
turn the oven on and off automatically at the times you select in advance.
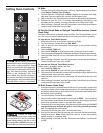
To operate the Timed Bake Feature:
1. Make sure the clock is set to the correct time of day.
2. Turn the Selector Control knob to TIME BAKE.
3. Push in and turn the Thermostat Control knob to the desired cooking
temperature.
4. Push the BAKE TIME pad.
5. Push the UP ARROW to enter the amount of time you want to bake.
6. The oven cycle will being and will bake the amount of time you programmed.
7. After the bake time has run out, the buzzer will sound and the oven will
shut off.
8. When cooking is finished, turn the Thermostat Control knob (and Selector
Control knob lower oven only) to OFF.
To operate the Delayed Timed Bake Feature:
Follow steps 1 through 6 above, and then:
7. Push the STOP TIME pad.
8. Push the UP ARROW to enter the time you want baking to stop.
9. The control will calculate the correct time for baking to begin based on the
bake and stop times you have entered.
10. After the bake time has run out, the buzzer will sound and the oven will
shut off.
11. When cooking is finished, turn the Thermostat Control knob (and Selector
Control knob lower oven only) to OFF.
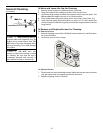
To Broil (Lower Oven Only)
1. Arrange oven rack(s) while the oven is still cool. For rare meats, position the
broiler pan closer to the burner (upper position). For well-done foods such
as chicken, lobster tails or thick cuts of meat, position the pan further from
the burner (lower position).
2. Turn the Selector Control knob to BROIL.
3. Push in and turn the Thermostat Control knob to BROIL. You may adjust
the Thermostat Control knob down to avoid excess browning or drying of
foods that should be cooked to the well-done stage.
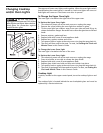
4. Place the grid on the broiler pan, then place the meat on the grid. DO NOT
use the broiler pan without the grid or cover the grid with aluminum
foil. The exposed fat could ignite.
5. Place the pan on the oven rack. Close the oven door.
6. Broil on one side until food is browned; turn and cook on the second side.
Season and serve. Note: Always pull the rack out to the stop position
before turning or removing food.
7. When broiling is finished, turn the Thermostat and Selector Control knob
to OFF.
Should an oven fire
occur, leave the oven door closed and
turn the oven off. If the fire continues,
throw baking soda on the fire or use a
fire extinguisher. DO NOT put water or
flour on the fire. Flour may be explosive.
Use caution when using
the automatic timer. Use the automatic
timer when cooking cured or frozen
meats and most fruits and vegetables.
Foods that can easily spoil such as milk,
eggs, fish, meat or poultry, should be
chilled in the refrigerator first. Even
when chilled, they should not stand in
the oven for more than one hour before
cooking begins, and should be removed
promptly when cooking is completed.