


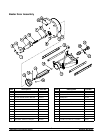

11
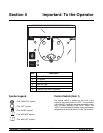
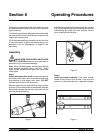
Models 382/RC25 Important: To the Operator
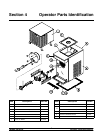
Fill Switch (Item 2)
The fill switch is located under the control channel. The
“ON” position enables refrigeration when the control
switch is in the “AUTO” position. The “ON” position
enables the fill system to replenish and maintain
product levels in the freezing cylinder and in the
hopper. The “OFF” position terminates the fill function.
The refrigeration system is disabled when the fill
switch is in the “OFF” position.
Add Mix Light (Item 3)
An “ADD MIX” indicating light is located on the front
panel. When the light is lit, it i ndicates that the mix
supply in the hopper is low and must be replenished.
Mix Out Light (Item 4)
A “MIX OUT” indicating light is located on the front
panel. When the light is lit, it indicates that the hopper
is empty and the mix supply must be replenished.
When the indicator lights, refrigeration is automatically
disabled to prevent component damage. The beater
motor continues to run.
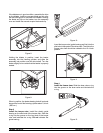
Viscosity Control (Item 5)
The viscosity adjustment screw is located under the
control channel. The viscosity (thickness) of the slush
can be adjusted b y turning the adjustment screw
clockwise for a thicker p roduct or counterclockwise for
a thinner product.
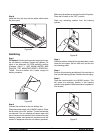
Standby Switch (Optional)
The standby switch is located under the control
channel. To maintain a refrigerated product during long
no sale periods, the standby mode will maintain the
product at approximately 38_Fto40_F(3.3_Cto
4.4_C).
To operate the standby mode, place the power switch
in the “AUTO” position. Place the fill switch in the
“FILL” position and the standby switch in the
“STANDBY” position.
To resume normal operation, leave the power switch
in the “AUTO” position and the fill switch in the “FILL”
position. M ove the standby switch to the “OFF”
position.
Display Light Switch (Item 6)
(Optional)
The display light switch is located under the control
channel. The left position is “OFF”. The right position
is “ON”, and activates the display light.
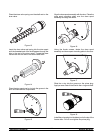
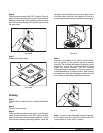
Push-Button Switch
If an overload condition occurs, the freezer will
automatically stop operating. To properly reset the
freezer, place the toggle switch in the “OFF” position.
W ait two or three minutes; then press the push-button
switch. Place the power switch in the “WASH” position
and observe the freezer’s performance; place the
power switch in the “AUTO” position.
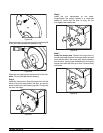
Note: If the freezer is unplugged from the wall
receptacle, it will be nec essary to press the
push-button switch for the freezer to operate once
power is re-established.