5.
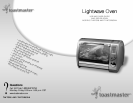
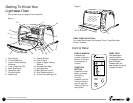
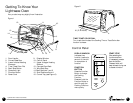
Getting To Know Your
Lightwave Oven
Your product may vary slightly from illustration.
1. Door Handle
2. Curved Glass Door
3. Lower Infrared Heating
Elements
4. Time/Toast Color Dial
5. Start/Stop Button
6. Operation Light
7. Function Button
8. Power Cord
9. Display Window
10. Control Panel
11. Upper Halogen Heating
Element
12. Concave Oven Back
13. Wire Rack Stop
14. Shelf Positions 1 and 2
15. Shelf Positions 3 and 4
16. Crumb Tray (see Figure 2)
1.
2.
3.
6.
5.
7.
8.
9.
10.
11.
12.
14.
13.
4.
15.
16. (P/N 22319)
4.
4.
Lightwave Oven Use and Care Guide
TIME/TOAST COLOR DIAL
Turn to set the minutes of the Cooking Time or Toast Color after
function is chosen.
Control Panel
DISPLAY WINDOW
Indicates time,
function, toast color,
amount of time left
for completion of
function.
FUNCTION
BUTTON
Press the Function
Button to change
the Cooking
Function.
Press and hold the
Function Button to
scroll through the
Cooking Functions
more quickly.
START/STOP
After selecting the
function and time
(if necessary), press to
start the function.
Press and hold until
beep is heard during use
to cancel a function.
Figure 1
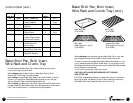
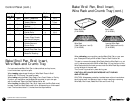
Figure 2


