11.
5. When desired browning is complete, either remove browned food
and continue with the recipe, or add recipe ingredients to the
Pressure Cooker Pan and begin pressure cooking according to
recipe instructions.
6. When finished, turn the Variable Temperature/Pressure Control to
WARMING and unplug the unit. The POWER Indicator Light will
turn off.
Steaming
This Function quickly brings cooking liquid to a boil for steaming
fresh vegetables or rice. Times will be similar to cooking the same
food on top of the stove in a sauce pan.
1. Position the electrical cord in the slot located on the bottom of the
Pressure Cooker.
2. To steam food, place food in the bottom of the Pressure Cooker
Pan or you may use a small heat-resistant steaming rack or basket
(not included) in the bottom of the Pressure Cooker Pan. Add at
least 1 cup of water when cooking up to 30 minutes. Do not fill the
Pressure Cooking Pan past the MAX Fill Line, 2/3 full.
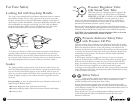
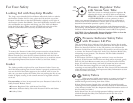
3. Add the Lid and lock it into place onto the Pressure Cooker Pan
following the instructions in the For Your Safety section of this Use
and Care Guide.
4. On the top of the Lid, turn the Pressure
Regulator Valve to STEAM.
5. Turn the Variable Temperature/Pressure
Control to WARMING. Plug the unit into
a 120V AC wall outlet. The POWER
Indicator Light will illuminate.
NOTE: The Lid can be removed while
STEAMING to check the food for
doneness, but you must wait for the
Pressure Lift Pin drops.
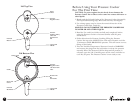
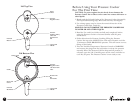
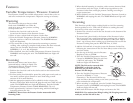
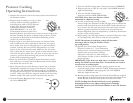
6. Turn the Variable Temperature/Pressure
Control to STEAM, 3 - 5 (see
illustration). The Pressure Lift Pin may
raise and lower during cooking as the unit cycles on and
off to maintain the temperature.
7. When steaming is completed, turn the Variable Temperature/
Pressure Control to WARMING and unplug the unit. The POWER
Indicator Light will turn off.
8. Wait until the Pressure Lift Pin drops and remove the Lid.
WARNING: Use caution when lifting Locking Lid. Escaping steam can
scald you, and the Lid will be hot.
3
7
2
5
6
8
Max/Browning
Warming
Steam
1
9
Steam
Clean
Pressure
Steam
Release
10.
Features
Variable Temperature/Pressure Control
Your Pressure Cooker has variable temperature control that cycles on
and off to maintain the temperature. Adjust the setting as necessary.
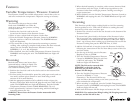
Warming
This Function reheats or keeps cooked
food warm. WARMING can either be
used on its own or after pressure cooking
to keep food warm.
1. Position the electrical cord in the slot
located on the bottom of the Pressure Cooker.
2. Place or leave cooked food in Pressure Cooker Pan.
3. Turn the Variable Temperature/Pressure Control to WARMING.
Plug the unit into a 120V AC wall outlet. The POWER Indicator
Light will illuminate.
4. If you would like to keep food warm after steaming or pressure
cooking, after cooking is completed and pressure has been released,
simply turn the Variable Temperature/Pressure Control to
WARMING, 1, 2, or 3. Stir frequently.
5. When finished, turn the Variable Temperature/Pressure Control to
WARMING and unplug the unit. The POWER Indicator Light will
turn off.
Browning
Braised foods always taste better when
browned before cooking in liquid. The
Toastmaster® Electric Pressure Cooker
has a built-in browning cycle.
1. Position the electrical cord in the slot located on the bottom of the
Pressure Cooker.
2. For best results, food should be patted dry with paper towels and cut
into small, uniform pieces. Brown or sauté food using a small
amount of oil in small batches.
3. Add the appropriate amount of oil as called for in the recipe to the
Pressure Cooker Pan. With the Lid off, plug the unit into a 120V AC wall
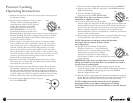
outlet. The POWER Indicator Light will illuminate. Turn the Variable
Temperature/Pressure Control to
MAX/BROWNING
, 7,8, or 9.
4. After approximately 5 minutes of preheating, add food and begin
browning without the Lid.
WARNING: Do not leave the Pressure Cooker unattended while
browning foods.
3
7
2
5
6
8
Max/Browning
Warming
Steam
1
9
3
7
2
5
6
8
Max/Browning
Warming
Steam
1
9


