


-5-
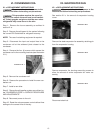
VI. CONDENSER COIL
VI. a-REPLACEMENT INSTRUCTIONS:
Disconnect the electrical power to the
machine and follow lockout/tag out procedures.
This procedure requires the use of re-
frigerants, be certain the work area is well ventilat-
ed. Safety goggles and gloves shall be worn since
refrigerants may cause burns to the skin.
Step 1: Remove the louver assembly as outlined in
section III. a.
Step 2: Recover the refrigerant in the system following
the current EPA Guidelines for refrigerant recovery.
NOTE: The use of reclaiming equipment is required.
Step 3: Disconnect the input and output lines to the
condenser coil at the soldered joints closest to the
condenser.
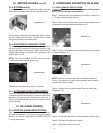
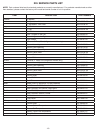
Step 4: Remove the four (4) screws which secure the
condenser coil to the mounting brackets (see Illustration
VI. 1).
Step 5: Remove the condenser coil.
Step 6: Reverse the procedure to install the new con-
denser coil.
Step 7: Install a new drier.
Step 8: Charge the refrigeration system as outlined un-
der “CHARGING SYSTEM” in “SERVICE PROCEDURES
AND ADJUSTMENTS”.
Step 9: Reconnect power to the unit.
Step 10: Reset the microprocessor control defrost time
settings to the correct time of the day.
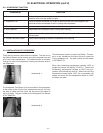
Illustration VI. 1
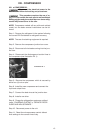
VII. EVAPORATOR FAN
VII. a-REPLACEMENT INSTRUCTIONS:
Disconnect the electrical power to the
machine and follow lockout/tag out procedures.
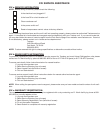
See section III. b. for removal of evaporator housing
cover.
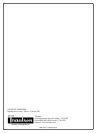
Remove the steel evaporator fan assembly retaining pin
from the evaporator housing.
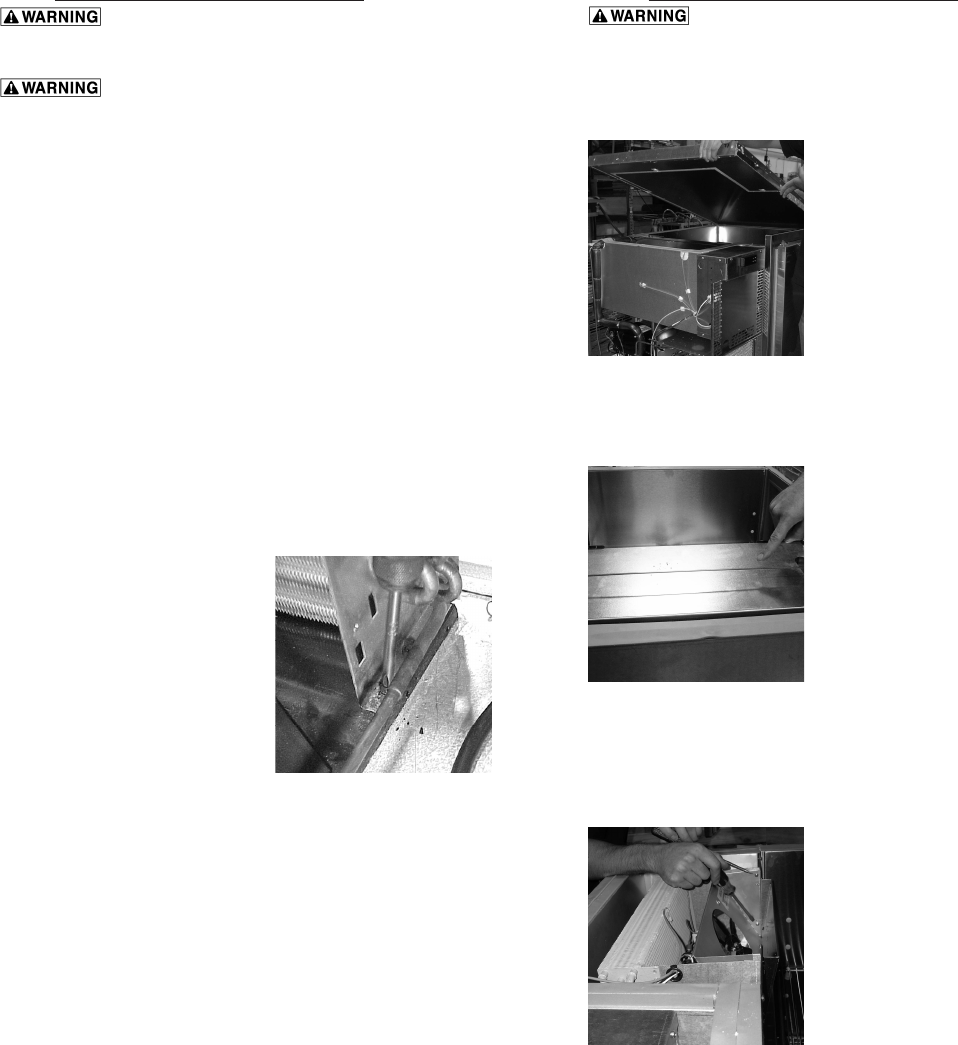
Remove evaporator fan housing amounting screws to
allow for removal of entire evaporator fan motor as-
sembly.
Disconnect electrical.
Illustration VII. 3
Illustration VII. 2
Illustration VII. 1