


3-52
Section 3 - Service and Repair
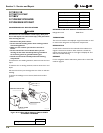
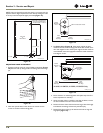
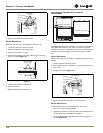
Figure 50
4. Repeat the procedure for the other slide.
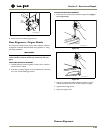
Severe Adjustment
NOTE: The slides have extra mounting holes that may be used.
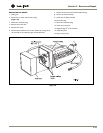
1. Loosen one slide’s rear mounting screws.
2. Remove the slide’s front mounting screws.
3. Reposition the slide so it is level.
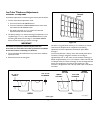
4. Mark new front drilling holes using a different set of mounting
holes on the slide
(Figure 51)
.
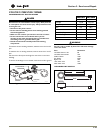
Figure 51
5. Drill the new holes with a #30 drill bit.
6. Remount the slide.
7. Repeat procedure for the other slide.
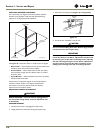
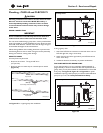
TOP-TO-BOTTOM (AND LEFT-TO-RIGHT)
ADJUSTMENT
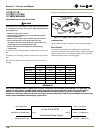
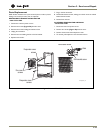
Figure 52
See Figure 52. The drawer will need a top-to-bottom adjustment if,
when viewed from the front, the drawer is not level horizontally.
Viewed from the top, one side will protrude. This is caused by one of
the slides being mounted higher than the other slide on the unit’s
liner.
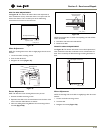
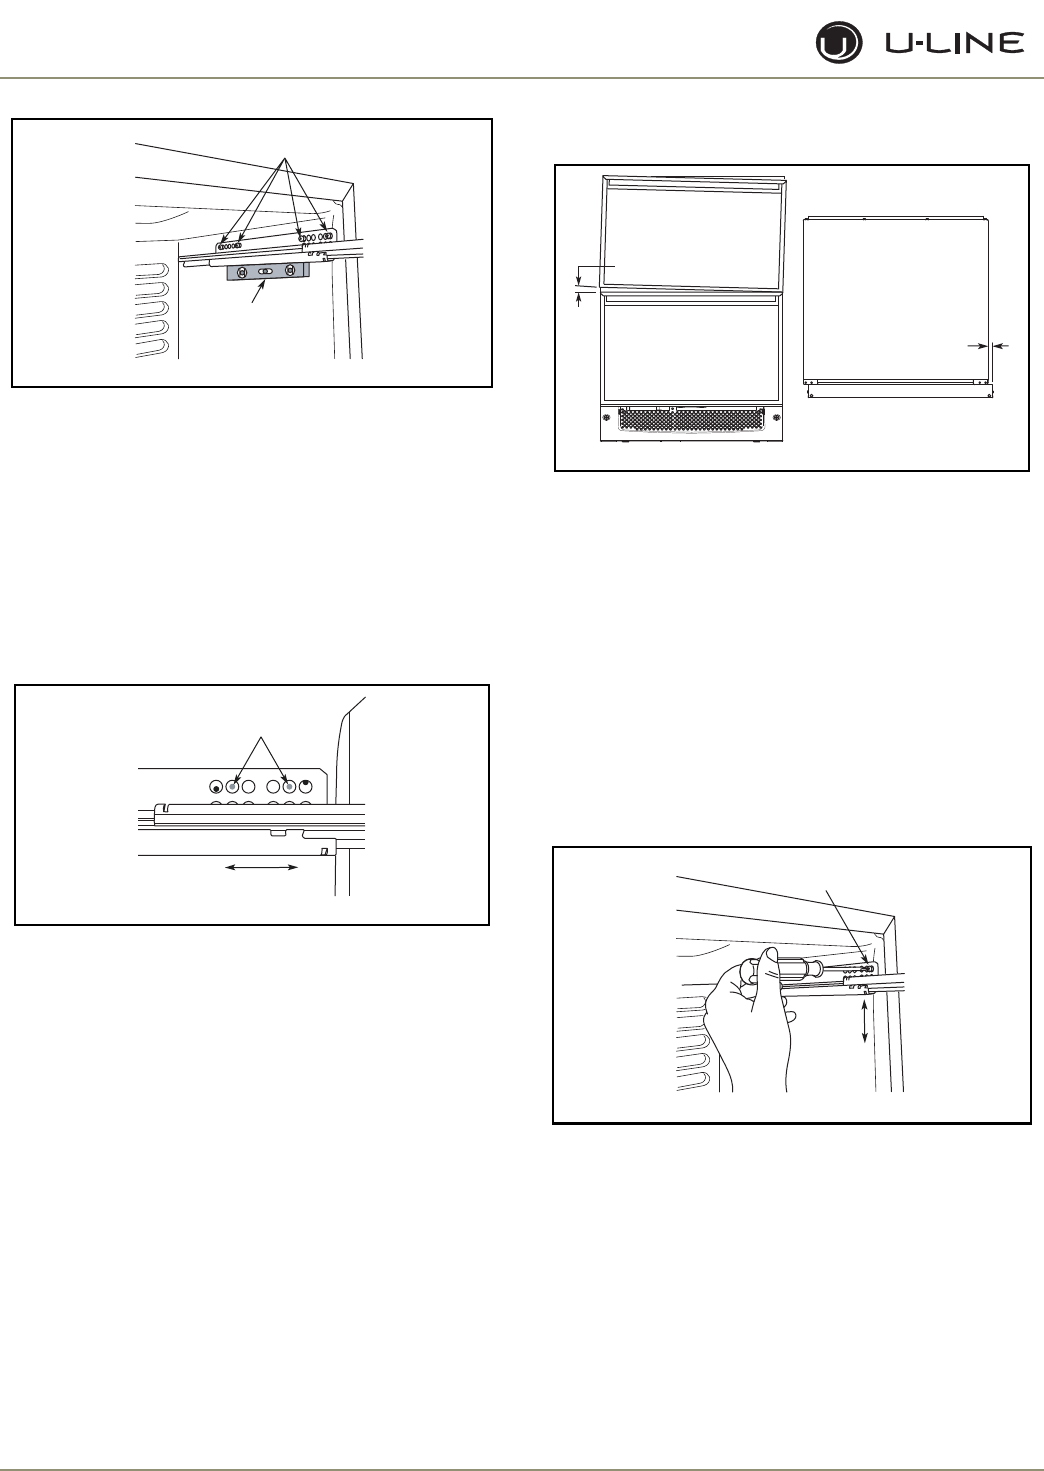
Minor Adjustment
NOTE: The mounting holes on the slide are slightly larger than the screws’
diameter.
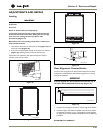
1. Loosen one slide’s mounting screws.
2. Push the slide upward or downward to match the position of the
other slide.
3. Retighten the screws
(Figure 53)
.
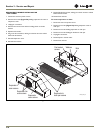
Figure 53
4. Repeat the procedure with the other slide if necessary.
Severe Adjustment
NOTE: The slides have extra mounting holes that may be used.
1. Remove one slide’s mounting screws.
2. Reposition the slide so it is the same distance from the bottom of
the liner as the other slide. Measure to confirm.
3. Mark new drilling holes using different sets of mounting holes on
the slide
(Figure 54)
.
dluohS swercS
esooL eB
edilS eht leveL
ULIN_0320_A
weN llirD dna kraM
seloH gnitnuoM
edilS eht leveL
ULIN_0322_A
m o t t o B - o t - p o T d e n g i l A t o N
t i n U f o w e i V p o T
t h g i R - o t - t f e L d e n g i l A t o N
ULIN_0323_A
t i n U f o w e i V t n o r F
edilS hsuP
ro drawpU
drawnwoD
nesooL
swercS gnitnuoM
ULIN_0324_A