


20 CLR2160, CLRCO2175
Figure 32
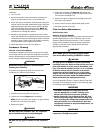
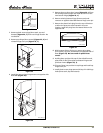
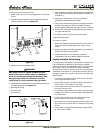
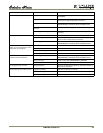
If using a Gravity Drain:
1. Attach the 5/8-inch ID drain connection on the back of
the unit to a 5/8-inch OD rigid tube, using a worm
clamp.
2. Attach the other end of the rigid tube to your 5/8-inch
ID drain line with a worm clamp.
3. Insulate the drain line, if necessary to prevent
condensation. Go on to Water Supply Connection.
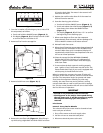
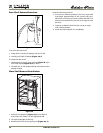
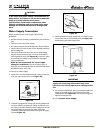
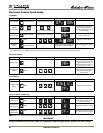
Factory-Installed Drain Pump
If your drain line will run up to a stand pipe, disposal
assembly or spigot assembly or does not otherwise meet
the requirements for a Gravity Drain, you may have
ordered the CLRCO2175 with a U-Line P60 Drain Pump.
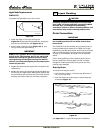
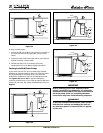
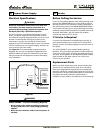
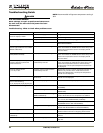
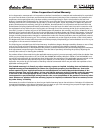
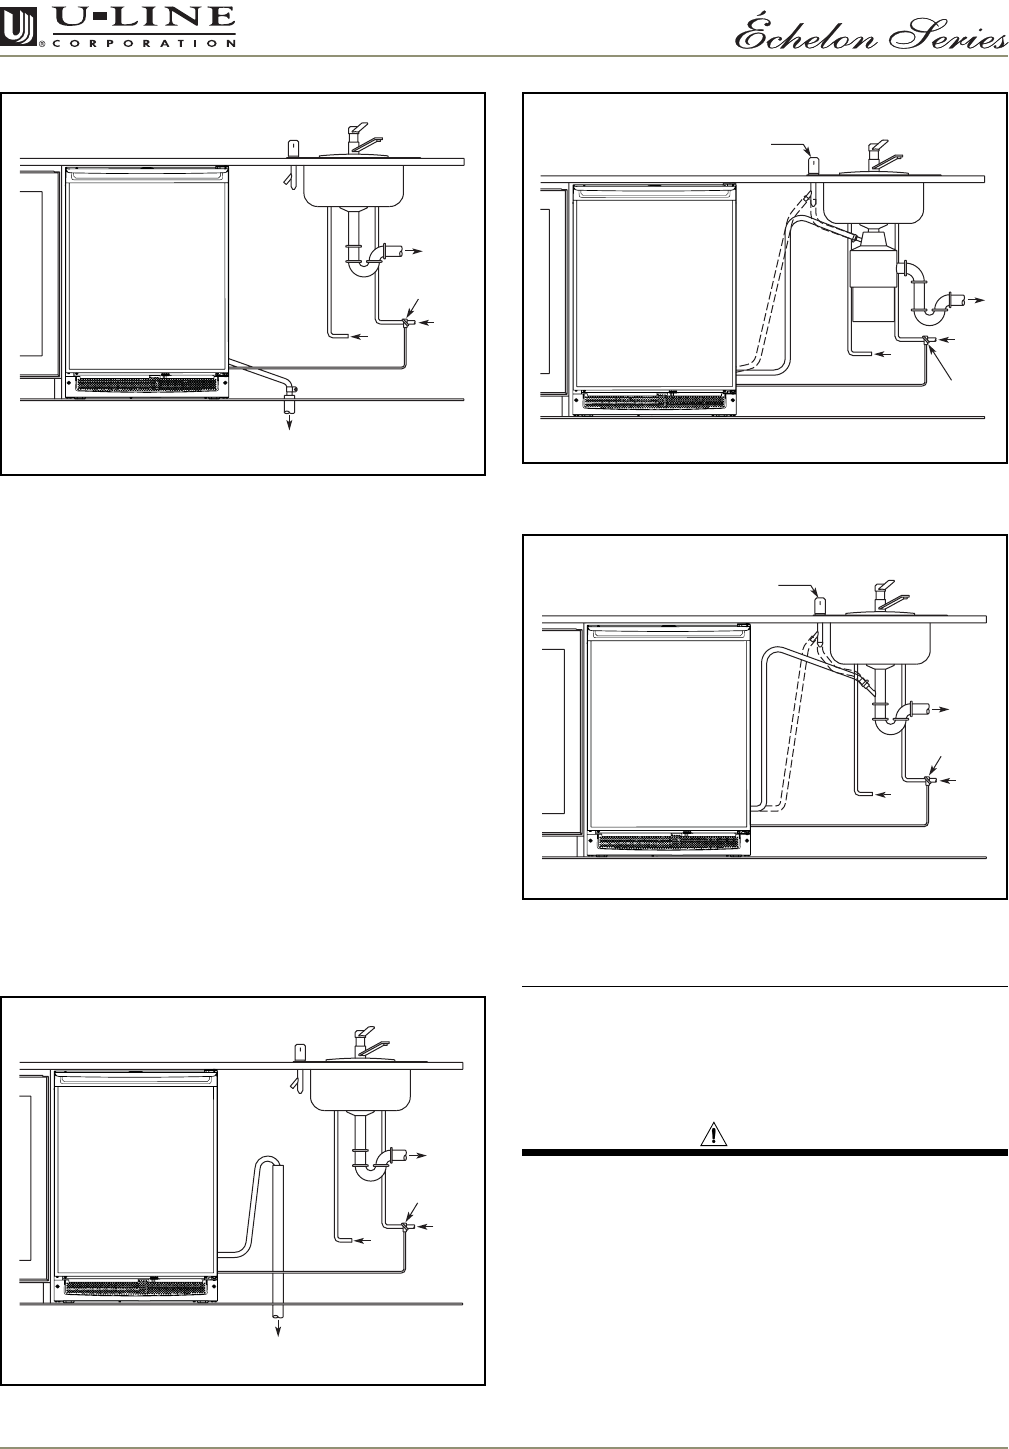
See Figures 33, 34 and 35 for typical installations
requiring a Drain Pump. If you need to install a P60 Drain
Pump into your unit, see Locally-Installed Drain Pump on
Page 21.
Figure 33
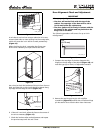
Figure 34
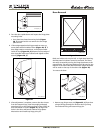
Figure 35
IMPORTANTIMPORTANT
Before installing your U-Line CLRCO2175 with
Factory- Installed U-Line P60 Pump, it is extremely
important to check and test all hose connections at
the drain pump. There is a possibility that hose
connections may have loosened during shipment.
WARNING
To prevent accidental electrocution, make certain
that the floor surfaces surrounding the unit are
dry whenever power is removed from, or applied
to, the unit.
Waste
Waste
Cold
Water
Shut-Off
Valve
Hot
Water
Gravity Drain
Cold
Water
Hot
Water
Waste
Waste
Shut-Off
Valve
Stand Pipe
Air Gap
(Optional Hook-Up)
Cold
Water
Hot
Water
Waste
Shut-Off
Valve
Disposal Assembly
Waste
Cold
Water
Shut-Off
Valve
Hot
Water
Air Gap
(Optional Hook-Up)
Spigot Assembly