


15
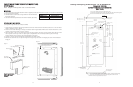
ELECTRICAL CONNECTION
E
E
l
l
e
e
c
c
t
t
r
r
i
i
c
c
a
a
l
l
R
R
e
e
q
q
u
u
i
i
r
r
e
e
m
m
e
e
n
n
t
t
s
s
A
115 volt, 60 Hz, AC only 15 amp fused electrical supply is required. (A time
delay fuse or circuit breaker is recommended.) It is recommended that a
separate circuit, serving only this appliance, be provided.
••EELLEECCTTRRIICCAALL GGRROOUUNNDD IISS RREEQQUUIIRREEDD OONN TTHHIISS AAPPPPLLIIAANNCCEE..
••DDOO NNOOTT UUNNDDEERR AANNYY CCIIRRCCUUMMSSTTAANNCCEESS RREEMMOOVVEE TTHHEE PPOOWWEERR SSUUPPPPLLYY
CCOORRDD GGRROOUUNNDD PPLLUUGG..
••DDOO NNOOTT UUSSEE AANN EEXXTTEENNSSIIOONN CCOORRDD..
RReeccoommmmeennddeedd GGrroouunnddiinngg MMeetthhooddss
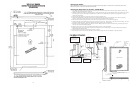
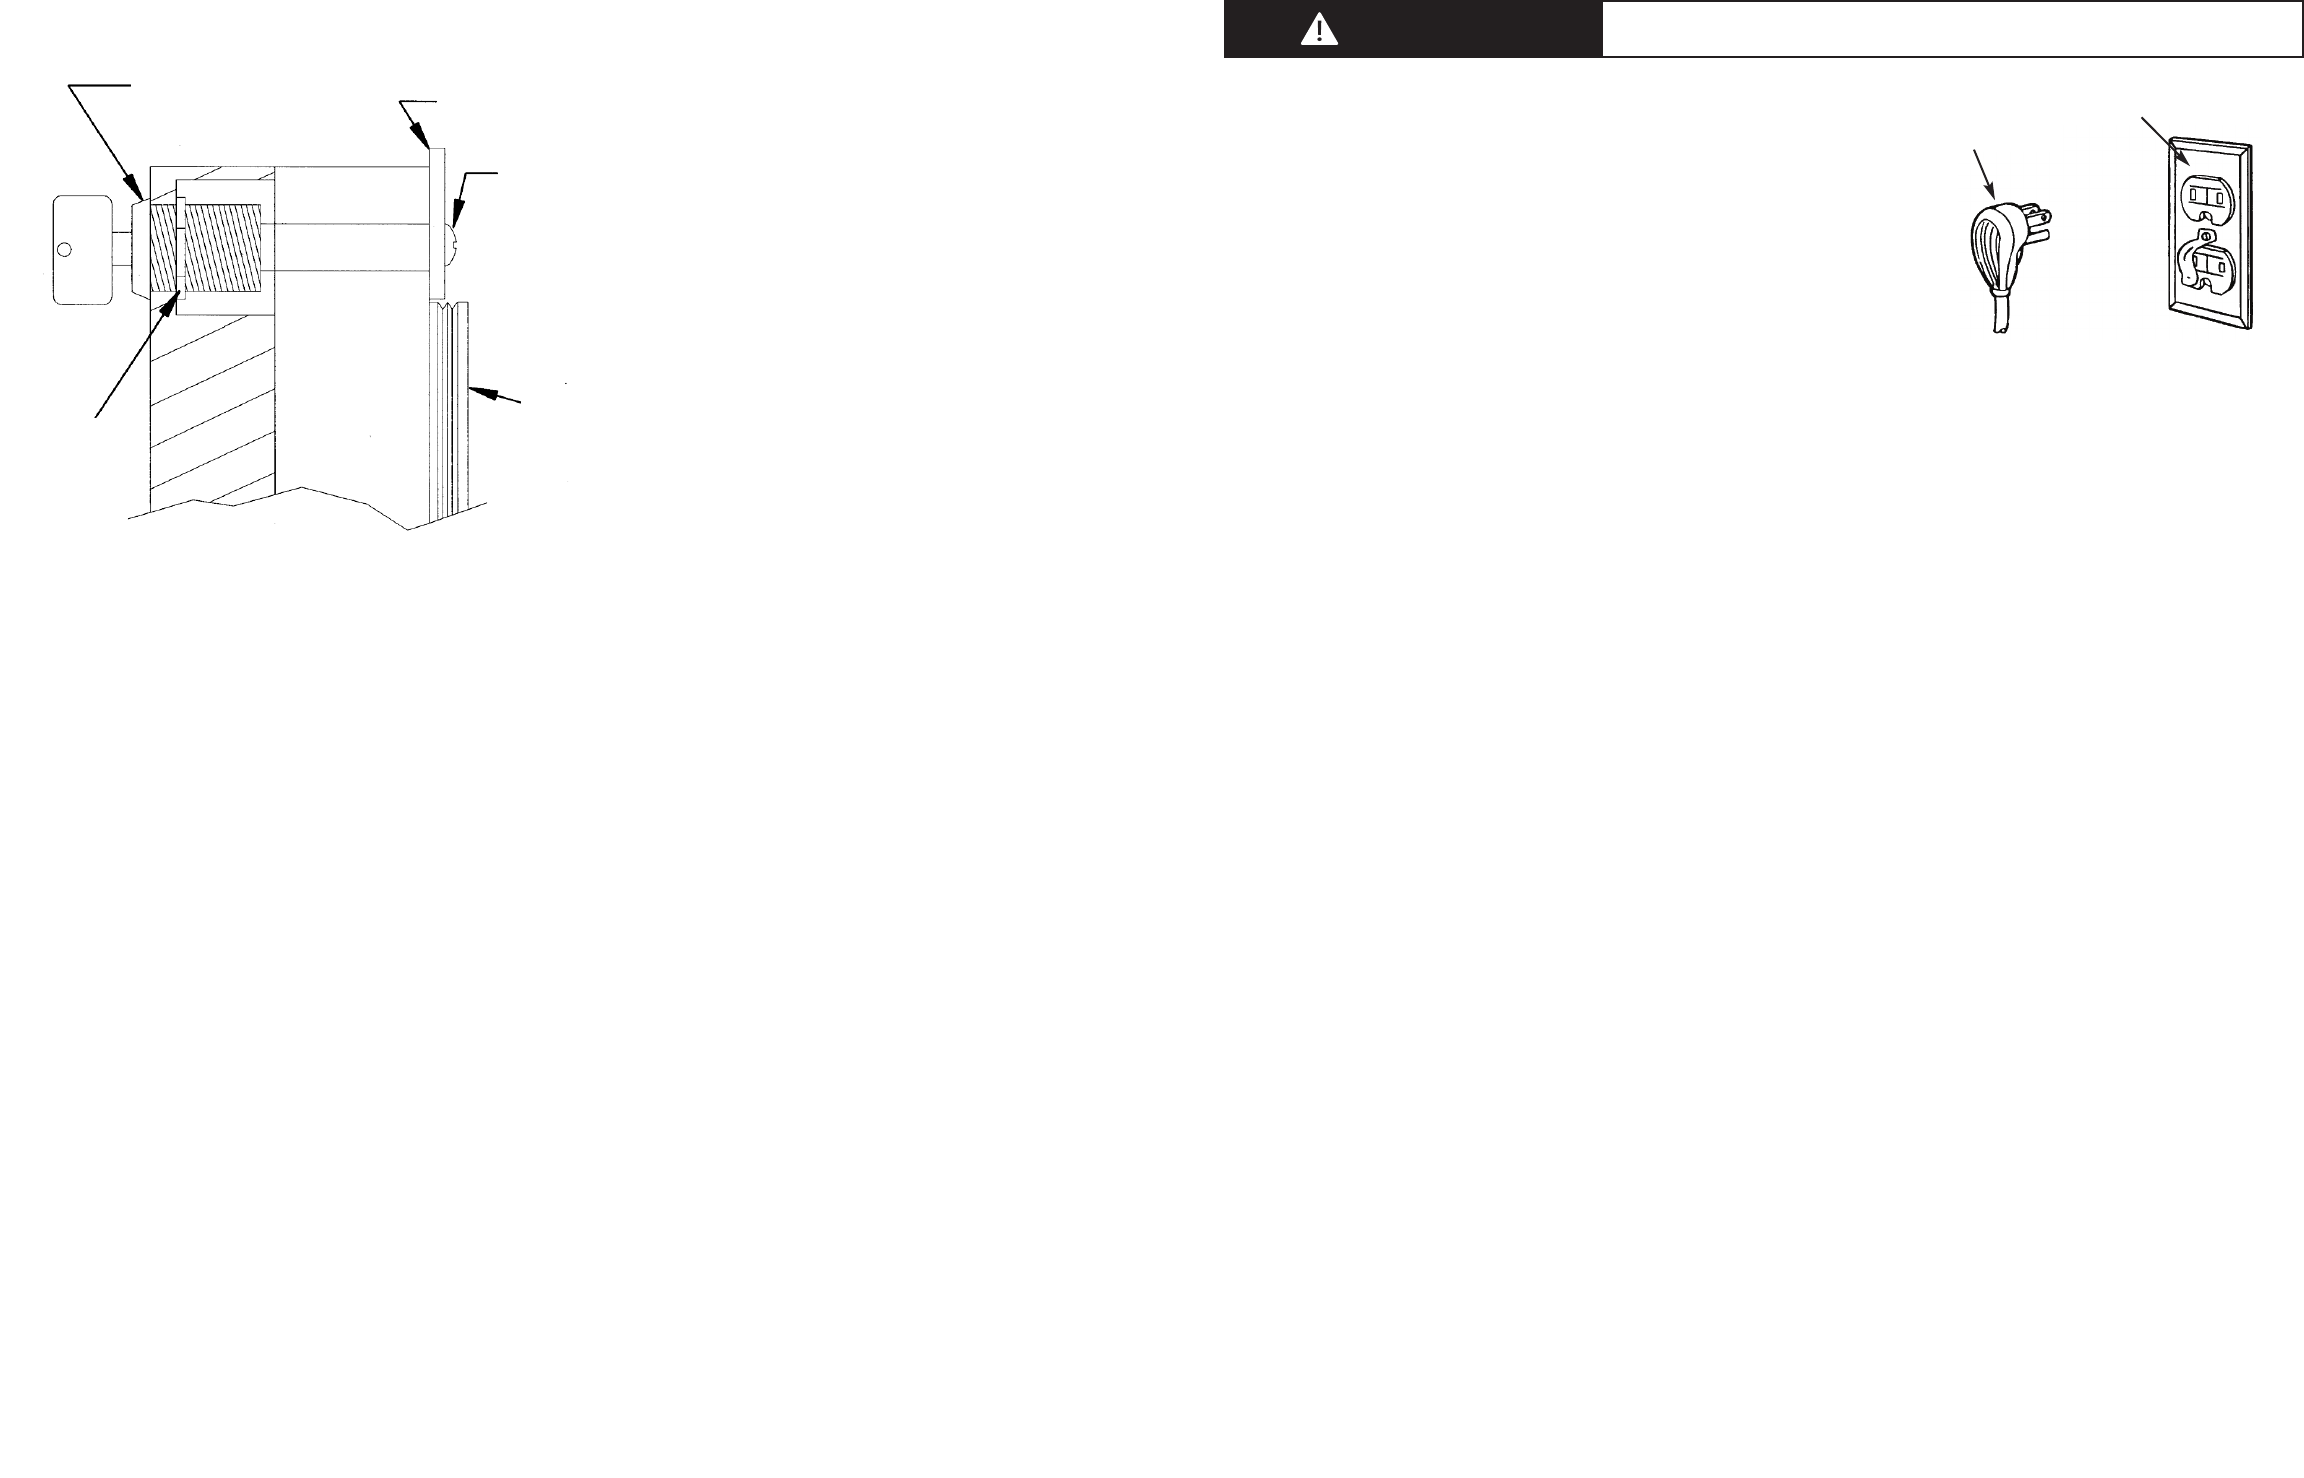
For your personal safety, this wine cellar must be grounded. This appliance is equipped with a 7’ (2.1 m) power supply cord
having a 3-prong grounding plug. To minimize possible shock hazard, the cord must be plugged into a mating 3-prong
grounding type wall receptacle grounded in accordance with the National Electrical Code and local codes and ordinances. If
the circuit does not have a grounding type receptacle, it is the responsibility and obligation of the customer to exchange the
existing receptacle in accordance with the National Electrical Code and applicable local codes and ordinances. The third
ground plug SHOULD NOT, under any circumstances, be cut or removed. All UL listed refrigerated products are equipped
with this type of plug.
Power Supply
with 3-prong
grounding plug
Grounding type wall
receptacle
FINAL PREPARATION
1. Some stainless steel parts may have a plastic protective wrap which must be peeled off. The interior of the wine cellar
should be washed thoroughly with hot, soapy water, rinsed and wiped dry to remove film residue and any installation dust
or debris before being used. Solutions stronger than soap and water are rarely needed.
2. All stainless steel parts should be wiped with hot soapy water. If buildup occurs, do not use steel wool, abrasive cloths,
cleaners, or powders. If it is necessary to scrape stainless steel to remove encrusted materials, soak with hot, wet cloths to
loosen the material, then use a wood or nylon scraper. Do not use a metal knife, spatula, or any other metal tool to scrape
stainless steel; scratches are almost impossible to remove.
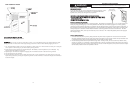
ELECTRICAL SHOCK HAZARD
F
ailure to follow these instructions could result in fire or electrical shock.
14
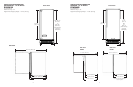
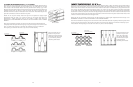
LLEEGG LLEEVVEELLEERR IINNSSTTAALLLLAATTIIOONN
Read before installing leg levelers.
WWAARRNNIINNGG::
Do not lay unit on top, side, back, or front. If unit is accidentally laid in any position other than right
side up, then the unit must remain in the right side up position for at least 24 hours before plugging the unit in.
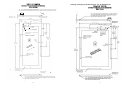
1. Tip unit backwards so there is one foot of clearance on front of the unit. Have someone to assist you in tilting the
unit to prevent it from falling on you while installing the leg levelers.
2. Screw front two (2) leg levelers into the weldnuts (24” W. Models) or screw impressions (15” W. Models). Leg
levelers should be screwed in until snug.
3. Repeat steps 1 & 2 with the exception of tipping the unit forwards to screw in the back two leg levelers.
4. The leg levelers are now installed.
5. The unit should be level from front to back and side to side. If floor conditions do not allow the unit to sit level,
adjust the leg levelers by turning the required leg leveler counter-clockwise to increase the height and clockwise to
reduce the height.
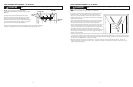
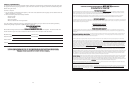
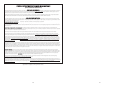
Lock Installation Details
L
L
o
o
c
c
k
k
B
B
o
o
d
d
y
y
LLoocckk CCaamm
P
P
h
h
i
i
l
l
l
l
i
i
p
p
s
s
S
S
c
c
r
r
e
e
w
w
L
L
o
o
c
c
k
k
E
E
x
x
t
t
e
e
n
n
s
s
i
i
o
o
n
n
L
L
o
o
c
c
k
k
R
R
e
e
t
t
a
a
i
i
n
n
e
e
r
r
N
N
u
u
t
t
KKEEYY
D
D
o
o
o
o
r
r
G
G
a
a
s
s
k
k
e
e
t
t
GG
ll
aa
ss
ss
DD
oo
o
o
rr
WW
oo
oo
dd
PP
aa
nn
ee
ll
WARNING