


— 29 —
CONVECTION OVEN THERMOSTAT REPLACEMENT
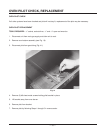
CONVECTION (SNORKEL
®
) OVEN THERMOSTAT CHECK AND CALIBRATION (90 Series Only)
Refer to the THERMOSTAT ADJUSTMENTS section of this manual for the procedures for checking and calibrating the
thermostat for the convection oven (see Page 22).
CONVECTION (SNORKEL
®
) OVEN THERMOSTAT REPLACEMENT (90 Series Only)
TOOLS REQUIRED: Standard flat blade screwdriver, small
1
/8" blade screwdriver,
5
/16" socket, and socket wrench.
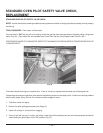
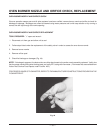
1. WARNING: DISCONNECT ELECTRICAL POWER SUPPLY AND PLACE A TAG AT THE DISCONNECT SWITCH
TO INDICATE YOU ARE WORKING ON THE CIRCUIT.
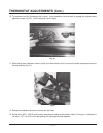
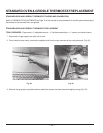
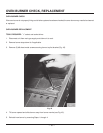
2. Allow unit to cool and disconnect the capillary from the holding clips located on the oven cavity back.
3. Remove the burner top grates required to access the thermostat and capillary.
4. Straighten the capillary end inside the oven cavity. From the top burner area, pull the capillary line from the oven cavity
through the oven body top.
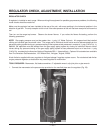
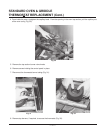
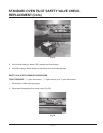
5. Remove all control panel knobs.
6. Remove (4) screws securing the control panel to the unit front frame.
7. Remove (4) screws retaining the thermostat housing to the control panel.
8. Remove (2) screws mounting the thermostat directly to the control panel.
9. Pull the thermostat out to reveal the thermostat wire connectors.
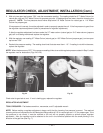
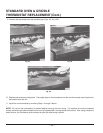
10. Remove the electrical wires from the connectors. Make a note of the wire arrangements for reassembly of the new
thermostat.
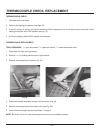
11. Completely remove the old thermostat and capillary from the unit.
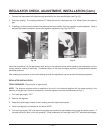
12. Install the new thermostat by reversing procedures 1 through 11.
NOTE: Be careful not to kink the capillary wire while feeding it through the oven cavity. The capillary wire may be loosely
wound around the burner tube to keep excess wire lead from laying detached in the open top section.