9
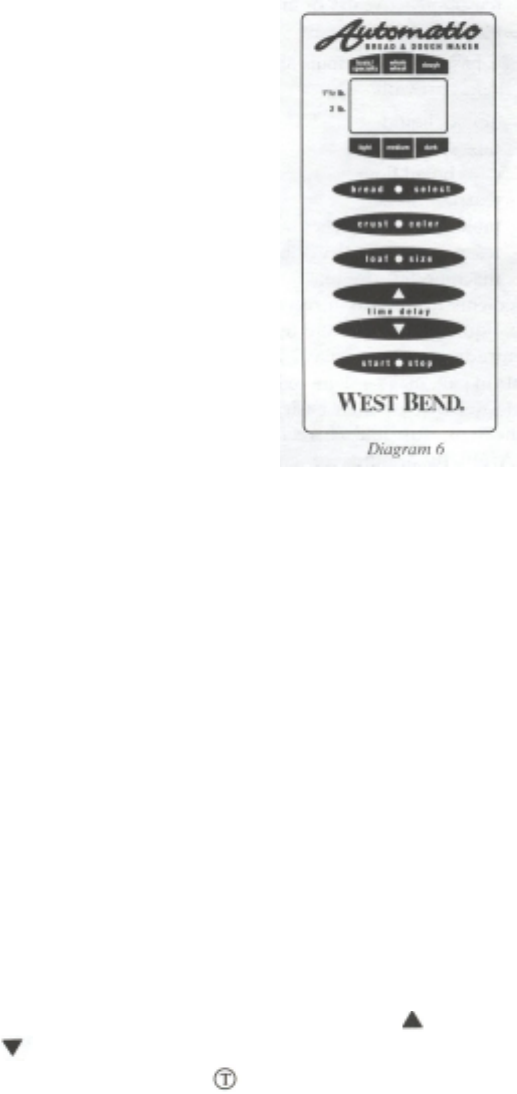
BECOMING FAMILIAR WITH CONTROL PANEL
Before using your bread maker, it is important that you understand how to use the control panel as this is the “brains” of the machine.
Review the following features to better understand what each button is designed to do and the options that are available to you when
using this machine.
BREAD SELECT BUTTON
The BREAD SELECT button lets you choose two different bread settings as well as a dough setting.
With each press of the BREAD SELECT button, the indicator arrow will point to a bread or dough
setting on the control panel. The time required to complete each also appears in the display as follows:
basic/specialty …………….3:30 (medium crust)
whole wheat…………………3:40 (medium crust)
dough ……………………...1:40
The basic/specialty setting can be used for almost any bread recipe containing at least 50% bread
flour. If a recipe contains less than 50% bread flour, then use the whole wheat settings as these
settings feature a longer knead cycle, which is beneficial for whole grain flours.
The dough setting is used when you wish to make dough for hand shaping and baking in your own
oven, such as dinner rolls.
When using the basic/specialty, whole wheat and dough settings, an audible alert will sound during
the knead cycle as a reminder to add ingredients, such as nuts, raisins, etc. if recommended in recipe. If
not adding extra ingredients, ignore this alert or use it as a checkpoint to check the condition of the dough for any minor adjustment
that may be necessary.
CRUST COLOR BUTTON
The crust color button lets you choose three different crust colors for yeast bread. With each press of the crust color button, the
indicator arrow will point to light, medium or dark on the control panel. Select the desired crust color you wish for the bread recipe
you are preparing. The crust color button does not apply to the dough setting.
LOAF SIZE BUTTON
The loaf size button lets you select between making 1½ and 2 pound loaves of bread and recipes for both sizes are included in this
book. With each press of the loaf size button, the arrow indicator will alternately point to the 1½ lb. and 2 lb. setting on the control
panel. Selecting the loaf size is important as the programming is different to ensure the optimum results for both sizes. The loaf size
button does not apply to the dough setting.
TIME DELAY BUTTONS
The TIME DELAY buttons let you program the bread maker to start at a later time, which is especially convenient if you wish to
wake up to a fresh loaf of bread in the morning or come home to a fresh loaf for dinner. The timer can be programmed to delay the
start of the bread maker for up to 13 hours at all settings. When using the time delay feature, no perishable ingredients should be
used, such as milk, eggs, cheese, yogurt, etc. as these foods can spoil when held at room temperature for several hours. Simply
prepare the recipe you wish to make, place the bread into the bread maker, program the bread select, crust color and loaf size, then
enter the number of hours and minutes from when you start the bread maker to when you want the bread done. The (up)
time
delay button will scroll up in 10 minute intervals, whereas the (down)
time delay button will scroll down in 10 minute intervals.
See “HOW TO USE TIME DELAY” section in this book for more details. The recipes with the
symbol can be used in the time
delay mode
.
START/STOP BUTTON
Use the start/stop button to turn bread maker on and off. Before starting the machine, you must first program the bread select and
crust color and loaf size if applicable, plus the time delay if being used. To start the bread maker, press start/stop button once.


