Caring For Your Cooktop
Continued
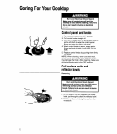
Cleaning tips
Control knobs
Clean with warm, soapy water and a soft cloth.
l
Wash, rinse and dry well.
9 Do not soak.
Control panel
Clean with warm, soapy water or spray glass
cleaner and a soft cloth.
l
Wash, rinse and dry well.
l
Follow directions provided with the cleaner.
Cooktop surface
Clean with warm, soapy water and a soft cloth.
l
Wipe off regularly when cooktop is cool.
Use a non-abrasive plastic scrubbing pad for
heavily-soiled areas.
9 Do not use abrasive or harsh cleansers.
NOTE: Do not allow food containing acids (such
as vinegar, tomato or lemon juice) to remain on
surface. Acids may remove the glossy finish.
Also, wipe up milk or egg spills when cooktop is
cool.
Coil surface units
No cleaning is required.
l
Spatters or spills will burn off.
l
Do not immerse in water.
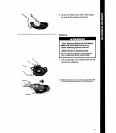
Porcelain-enamel reflector bowls
Clean with warm, soapy water and a non-
abrasive plastic scrubbing pad.
l
Wipe off excess spills.
l
Wash, rinse and dry well.
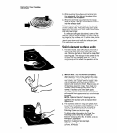
Solid element surface units
Clean with warm, soapy water on a soft cloth.
l
Make sure the cooktop and the surface units
are cool.
OR
Clean with soapy scrubbing pad or scouring
powder.
l
Wipe off the surface units after each use.
NOTE: After each cleaning, heat surface units
until dry.
To darken surface units or to remove rust
spots:
Use salt-free oil on a soft cloth.
l
Make sure surface units are cool.
l
After each cleaning, apply thin coat of oil to
surface units, then heat for 3-5 minutes. Slight
smoking of oil will occur.
Use Electrol@ dressing (Part No. 814030)‘.
l
Follow the directions on the dressing.
NOTE: This will improve surface unit appearance,
but will not eliminate dark spots.
Trim rings
Use stainless steel cleaner or Cook Top Polishing
Creme (Part No. 814009)‘.
. Make sure surface units are cool.
l
Follow directions provided with cleaner or
polishing creme.
NOTE: Yellowing of trim rings is normal from heat
of the surface units and pans.
Ceramic cooktop
See pages 15 and 16 for cleaning care instruc-
tions.
‘See page 14 for ordering information.
20


