


Special tips:
l
If the cleaning cycle doesn’t get the oven as clean as it should
be, the time set for cleaning was probably not long enough.
Set the cleaning time longer next time. You can set it for more
than 3 hours, if you want.
l
Plan to clean the oven before it gets too heavily soiled. Other-
wise, you may notice more smoke than you would expect
coming from the oven vent. And, the cleaning cycle has to be
longer to clean a very soiled oven.
l
There will be normal “heat odors” during the cleaning cycle.
To help get rid of them, keep the kitchen well ventilated.
l
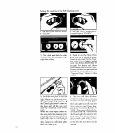
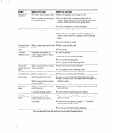
To stop the cleaning cycle after it has started:
-Turn the Stop Time Knob to the right time of day.
-Turn the Oven Selector Knob to “OFF.”
-Turn the Oven Temperature Control Knob to “OFF.”
-Unlock and open the oven door when the Lock Lights turns
off.
NOTE: Do not force the Lock Lever. Wait until it moves
easily.
l
Do not use foil or other oven liners in your Self-Cleaning
Oven.
l
Don’t use commercial oven cleaners in your Self-Cleaning
Oven.
l
If racks are left in the oven during a cleaning cycle, they will
lose their shine. discolor and be harder to slide in and out. To
make them slide easier, polish the edges of the racks and rack
guides with a soap-filled steel wool pad, rinse well, and wipe
on a thin coating of salad oil.
Cleaning and caring for your range
Your range is designed to be easy to clean. You will usually wipe off
spills and spatters when they happen, but you will sometimes want to
clean under and behind the control knobs and surface units. This section
will tell you how to remove those, and what to use when cleaning.
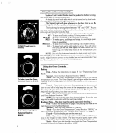
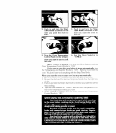
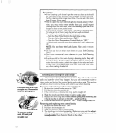
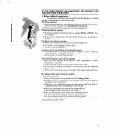
Pull knob and trim ring
Removing and replacing surface unit control knobs:
straight out. Remember
1. Be sure the control knobs are set to “OFF,”
how the spring goes.
2 Pull the black knobs straight off
3 If the control has a chrome trim ring. pull it straiqht off
4. Wash the knobs (and trim rings) in warm, sudsywater.
5. Replace the trim rings first. If the control spring was removed, put
it back exactly as shown on the left...small end first.
6. Hold the black knob so it points to “OFF.” Push it straight back on.
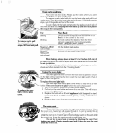
Removing and replacing oven control knobs:
1. Be sure the knobs are set to “OFF.”
2. Pull each knob straight off.
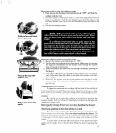
To remove surface
unit, lift and pull
straight out.
3. Wash the knobs in warm, sudsy water.
4. The knobs are not interchangeable. Make sure you put the adjust-
able Oven Temperature Control Knob on the right place, and the
nonadjustable Oven Selector Knob on the other.
12