


I
I I’
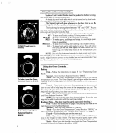
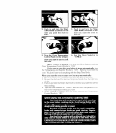
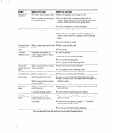
PUSH IN and turn to
setting.
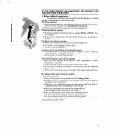
To bake, turn the Oven
Selector Knob to BAKE.
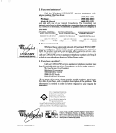
To broil, turn the Oven
Selector Knob to
BROIL.
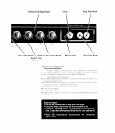
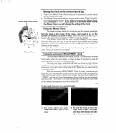
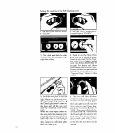
Using the surface unit controls
Surface Unit Control Knobs must be pushed in before turning.
Turn either way to the setting you want.
A design by each knob tells which unit is turned on by that knob.
(For example, [::I shows the right front unit.)
The Signal Light will glow whenever a Surface Unit is on. Be
sure this light is off when you have finished cooking.
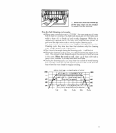
The knob may be set anywhere between “HI” and “OFF” As you
use your surface units, you will get used to the settings that match your
pots, pans and favorite foods the best.
As a guide, the setting should cook at about the following heats:
HI - To start most foods cooking. To bring water to a boil.
MED-HI - To hold a rapid boil; to fry pancakes or chicken.
MED - To make gravy, puddings and icings; to cook large quan-
tities of vegetables.
MED-LO - To keep food cooking after starting it at a higher setting.
LO -To keep food warm until ready to serve. You will notice
that you can set the heat higher or lower within the LO
band [ &%I to help keep food at the temperature you
want.
NOTE: Use only flat-bottomed utensils for best results and to pre-
vent damage to the range. Specialty items with rounded or ridged bottoms
(woks. ridged-bottom canners or tea kettles) are not recommended. See
the “Cooking Guide” for important utensil informatlon.
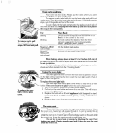
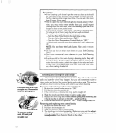
Using the Oven Controls
Baking:
First-Follow the directions on page 8 for “Positioning Oven
Racks.”
Second-Turn the Oven Selector Knob to “BAKE.”
Third-Turn the Oven Temperature Control Knob to the baking
temperature you want. The Oven Signal Light will glow while the oven is
heating. When this light goes off, the oven has heated to the temperature
you set.
Fourth-Place food in the oven. During baking, the elements will
turn on and off to help keep the oven at the temperature you set. The
Oven Signal Light will turn on and off with the elements. The top element
helps heat during
baking,
but does not turn red.
Fifth-When the baking is done, turn both the Oven Temperature
and Oven Selector Knobs to “OFF”
NOTE: Do not lock the oven door during baking. If you do, you
may not be able to unlock it until the oven has cooled.
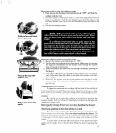
Broiling: (Note-The door must be partly open while broiling.)
First-Follow the directions on page 5 for placing the meat at the
right distance from the Broil Element.
Second-Turn the Oven Selector to “BROIL.”
Third-Turn the Oven Temperature Control Knob to “BROIL” or
turn it to a lower temperature (see “Variable Broil Feature,” on page 5.
Fourth-Put the broiler pan on the oven rack.
Fifth-Open the oven door about four inches (10 cm). There is a
stop in the hinges to hold it there.
The door must be part/y open while
broiling. The Oven Signal Light will glow while the broil element is on.
Sixth-When you are through, turn both the Oven Temperature
Control and the Oven Selector Knobs to “OFF.”