


5
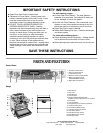
PARTS AND FEATURES
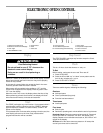
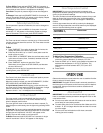
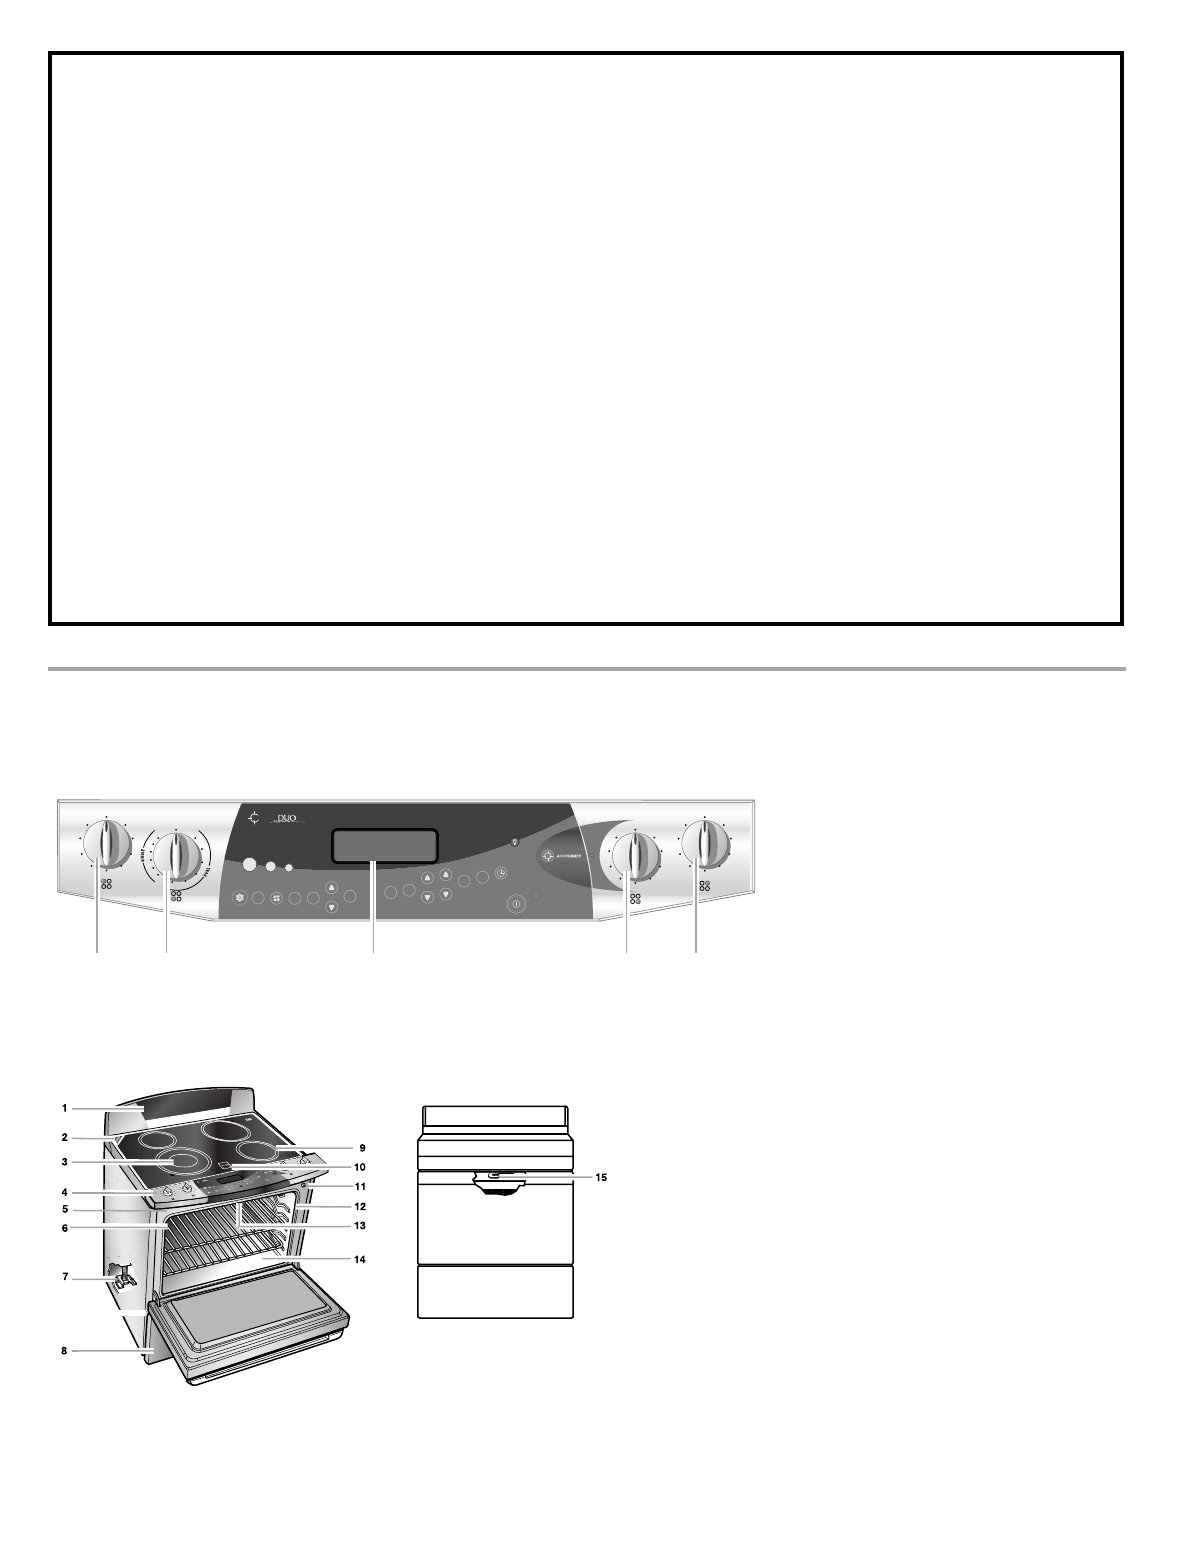
Control Panel
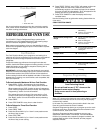
Range
■ Keep Oven Vent Ducts Unobstructed.
■ Placement of Oven Racks – Always place oven
racks in desired location while oven is cool. If rack
must be moved while oven is hot, do not let
potholder contact hot heating element in oven.
■ DO NOT TOUCH HEATING ELEMENTS OR
INTERIOR SURFACES OF OVEN – Heating
elements may be hot even though they are dark in
color. Interior surfaces of an oven become hot
enough to cause burns. During and after use, do
not touch, or let clothing or other flammable
materials contact heating elements or interior
surfaces of oven until they have had sufficient time
to cool. Other surfaces of the appliance may
become hot enough to cause burns – among these
surfaces are oven vent openings and surfaces near
these openings, oven doors, and windows of oven
doors.
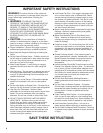
IMPORTANT SAFETY INSTRUCTIONS
SAVE THESE INSTRUCTIONS
For self-cleaning ranges –
■ Do Not Clean Door Gasket – The door gasket is
essential for a good seal. Care should be taken not
to rub, damage, or move the gasket.
■ Do Not Use Oven Cleaners – No commercial oven
cleaner or oven liner protective coating of any kind
should be used in or around any part of the oven.
■ Clean Only Parts Listed in Manual.
■ Before Self-Cleaning the Oven – Remove broiler pan
and other utensils.
For units with ventilating hood –
■ Clean Ventilating Hoods Frequently – Grease should
not be allowed to accumulate on hood or filter.
■ When flaming foods under the hood, turn the fan on.
1. Left Rear Control Knob
2. Left Front Control Knob
(Dual Cooking Zone)
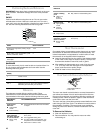
3. Electronic Oven Control Display
4. Right Front Control Knob
(ACCUSSIMER™ Feature)
5. Right Rear Control Knob
OFF
HI
8
7
6
5
4
3
2
LO
MIN
MAX
OFF
HI
8
7
6
5
4
3
2
LO
OFF
HI
8
7
6
5
4
3
2
LO
OFF
START
COOL
BAKE
BROIL
CONVECT
BAKE
WARM
AUTO
CLEAN
TIMER
SET
TIMER
OFF
CLOCK
SET
START
TIME
STOP
TIME
TEMP
HR
MIN
OVEN
LIGHT
FIRST STEP/
NEXT STEP
REVIEW
STEPS
UNDO
STOP
CANCEL
PROGRAMMING
HEATING OPTIONS
1,2,3,4
TIMING OPTIONS
ACCUBAKE
3
2
4
1 5
2
4
6
8
HI
LO
HI
LO
2
4
6
8
1. Back Guard
2. Oven Vent
3. Dual Element
4. Control Panel
5. Model and Serial Number Plate
(located on bottom left side of control panel)
6. Oven Rack
7. Anti-Tip Bracket
8. Compressor (not consumer accessible)
9. Surface Cooking Area
10. Hot Surface Indicator Light
11. Automatic Oven Light Switch
12. Oven Door Gasket
13. Broil Element (not shown)
14. Bake Element (not shown)
15. Self-Clean Latch
Parts and Features Not Shown
Oven Door Window Broiler Pan and Grid Roasting Rack
Oven Light Convection Fan
M
I
N
M
A
X
S
T
A
R
T
C
O
O
L
B
A
K
E
B
R
O
I
L
C
O
N
V
E
C
T
B
A
K
E
W
A
R
M
A
U
T
O
C
L
E
A
N
T
I
M
E
R
S
E
T
T
I
M
E
R
O
F
F
C
L
O
C
K
S
E
T
S
T
A
R
T
T
I
M
E
S
T
O
P
T
I
M
E
T
E
M
P
H
R
M
I
N
O
V
E
N
L
I
G
H
T
F
I
R
S
T
S
T
E
P
/
N
E
X
T
S
T
E
P
R
E
V
I
E
W
S
T
E
P
S
U
N
D
O
S
T
O
P
C
A
N
C
E
L
P
R
O
G
R
A
M
M
I
N
G
H
E
A
T
I
N
G
O
P
T
I
O
N
S
1
,
2
,
3
,
4
T
I
M
I
N
G
O
P
T
I
O
N
S
AC
C
U
B
A
K
E
O
F
H
I
8
7
6
5
4
3
2
L
O
O
F
H
I
8
7
6
5
4
3
2
L
O
O
F
F
H
I
8
7
6
5
4
3
2
L
O
O
F
H
I
8
7
6
5
4
3
2
L
O
O
F
H
I
8
7
6
5
4
3
2
L
O