1211
Setting the Clock to Real Time
The clock can only be set when not in any activated bread making cycle.
Always ensure that your batteries are properly placed into the battery
compartment of the breadmaker to ensure that all settings are saved
should a power outage occur.
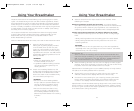
1 Press and hold the PAUSE button. The display will show SET CLOCK
TIME, and the HOUR setting will begin to flash.
2 Press the TIME button until the correct HOUR is displayed. Be
sure to pay attention to the AM/PM setting when cycling through
the hours.
3 Press the PAUSE button a second time and the MINUTES will begin
to FLASH.
4 Press the TIME button until the correct MINUTES is displayed.
5 When finished setting the time, press the PAUSE button and the
colon will begin to flash indicating that the displayed time is set.
Setting the Delay Time
Function
The delay time setting will always show the COMPLETION time of the
selected bread making cycle.
1 Always make sure that the real clock time is set, and be sure to
select bread type, crust COLOR, and LOAF SIZE before entering
delay TIME cycle.
2 Press the TIME button once; the HOUR and MINUTES will begin to
flash, and the display will also show SAME DAY.
3 Press TIME again to cycle in 10-minute increments until the time
that you want the bread completed is shown in the display. Pay close
attention to the AM/PM indicator and the SAME DAY/NEXT DAY
indicator to ensure that the accurate completion time is set.
4 While the completion time is still blinking, press START/STOP
to begin the delay TIME feature. You can cancel the delay TIME
feature by simply pressing and holding the START/STOP button
for 3 seconds.
BreadmakingMachine manual 7/13/08 9:40 PM Page 11


