12
“POUR-OVER SECTION”
INITIAL BREWER SET-UP
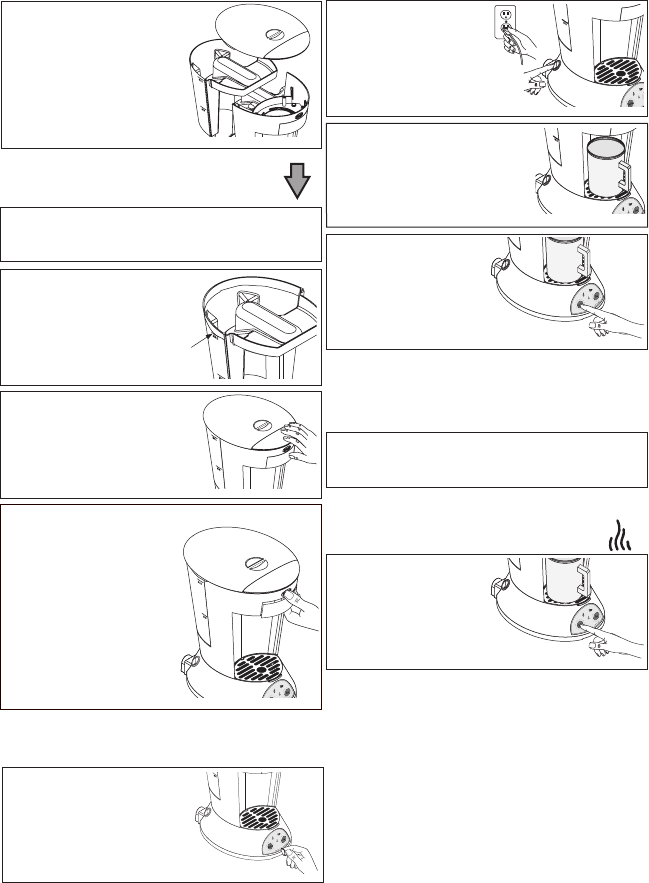
1. Remove the lid and
water reservoir.
(CAUTION: Do not place the brewer in
a sink or other water source.)
8. Place a mug or bowl that
will hold at least 414 ml
(14 fl. oz.) onto the drip
tray grate.
4. Replace the reservoir
and lid and close the
slide lid.
9. Press and release
the coffee brew
button to fill the
internal water
tank.*
5. To ensure the Pod
Holder is locked in
place, use thumb to
press the pod holder
release button to eject
the holder and then
press all the way in to
lock.
(CAUTION: Water may not immediately flow
from the brewer. Never remove pod holder
from brewer during a brew cycle.)
(CAUTION: You should hear a clicking sound
when the pod holder locks in place.)
6. Slide the volume
control lever to the
maximum setting.
7. Plug in the brewer
and turn on the
power switch.
11. Press and release
the coffee brew
button a second
time.*
(CAUTION: Water should flow from the pod
holder. Wait until water drip out has finished
before removing the pod holder.)
P2901
P2961
P2903
P2958
P2965
P2958
P2959
P0214/2960
10. Empty any water in the mug or bowl and
place the mug back on the drip tray grate.
You are now finished preparing the brewer
for it’s first use. Proceed to the “Brewing
Delicious Coffee Or Tea” section.
2. Thoroughly rinse the water reservoir.
3. Fill the reservoir to the
maximum line with
fresh cold water.
P3017
For Automatic set-up, go to “Automatic Section” on page 10.
* Some noise is normal when the water
pump is running.
(NOTE: Wait for Heating Indicator to go out
before proceeding to Step #11)


