


• READY Place one or two cups under the Dual Coffee Spouts.
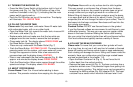
• Open the Lid for Ground Coffee (Fig. 11). Opening this lid
automatically disengages the grinder. The display shows
repeatedly
FILL PRE-GROUND.
• Add one or two level scoops of pre-ground coffee into the
funnel and close the lid. The display shows SELECT BUTTON.
• Push any of the four coffee buttons. The J5 brews the selected
beverage without grinding. During brewing you can still change
the coffee volume by turning the Rotary Dial.
READY
Please note: If you inadvertently opened the lid for the coffee
funnel, just close it. The J5 will detect that there is no coffee in
the funnel. The display will show
NOT ENOUGH PRE-GROUND
and will return to READY.
Please note: After using pre-ground sugar coated or flavored
coffee through the coffee funnel you may experience some
flavor transfer when switching back to your regular coffee. Select
the program RINSE in the maintenance section to run hot water
through the coffee spouts (chapter 17.1).
12. CAPPUCCINO AND LATTE
Frothing milk for Cappuccino: Injecting hot steam into the milk
to warm the milk and create a frothy layer of tiny bubbles.
Steaming milk for Latte: Injecting hot steam to warm the milk
without creating a frothy layer.
The J5 is equipped with two different frothing/steaming systems:
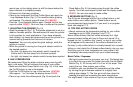
a) The frothXpress system - mounted on the machine.
b) The Dual Frother PLUS - located in the storage area (Fig. 1.3)
Recommendation:
• If you froth for only one or two cups and want 100% control
over the frothing/steaming process, the Dual Frother PLUS
might be the preferred equipment.
• If you always want the same amount of milk and milk froth in
your cup or you make multiple cappuccinos the frothXpress is
faster and more convenient to use.
• Make yourself familiar with both systems.
12.1 USING THE FROTHXPRESS SYSTEM
The frothXpress system lets you produce hot steamed or frothed
milk right into your cup(s). After becoming familiar with this
attachment you will be able to get exactly the amount of frothed
or steamed milk you want in your cup (refer to the video).
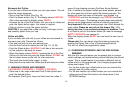
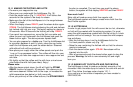
• Remove the red protective cap from the side of the frothXpress
system and attach the milk hose (from the welcome pack) with
the black connector into the opening of the frothXpress (Fig. 13).
• Insert the other end into your milk carton or any container with
cold milk (Fig. 14).
Important: This system siphons milk and mixes it inside the
frothXpress with hot steam. It is necessary that all parts are
connected tightly, otherwise the siphoning process will not work.
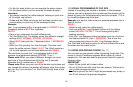
Frothing Position: Point the dial between 12 and 2 o’clock.
Turning the dial towards the 2 o’clock position will reduce the
amount of froth but will increase the temperature of the milk.
Milk will be siphoned, heated and frothed. Fig. 13 shows the 12
o'clock position.
Steaming Position: Point the dial between the 4 and 6 o’clock
position. Milk will be siphoned and heated with no froth. For
hotter milk move the dial more towards the 4 o’clock position.
Steam Only Position: When the dial points to the 3 o'clock
position, the siphoning of the milk is blocked. Only steam will
pass through the frothXpress. Fig. 12 shows that exact position.
17.