


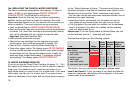

• The bigger the dots, the coarser the grinding.
IMPORTANT: The grinding grade can only be adjusted while
the grinder is actually grinding.
ATTENTION: Oily beans tend to stick together. Stir beans just
before grinding to ensure a proper flow of beans into the burrs.
Please note: If coffee does not flow in a constant stream, turn
the grinder to a coarser setting.
8. DAILY PREPARATION
We recommend filling the water container every morning with
fresh, cold water. This will enhance the taste of your coffee.
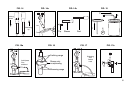
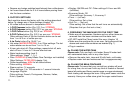
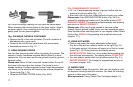
• Make sure the Main Power Switch is on (Fig. 1b). In this case
the On/Off button is illuminated.
• Push the On/Off button. The display shows
HEATING UP.
After approx. 2 minutes the display shows
PRESS RINSE.
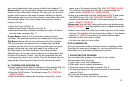
• Push the Rinse Button (Fig. 2,E). Hot water will warm up all
internal parts and pump through the coffee spouts MACHINE
RINSING
. The water will be caught in the drawer underneath.
The rinse cycle stops by itself and the display reads: SELECT
PRODUCT. You are now ready to make coffee.
Please note: Under normal use the machine will automatically
complete a rinse cycle when it is turned off (or when the
machine turns off automatically). If you have not brewed any
coffee at all the machine will not run a rinse cycle when turning off.
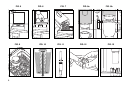
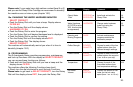
9. BREWING COFFEE AND ESPRESSO
The machine has four pre-set coffee buttons, 1 ESPRESSO,
2 ESPRESSI, 1 COFFEE, 2 COFFEES (Fig. 2).
All buttons are pre-set for coffee strength, coffee volume and
temperature.
• Place one or two cups underneath the Dual Coffee Spouts
and push the desired button. The machine will grind, tamp
and then brew the coffee. It uses a 2-step brewing process
(pre-brew phase), pauses for a few seconds, and then starts
the brewing process. The display will show the name of the
button you pushed, e.g.
1 ESPRESSO and the selected coffee
strength, e.g.
STRONG.
Please note: when pushing any of the two-cup buttons, the cof-
fee strength is not displayed.
Important: After the brewing stops the machine will discard the
used coffee grounds. Please do not try to pull out the drawer
(Fig.1,18) during this operation. It can seriously damage the
machine.There is no need to pull out the drawer until the display
shows the message
EMPTY TRAY or EMPTY GROUNDS.
Please note: You can always stop the brewing process by
pressing any of the coffee buttons.
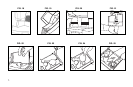
9a. OVERRIDING CUP SIZE
During brewing you can override the cup size for any of the four
coffee buttons as follows.
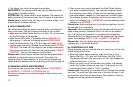
• When the coffee starts brewing, open the Cover for the
Rotary Dial (Fig. 1.19 ) and turn the Rotary Dial (Fig. 3A,P).
The display will show the cup size in oz. You can change the
coffee volume from 1 to 8 oz.
• When you push one of the double cup buttons, the display
shows the coffee volume per cup, e.g. if it shows 6 oz., the
machine will brew a total of 12 oz. of coffee.
Please note: Overriding the cup size will not change the pre-set
cup size. The next time you push one of the four buttons, it will
automatically brew the pre-set volume. See chapter 16 how to
change the pre-set values permanently.
13.