


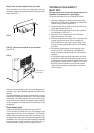
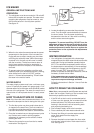
15
ICE MAKER
GENERAL INSTRUCTIONS AND
OPERATION
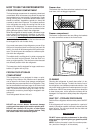
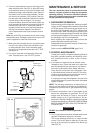
1. The refrigerator must be connected to 120 volts AC
before the ice maker can operate. The water valve
supplying the refrigerator must be turned on, and
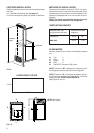
the ice level bail arm in the fully down position.
See figure 12.
2. When the ice maker thermostat senses the preset
temperature for the ejection of the ice cubes, the
fingers will start to rotate, dumping any ice cubes
and filling the mold with water. When the storage
container is full, the bail arm will come in contact
with the ice cubes. The bail arm cannot return to
the full down position and the ice production is
stopped until the bin is emptied, or ice cubes are
removed.
3. To prevent water from splashing out of the mold
assembly when your recreational vehicle is moving,
raise the bail arm to the full “UP/OFF” position
about 1-1/2 hours before departing. This will allow
the water in the mold to freeze.
WATER SUPPLY
The water supply system must have a minimum pres-
sure of 15 pounds per square inch gauge (psig). A 1/4”
diameter water line to the water valve should be used at
the rear of the refrigerator. The water line must have a
manual shut off valve placed where it is easily acces-
sible.
HOW TO ADJUST SIZE OF CUBES
Note: If the ice maker was cleaned and drained, no ice
cubes will be dumped into the bin during the first cycle.
1. The first few cycles may have small cubes due to
air trapped in the water lines. The first container of
ice cubes should be dumped if the water system
has been winterized or not used for several weeks.
2. Once the ice maker has run through several cycles
and if cubes are to small or sticking together,
adjustment is necessary on the amount of water
entering the mold.
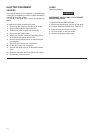
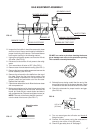
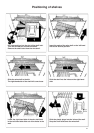
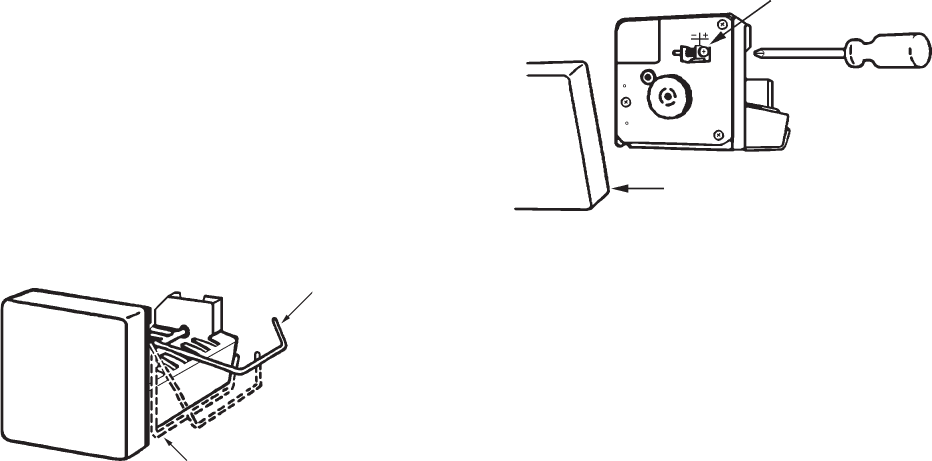
3. Remove the protective cover from the ice maker
mechanism. See figure 13.
4. Locate the adjusting screw under the protective
cover. Turn the screw counterclockwise to increase
the size of cubes. Turn the screw clockwise to
decrease the cube size or if the mold is overfilling,
and the cubes are stuck together.
Important: To prevent overfilling, DO NOT turn the
adjustment screw more than one revolution at a time.
Allow the ice maker to cycle several times before
another adjustment is made. Be sure to replace the
protective cover on the cycle after the adjustments
are complete.
WINTER OPERATION
1. Your refrigerator is equipped with a heater tape
wrapped around the water solenoid valve and outlet
water tube. During cold weather operation below
32°F/°C the automatic temperature switch will turn
the heater tape on automatically. If the recreational
vehicle is in storage and the refrigerator or the DC
power is turned “OFF” there will be no 12V DC
present to operate the heat tape; therefore, it will be
necessary to drain the ice maker.
If the temperatures are expected to reach or
exceed 0°F/-18°C the ice maker must be drained
to prevent component damage and leaks.
Follow the instructions in Section “ How to Drain the
Ice Maker”.
HOW TO DRAIN THE ICE MAKER
Note: Water, compressed air and AC power are required
to drain the ice maker. Draining of the ice maker must
be done by a qualified service technician.
1. If the RV will not be in use for an extended period
of time or put into storage, the ice maker should be
drained and dried. This will prevent water from
freezing in the solenoid valve or becoming stale
and producing bad tasting ice.
2. Shut off water supply valve to the ice maker.
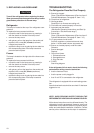
3. Place a shallow pan under water solenoid valve.
4. Remove inlet fitting to ice maker water solenoid
valve. Drain water from the supply line.
See figure 14.
5. Remove the plastic nut and water line from outlet
side of water solenoid valve. Drain water from the
line. See figure 14.
FIG. 13
Cover
Adjusting screw
Ice level
bail arm
Down
position
FIG. 12