


8
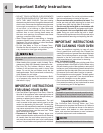
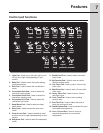
OVEN
timer
on-off
+
hi
-
lo
13
0
2
456
789
user
pref
CANCEL START
20
21
22
23 24
26 27
25
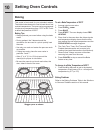
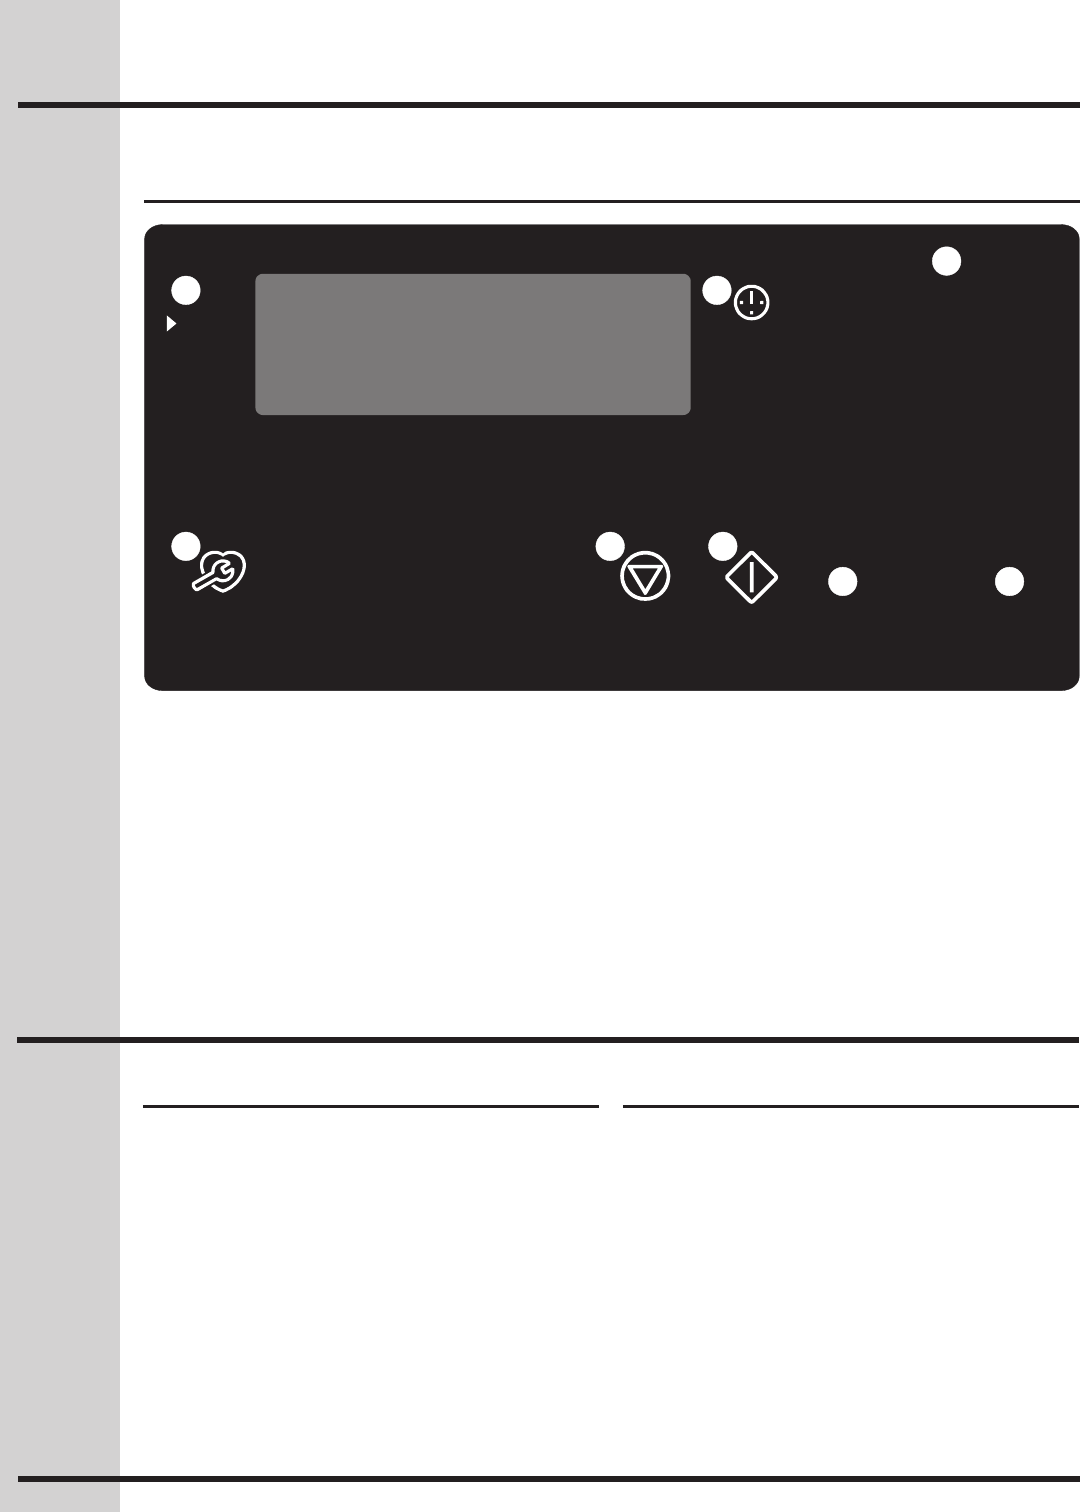
20. Oven Pad - Used to activate an oven cooking
mode.
21. User Preference Pad - Used to bring the user
preference menu in the display.
22. Timer on-off Pad - Used to set or cancel the
minute timer. The minute timer does not start or
stop cooking.
23. Cancel Pad - Used to cancel any functions
previously entered except the time of day and
Features
Control pad functions
the minute timer. Push Cancel Pad to stop
cooking.
24. Start Pad - Used to start all oven functions.
25. 0 thru 9 Number Pads - Used to enter
temperature and times.
26. - lo Pad - Used to lower the temperature and
times.
27. + hi Pad - Used to raise the temperature and
times.
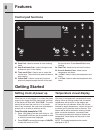
Getting Started
Settingclockatpowerup Temperature visual display
supply to the range has been interrupted, the timer
CLO 12:00”. The clock
cannot be set when the oven is on. If an invalid
time of day is entered, the control will triple beep to
prompt you to re-enter a valid time of day.
To set the clock (example for 1:30)
1. Press 1 3 0 pads to set the time of day to 1:30.
The pads HI or LO can also be pressed to raise
or lower the actual time displayed.
2. Press START to accept the changes or CANCEL
to start with a time of 12:00.
Your oven is equipped with a temperature visual
display. When a cooking mode is set, the actual
temperature will be shown in the display and
will rise as the unit preheats. When the unit has
reached its target temperature, a chime will sound
to remind you to place the food in the oven. This
feature will be active with some cooking modes;
bake, convection bake and convection roast.
The cooking modes which does not feature the
temperature visual display will be noted in their
descriptions.
NOTE: The lowest temperature that can be
displayed is 100°F.