7
ISLAND BEER DISPENSER INSTALLATION:
When installing the Beer Dispenser under a counter and using a remote location for the Dispenser Tower, follow
instructions below. Steps need to be taken to insure proper temperatures are maintained in the dispenser.
IMPORTANT:
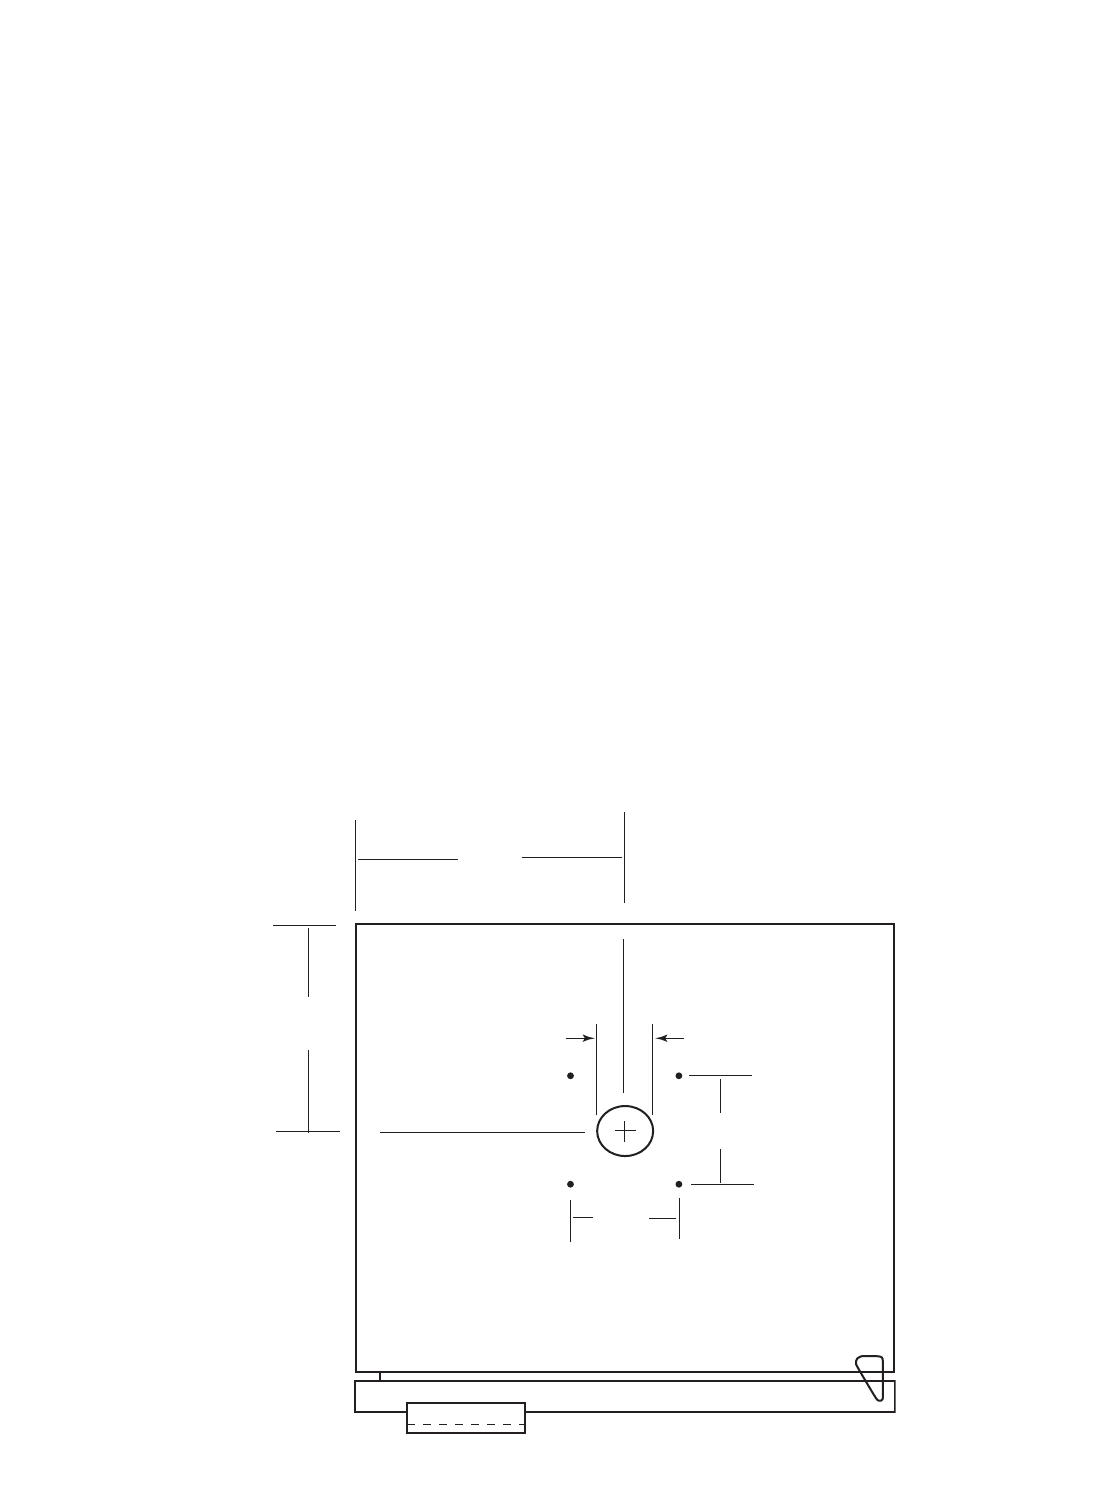
All holes must be sealed to prevent air leak. Placement of the tower can be done by cutting a hole in the counter top
directly above the existing hole of the Beer Dispenser unit (refer to tower template for dimensions Fig. 05).
1. Drill a 1-5/8” hole drilled thru the counter directly above the hole in the dispenser cabinet. Use the dimensions
shown to align both holes. When properly placed, you will see thru both holes.
2. Drill four 1/8” pilot holes at 2-5/8” apart using the large hole as a center point (see Fig. 05).
3. Using some insulating foam rubber (not included), slide it over the beer line far enough to bring the hose up
thru the top of the cabinet and counter.
4. Connect the beer line assembly to the tower as per “Assemble and Connect Parts” on page 10.
5. Slide the insulating foam rubber into the hole in top of the dispenser, making an air tight seal.
6. Mount the tower to the top of the cabinet and fasten securely.
7. Make connections to the keg and CO
2
cylinder as per “Assemble and Connect Parts” on page 10.
NOTE:
When there is a large build up of frost or ice on the evaporator plate, the drip pan may not be large enough to retain all
of the melted ice. The evaporator plate should never have more than 1/8” of frost at any time.
INSTALLATION
HOW TO INSTALL YOUR OUTDOOR REFRIGERATOR/BEER DISPENSER
1-5/8”
2-5/8”
2-5/8”
11-3/4”
12”
Fig. 05


