37
BAKED PRODUCTS TAKING TOO LONG TO COOK
CAUSE REMEDY
Shelf position too low. Try a higher shelf position.
Temperature too low. Try a higher temperature.
Baking tin the wrong size. Use pan/tin size stipulated in recipe. Baking time varies not only with
oven temperature and baking utensil material but also by utensil size.
Incorrect mode e.g. Pastry Bake. Try changing to an Aero
TM
mode. Aero
TM
modes speed up cooking and
distribute heat more evenly; they also increase the rate of browning.
FAULT CODES
If a fault occurs, the oven will ‘beep’ every second and a fault code will appear in the clock display as a letter ‘F’ with a number after it.
Depending on the nature of the fault, it may be possible to clear the display by pressing the PUSH TO CLEAR button. If the fault code
and continuous ‘beep’cannot be cleared this way, note down the fault code and switch the oven off at the main power supply. In either
event, please call your Fisher & Paykel Authorised Service Centre and advise them of the fault code. This information will help them to
resolve the problem. If you have any questions about operating the product, please contact our Fisher & Paykel Customer Care Centre.
HOW TO CHANGE THE OVEN LIGHT BULBS
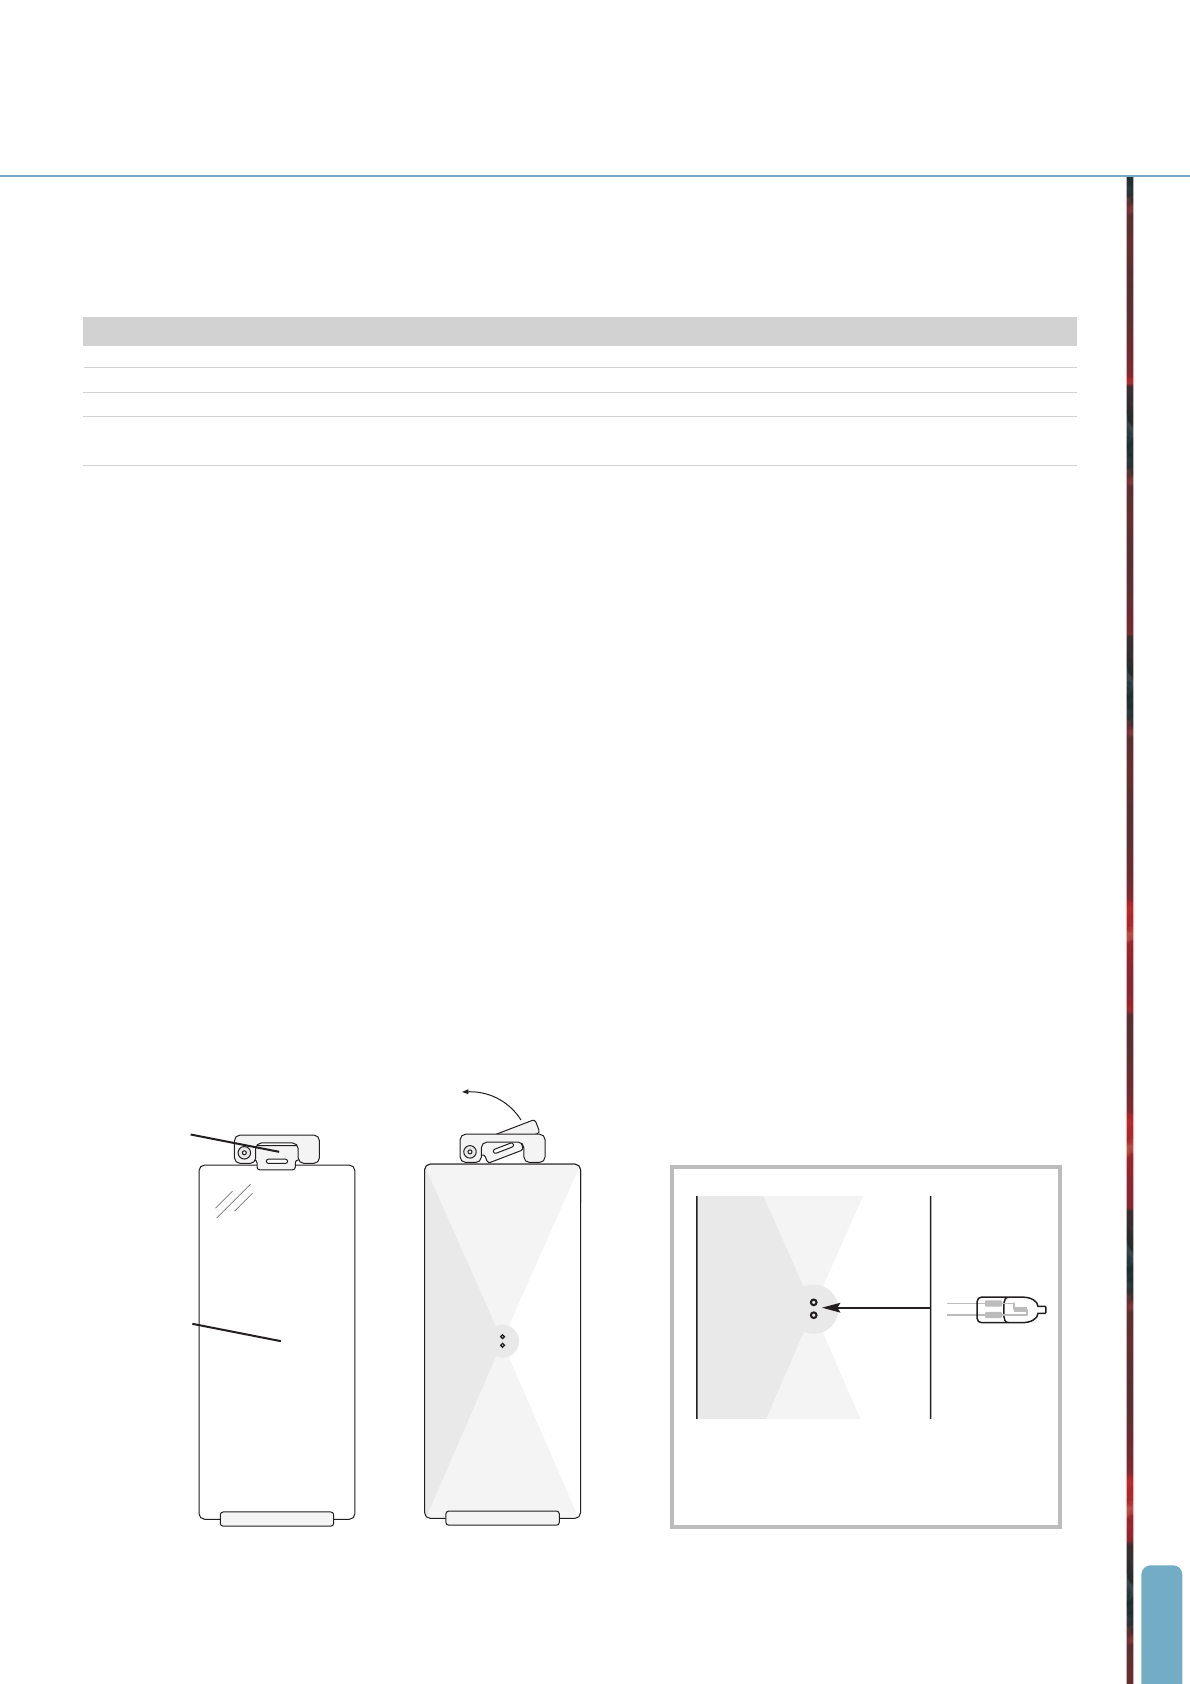
The oven is illuminated by 3, 12 volt, 20 watt halogen bulbs. These have a very long life, but if you should need to replace one, turn the
oven off and allow it to cool. Take out the shelves and use a small flat head screwdriver to twist and lift the retaining clip at the top of
the glass light cover. The clip pivots counter clockwise (see the diagrams below). Carefully lift the glass cover out of the lower support.
Pull out the faulty bulb and, holding it in a soft cloth or tissue (touching the bulb will reduce its life span), insert the replacement. The
two pins are vertically orientated. Reposition the glass cover and twist the top clip back in place. The procedure is the same for the
light in the roof of the oven cavity.
Use a flat-head screwdriver to turn the
bracket and free the plate glass cover.
plate glass cover
pivoted bracket
Carefully install the new lightbulb by inserting into the
vertical sockets as shown.


