


Part # 4523974 (11/07) Page 11
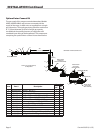
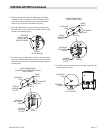
3. Slide the salamander down into the support brackets
installed in step 2, see gure 2. NOTE: On ranges with
space saver ovens, the center post must slide into the
center channels built into the back of the unit.
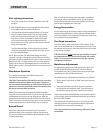
4. Once the salamander is in place, fasten it to the unit on
both sides of the range with the provided #14B x 5/8 hex
washer head tapping screws.
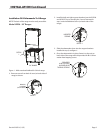
DETAIL I
ALL 48" RANGES
PROVIDED
#14B x 5/8 HEX
WASHER HEAD
TAPPING SCREWS
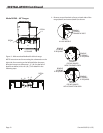
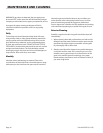
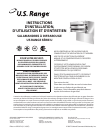
5. For center support, (detail II) re-insert screws removed in
step 1 or provided sheet metal screws as shown in detail
II and III, inserting screws for detail III through clearance
in back panel.
SCREWS
REMOVED
IN STEP 1
CLEARANCE
HOLE
CLEARANCE
HOLE
INNER
HOLES
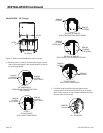
DETAIL III
PROVIDED
SHEET METAL
SCREW
2 SCREWS
REMOVED
IN STEP 1
DETAIL II
FOR 48" RANGES WITH
STANDARD OR CONVECTION OVENS
AND STORAGE
SCREWS
REMOVED
IN STEP 1
CLEARANCE
HOLE
CLEARANCE
HOLE
INNER
HOLES
DETAIL III
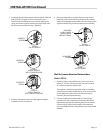
FOR 48" RANGES WITH
2 SPACE SAVER OVENS
3 PROVIDED
SHEET METAL
SCREWS
2 SCREWS
REMOVED
IN STEP 1
DETAIL II
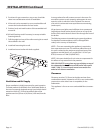
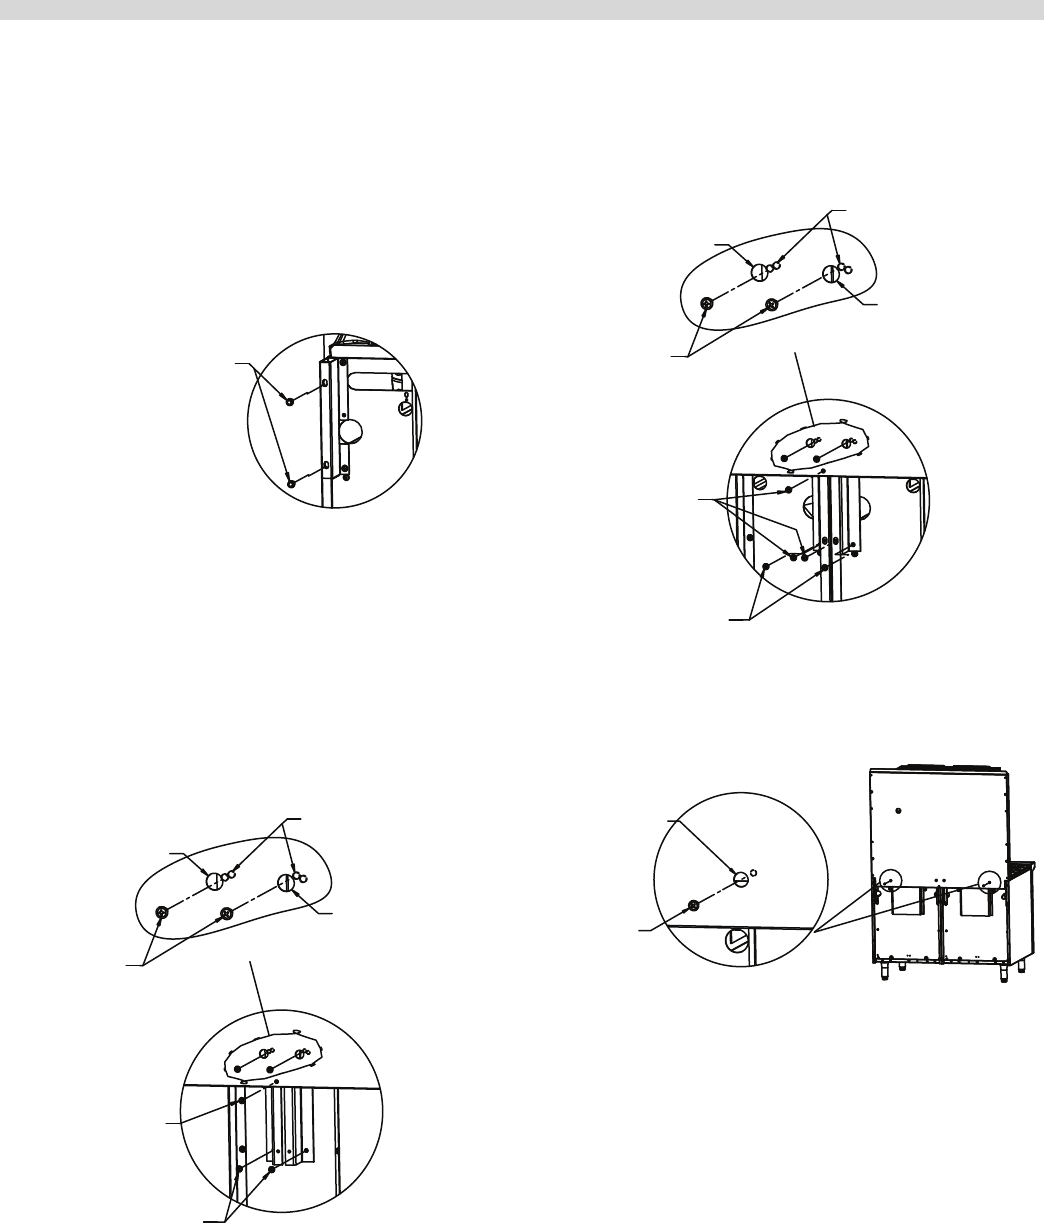
6. Re-insert screws removed in step 1 though clearance hole
in back panel as shown:
CLEARANCE
HOLE
REMOVED
SCREW
DETAIL IV
ALL 48" RANGES
INSTALLATION Continued