


Part # 4523974 (11/07) Page 9
Installation Of A Salamander To A Range
NOTE: The back of the range must be easily accessible.
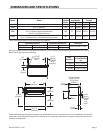
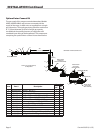
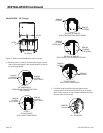
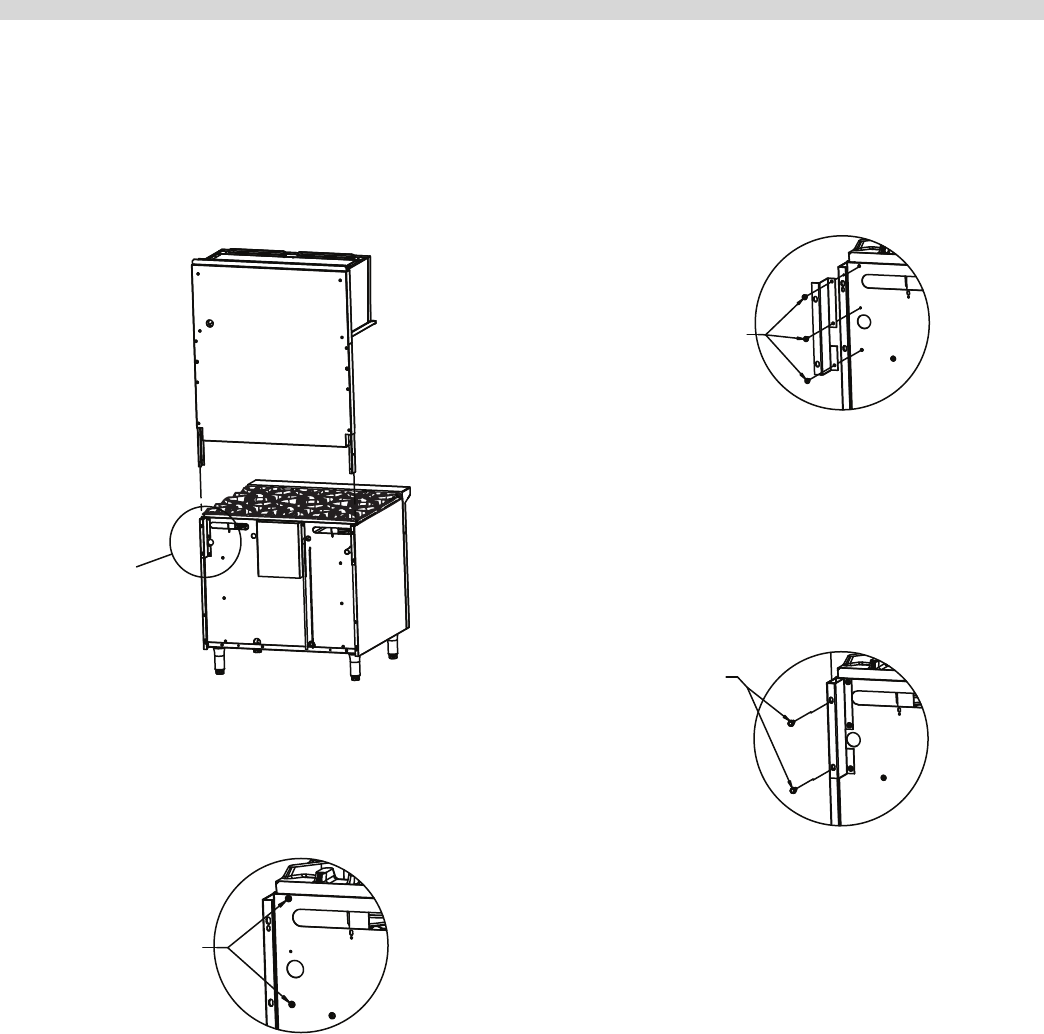
Model UIR – ” Ranges
DETAIL
I
36" RANGE
Figure 1 – With area detail dened for 36 inch range.
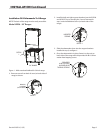
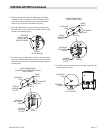
1. Remove screws from back of oven (on both sides of
range) as shown:
DETAIL I
REMOVE
2 SCREWS
(BOTH SIDES)
INSTALLATION Continued
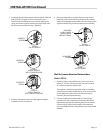
2. Install the left and right support brackets (part # 4523226
and 4523227) by re-inserting the 2 screws removed in
step 1 and one additional screw (on both sides of the
range).
DETAIL I
INSERTED
SCREWS
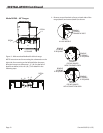
3. Slide the salamander down into the support brackets
installed in step 2, see gure 1.
4. Once the salamander is in place, fasten it to the unit on
both sides of the range with the provided #14B x 5/8 hex
washer head tapping screws.
DETAIL I
PROVIDED
#14B x 5/8 HEX
WASHER HEAD
TAPPING SCREWS