


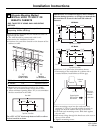
• Locate at least 2 vertical studs at the wood mounting
location by tapping drywall with a hammer or use a
stud finder.
• Center the supplied wood horizontal support, left to
right and below the marked line.
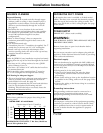
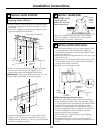
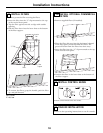
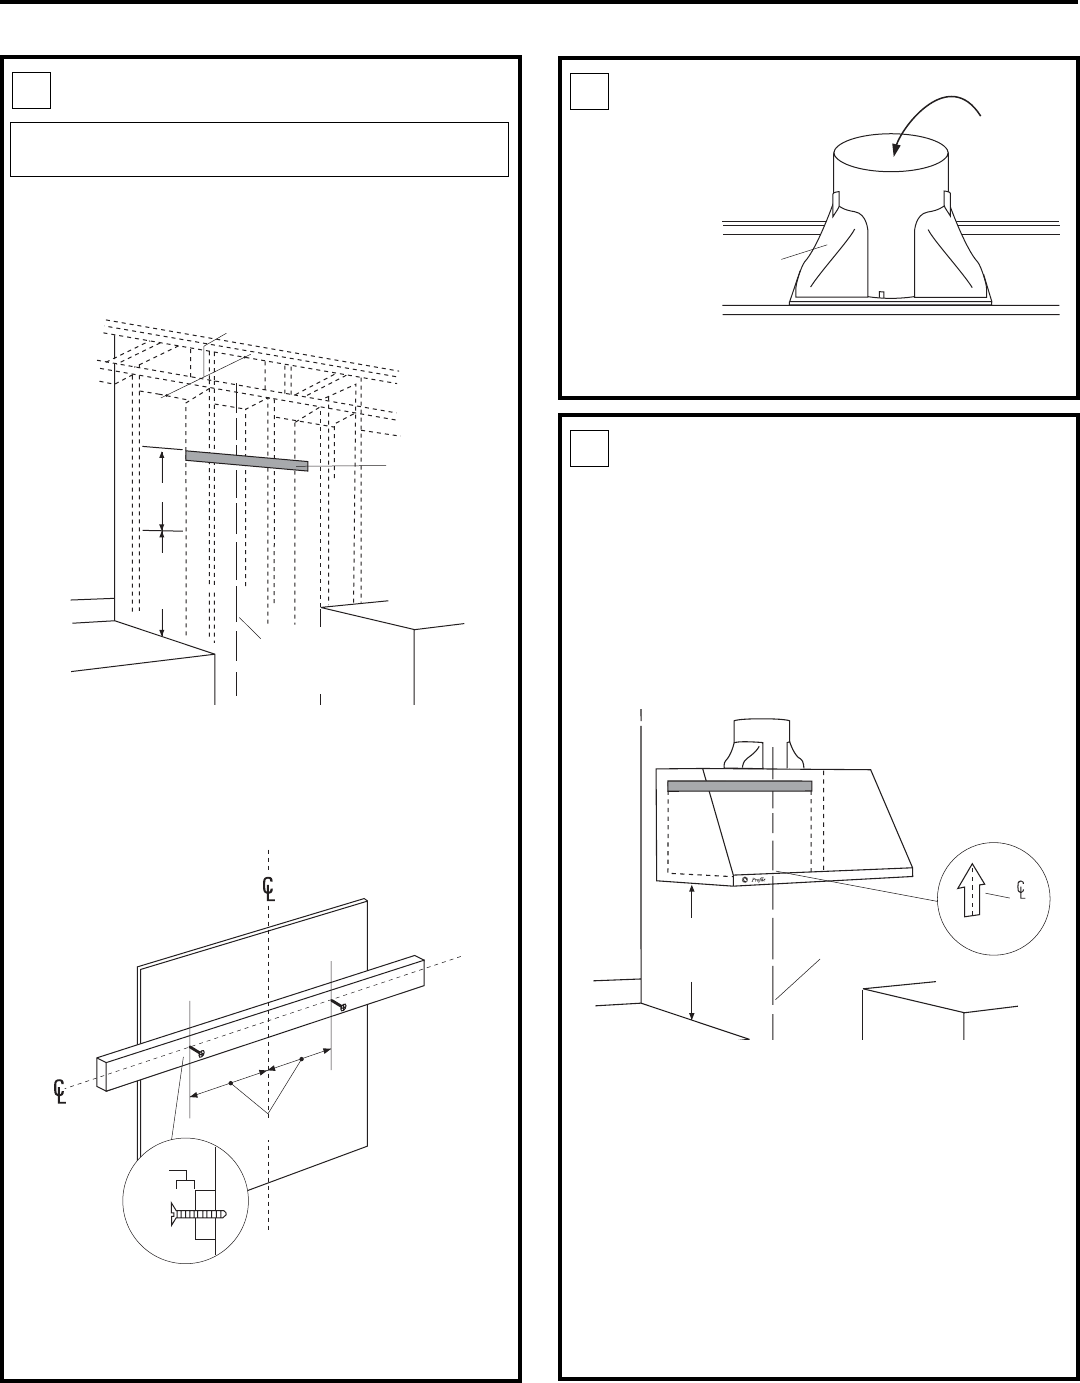
INSTALL HOOD SUPPORT
Installation Instructions
14
1
IMPORTANT: Framing must be capable of
supporting 100 lbs (45.3 kg)
• Drill 1/8” pilot holes through the support, drywall
and into the studs. Secure the support to 2 or
morevertical studs with supplied wood screws.
IMPORTANT: Screws must penetrate at least 1½” into
vertical studs. Countersink screws into support.
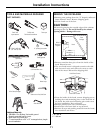
• Install mounting screws in the center of the wood
support, 13-1/16” from the centerline. The screws
should protrude forward ¼”. This ¼” gap will provide
clearance to hang the hood.
15-3/8"
24"
to
36"
Wood
Support
7” Min. Opening for Ductwork
Centerline of
Installation
space
13-1/16"
¼”
Gap
1 Ft = 0.3 m; 1” = 2.5 cm
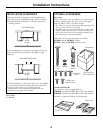
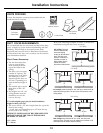
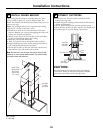
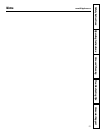
INSTALL TRANSITION
2
IMPORTANT: Remove
shipping tape from
damper and check that
damper moves freely.
• Place the transition piece over the hood exhaust.
Secure transition to hood with 4 screws provided.
• Use duct tape to seal the connection.
Remove
Shipping
Tape on
Damper
Duct
Transition
Top of
Hood
24"
to
36"
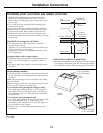
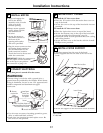
INSTALL HOOD ONTO WALL
3
• Lift the hood and place over the wood support. The
top keyhole slots in the hood should engage the
protruding mounting screws. Allow the hood to slide
down into position.
• Pull house wiring through knockout at the rear or the
top of the hood.
• Check to be sure the hood is level and centered. The
arrow shaped cutout in the back of the hood allows
viewing the marked centerline.
• Remove cover from junction box.
Centerline of
Installation
space
Cutout
Drill Bottom Mounting Hole Locations
• Drill 1/8” pilot holes into the two lower mounting
holes. Enlarge the holes if they did not enter studs to
3/8”.Tap anchors for wall fasteners into bottom holes.
– Install screws by hand into the fasteners to allow
anchors to expand against the wall. Remove screws.
• Using two large flat washers (supplied), install wood
screws or wall fastener screws, loosely, into lower
mounting holes. Do not tighten.
• Check hood level. Tighten upper screws. Tighten
lower mounting screws.
• For additional security, drive screws through the
original wood support screw holes in the back of the
hood.